Homemade products from a washing machine engine:
1. How to connect a motor from an old washing machine through a capacitor or without it 2. Homemade emery from a washing machine engine 3. Homemade generator from a washing machine engine 4. Connecting and adjusting the speed of a commutator motor from an automatic washing machine 5. Potter's wheel from a washing machine machines 6. Lathe from an automatic washing machine 7. Wood splitter with an engine from a washing machine 8. Homemade concrete mixer
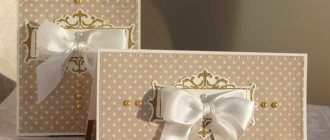
Do-it-yourself wedding money chest (master class, photo, step by step)
In this master class I will create and show step by step in the photo how to make a wedding money chest with your own hands from an ordinary glass box, into which guests throw envelopes, postcards and bills at the wedding. It seems that such an accessory is optional, but on such a day everything should be perfect down to the smallest detail.
So, to create and decorate a wedding money chest we will need:
• box; • Whatman paper; • PVA glue; • brush; • decorative paper; • organza; • corrugated paper; • satin ribbon; • glue gun; • regular and masking tape; • scissors; • ruler; • pencil.
First, let's take the internal partitions out of the box. Let's start forming the chest lid.
Next we draw a part of the circle (arc) on the side. On both sides we make indents of about 5 cm and draw a straight line. We do the same on the second side and connect all the lines on the front wall. It is important that all lines are parallel to the base of the box.
Cut out the top part with scissors.
It is necessary to make sure that the lid of the chest can bend freely. Otherwise, it will simply break and become deformed. Therefore, we make big (fold) lines at intervals of about 1.5 cm. It is necessary to push the lines under the ruler with the back of the scissors on the inside of the lid.
We cut the drawn lines on the front and side walls. On the inside of the back wall we draw a big (fold) line.
We fasten the top part to the side walls using regular tape. It holds firmly, but it is better to stick masking tape on top of it, since we will then cover the box with paper, and this is unlikely to be possible with regular tape.
We also cut off the excess cardboard to make even joints. Just don’t throw away the cut strip - we will need it in the future.
We fasten all sides with tape.
Place the lid with the inside facing up and cut a hole in the center for the envelopes. The thickness is 1-1.5 cm, and the length is at your discretion.
It is necessary to cut off a few millimeters of cardboard along the bottom of the lid so that after pasting the chest can be closed.
Now we will cover the entire chest with white Whatman paper. Let's start from the bottom. We cut out a strip with a size equal to two side walls, the front one and allowances of 1 cm on all sides. First, we glue the front wall in the center of the cut paper, and then we glue the sides. You need to smooth the surface and press down briefly so that the paper does not come off.
We cut the paper at an acute angle in the corners and seal all the allowances.
We glue the side walls of the lid. In this case, the allowances on the convex side should be cut to repeat the rounded shape. Next, cut out a strip of paper equal in size to the bottom, back wall, and top of the lid. Allowances should be left only on two sides: bottom and top. We seal the rest of the box.
On the reverse side, we make a cut in the hole so that we get allowances and glue them inside.
We cover the entire chest with some beautiful decorative paper in the same way as we covered it with whatman paper. Just do not glue it with PVA glue, but just glue the edges with a glue gun.
You can wrap the chest in organza or some similar material for greater effect. We take organza of such a size that it completely envelops the box. We wrap it completely to its full length, placing the chest in the middle of the material. We glue the allowances inside.
We make drapery on the sides and glue it to the inside of the chest using a glue gun.
Take a cut strip from the lid and cover it with decorative paper. Glue to the inside of the front wall. This protrusion will help the lid stay in place.
All that remains is to decorate the chest inside and out. Outside there will be voluminous flowers made from the material we used throughout the entire work. We cut strips of different lengths and widths.
Fold the strip in half.
We bend the corner at the very beginning.
We begin to twist the ribbon to the end, holding it with our fingers at the base.
We glue the flowers with hot glue in a chaotic manner.
Let's make ties for the chest by gluing ribbons to the bottom and lid under the flowers.
Decorating the inside. Before gluing the entire surface, you need to secure the cover with tape. We glue one end of it to the lid, and the other to the side.
We cover the entire inside of the chest with corrugated paper.
This is the chest in which the newlyweds will collect their first family budget.
DIY wedding chest for money
Wedding gifts are a long-established tradition.
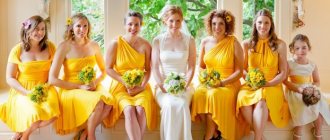
Most often, invited guests prefer to give money. This is not only convenient, but also gives the newlyweds the opportunity to buy themselves the things they really need. After all, you must admit that few people will need two irons, for example. In this regard, a money chest is becoming a frequent attribute of a modern wedding. It will not only fit harmoniously into the decor, but will also make gift-giving more convenient. There is also a sign according to which one should not give money to young people personally. This is interesting: DIY stationery organizer
Where to buy a wedding chest for money and cards?
Among all the accessories, the wedding chest for money and congratulation cards stands out. This attribute recently appeared on the Russian market and is available for sale in our online store. It quickly gained popularity due to several of its advantages:
- conveniently store all monetary gifts in one place;
- looks very beautiful and solemn;
- allows you to protect cash gifts from prying eyes.
Usually, the newlyweds’ treasury is made in the same style or color scheme as the rest of the accessories, then it becomes not only a functional part of the holiday, but also an element of the decor of the room. Our wedding salon has a large selection of designer piggy banks for newlyweds, completely different in design, shape and colors.
Many options for family banks are made in the same style with other accessories (wedding glasses, candles, champagne decorations, etc.), so you can buy a ready-made collection of jewelry that will complement each other perfectly. And, of course, you can always order something completely special from our craftsmen, designed especially for you!
What is needed to make a chest
The advantage of this attribute, made with your own hands, will be:
- Price. A wedding is already a rather expensive event; a little saving won’t hurt.
- Unique design. With the right approach, you will get an item that fits well into the wedding setting.
- A memorable gift. Will give pleasant memories of this event.
Such a chest, of course, can be purchased in a store, but if you wish, it is not difficult to make it yourself. This will make it possible to choose materials and colors that will most harmoniously fit into the festive atmosphere, and save a little. After all, a wedding is already a very expensive event.
Making an unusual casket that will decorate the celebration atmosphere is not difficult at all and will not take much time. Even if you don’t want it to have a rectangular shape, but, for example, the shape of a heart or a wedding cake. In this case, the casket will look chic and attract the attention of guests.
After some effort, this chest will become an important holiday attribute, symbolizing the prosperity of the new family. The opportunity to save money and add additional zest to the wedding atmosphere does not require large investments and effort. You will need a shoe box or thick cardboard, glue, scissors, decorative elements and a little perseverance. Also, special attention will need to be paid to the finishing material. It can be velvet fabric, silk, corrugated paper. It is better to choose a color in the style of the holiday. White, red, brown or cream colors and their shades are recommended.
What is a chest made of?
By making a chest yourself, you can not only save money, but also decorate it in accordance with the theme of the wedding.
A money chest can be made in the form of a beautifully decorated cardboard box or a classic suitcase. But it’s also easy to make such seemingly complex products as a money box in the form of a cake with several tiers, a house, or an interesting box. But no matter which option you choose, the following materials are required for mastery:
- cardboard box or sheet of thick cardboard. The quantity and shape depend on the chosen chest model. You can purchase a plastic or glass box. If you have skills in working with wood, you can make a product from it. This money chest will last for many years and will become a family heirloom.
- PVA glue or glue gun. The glue must be of high quality. The strength and beauty of the future product depends on this.
- scissors and stationery knife;
- masking tape;
- colored or corrugated paper for finishing the casket. You can use satin, silk or velvet fabric.
- elements for decoration: ribbons, beads, beads, decals, shells, bugles. An interesting design would be a collage of photographs of spouses.
- figured hole punch. With its help you can make various figures to decorate your chest.
If you want the casket to serve not only during the celebration, but also to be preserved as a keepsake, use only high-quality materials. Having prepared everything you need, you can proceed to the next stage - creating a chest.
Making a casket
You can make a money chest from a shoe box:
- The front of the chest may be slightly lower than the back.
- It is necessary to select a box of such a size that the length is equal to the sum of the height of the front wall and the width of the box.
- The lid can be made curly.
- After this, the box must be covered with paper or cloth.
- Decorate the chest with various accessories.
If you want to make your own pattern from a sheet of cardboard,
It’s worth finding a suitable scheme in advance. For example, the photo shows a diagram of a rectangular casket.
Detailed instructions on how to make a chest with your own hands consist of several steps:
1.Cut out a template from cardboard
Carefully bend the folds and allowances. We seal all the allowances to the inside of the chest with glue or regular tape
2.Cut out a strip of cardboard. We glue the cut strip at the junction of the inside of the box. This will help to securely fasten the walls of the casket together. 3. In order for the box to look like a casket, the lid must be given a convex shape. Thick cardboard does not take on this configuration well. Then longitudinal grooves can be made on the inside of the lid using scissors or a stationery knife. This must be done carefully so as not to cut the cardboard through. Otherwise you will have to start all over again. After this, the lid will easily take a rounded shape.
We connect the lid to the bottom of the box using tape. It is better to glue it to the inside, then the joints will not be visible.
4. The resulting gaps in the lid of the money chest are covered with cardboard cut to the shape of the holes. They are also attached with tape. For reliability, you can use a furniture stapler.
5.Next, it’s worth making a cutout with a hole for envelopes. To do this, draw a rectangle about 1 cm wide and the length of an envelope on the inside of the lid. Using a utility knife, cut a hole.
6.You can start draping the box. To do this, we measure the base and cover separately. In accordance with the parameters, we measure a piece of fabric or decorative paper of the required size. First, the lid is sheathed, then the remaining parts of the chest.
7.After this, you need to make a hole in the lid fabric. There is no need to rush, because the entire appearance of the casket depends on accuracy. The edges of the cut hole are processed using a lit candle.
8.The final stage is decorating the money chest. Here you can use your imagination to the fullest. The main thing to remember is a few tips:
•the sides of the side walls and the joining places should be decorated with satin ribbons to match the main color of the casket;
•the lid of the chest should not be decorated with heavy elements, otherwise it will begin to sag;
•if the main color of the drapery is neutral, use contrasting colors, red or purple, for cladding;
•a chest for collecting money, decorated with photographs of the newlyweds, looks romantic. They are placed on the sides.
A master class on making a casket is shown in the video
Making a gift box in the form of a chest with your own hands is not difficult. You should follow the instructions and the casket will become a real masterpiece.
Tools and materials
You don't need expensive tools to create a truly beautiful money chest. Most people have everything they need at home. You can order decoration pieces online or go to your local craft store.
You cannot do this without the following tools:
- Ruler. It will be needed for marking, because everything should look beautiful and neat.
- Stationery knife and scissors. We will use them to cut the box and make a hole in it for envelopes with money.
- Glue. PVA is perfect. A hot glue gun will come in very handy; it will make working with decorative elements easier.
- Scotch. It will be convenient to attach finishing materials. Double-sided tape will be much more practical and convenient.
Almost everyone has all of the above tools at home. If something is missing, young people can borrow it from their parents or friends. As for materials, you will need the following:
- Shoe box. If you don't find the right size, no problem. The required container can be easily glued together from thick cardboard.
- Beautiful fabric for outdoor decoration. Velvet satin and others are suitable here.
- Materials for decoration. You can use decorative ribbons, artificial flowers, beads, feathers, stones, rhinestones.
When everything you need is available, all you have to do is stock up on a little patience and you can start. If you are not confident in your abilities, ask your family for help. Although this task is not at all difficult, and anyone can handle it on their own.
Step-by-step instructions for making your own wedding money box
- small box;
- thick cardboard (you can also use old boxes or parts thereof);
- double sided tape;
- high-quality glue stick;
- ruler;
- heat gun;
- stationery knife;
- tape measure;
- pen or pencil;
- scissors;
- masking or transparent tape;
- satin or crepe-satin of a suitable shade;
- beautiful lace;
- a small bouquet or individual small flowers;
- decorative bow.
- Cut the lid of the box as in the photo. We use a utility knife and scissors.
We strengthen the resulting high “walls” with appropriate pieces of thick cardboard, gluing them to double-sided tape.
We cut out the parts for the wide walls and also glue them to the base. We make sure that all cuts are even. Using masking or regular tape, we fasten the corners of the structure. When the corners are securely fastened, we form the “lid” of the chest. To do this, measure the top cut of the wide wall and cut out the part from a sheet of cardboard. Then we mark the hole for money exactly in the center, making it slightly larger than the width of a standard envelope.
Note! For this part, it is important to use thick cardboard, because it lends itself well to molding. Multilayer corrugated material is not suitable for the top part, but it is perfect for creating the walls of the structure
Carefully cut a hole by placing the cardboard on a ring of tape - as in the video. We correct unevenness using scissors. Give the part a semicircular shape.
We cut two thin strips of double-sided tape and glue each to the top edge of the wide wall of the structure. Glue the top piece to these strips.
We cut out suitable semicircular parts, adjust and adjust them, bringing them into full compliance with the shape of the upper part. We move them slightly under the top part (literally half a millimeter) and secure the corners with tape. In order for the tape to repeat the semicircular shape and securely fix the joints, it is necessary, after gluing one half of the piece, to cut the free end in half. Then, having fixed one half, glue the second one a little obliquely - this way you get something like a dart. The tape glued in this way will not bubble, deforming the edge, and the work will turn out quite neat.
Let's prepare the fabric and lace for work.
They must be ironed thoroughly.
Having measured the chest, cut out a piece of the appropriate size. Apply double-sided adhesive tape around the perimeter of the lower part of the structure and stretch the fabric well. Leave the side parts in a free position. Carefully cut a hole as in the photo.
Turn the structure over with the hole facing down. Generously coat the inside of the slot (cardboard part) with glue stick. Carefully fold the fabric allowances inward, gluing them at the same time. Wait until it dries.
DIY diagram or pattern of a wedding chest
When starting work, you need to draw out a box or sheet of cardboard so that the upper part is semicircular and resembles a chest in shape. To do this you need:
- Make the back wall much larger than the front. After folding and gluing, it will also serve as the top lid of the wedding treasury.
- On the side walls, provide semicircular parts that will partly cover the sides in the lid area.
- Take care of the cutout for envelopes in advance. A finished product lined with fabric can be damaged by making a hole in it.
ATTENTION! Using a large box will simplify the process of creating this item. In this case, all that remains is to make the figured top part, and you can start decorating.
DIY wedding money chest in red and white colors.
The long-awaited day of your wedding is just around the corner. Friends, relatives and acquaintances begin to think about gifts. Some guests will bring beautiful packages and boxes with sets, blankets, household appliances, and some guests will decide to make their modest contribution to your family budget and just give money. As you know, money loves not only counting, but also careful handling, so for such a valuable gift it is necessary to allocate a separate place at the wedding celebration. I bring to your attention a master class on how to make a wedding money chest in red and white colors.
Wedding chest for money.
Detailed master class.
The base of the chest is a cardboard box measuring 25 cm x 17 cm x 20 cm (L x W x H).
If you are lucky enough to get a completely white box, then you can safely proceed to the next stage of making the chest. Otherwise, you need to cover the box with white thin cardboard. We glue all sides except the bottom. We glue the cardboard joints on the edges of the box with white electrical tape.
2) Open the bottom and again cover it with thin white cardboard.
3) Cover the edges of the open bottom with white electrical tape, close the bottom and fasten it in several places with electrical tape. The bottom must open, since it is through the bottom that the newlyweds will be able to take away the donated money. Therefore, use duct tape rather than duct tape, as duct tape can be easily peeled off without damaging the structure of the cardboard.
4) Make the lid of the chest. To do this, take a sheet of white thick cardboard and, using electrical tape, glue it first to one side of the box and then to the other. The result was a dome. Carefully cut off the remaining cardboard.
5) Prepare a slot for money. The slot should be 18 cm long and 1 cm wide. We measure the length and width of the dome and draw a rectangle measuring 18 cm x 1 cm exactly in the center.
6) Using a sharp blade, cut out the drawn rectangle.
7) Prepare the sides of the dome. To do this, place the wedding money chest sideways on a sheet of white thick cardboard and trace the side. Next, cut out the part we need.
Glue the side to the dome using white electrical tape.
9) Place double-sided tape 1 cm wide on the edges of the chest.
Let's start covering the chest with fabric.
Take a piece of white satin fabric and stretch the fabric over the front and back of the chest through the dome.
Let me remind you that the fabric is fixed with double-sided tape. Similarly, glue the fabric to the sides of the chest. Using a sharp blade, carefully cut the fabric in the place where the slot should be.
Please note that, unlike working with cardboard, we do not cut out the entire slot, but only make 1 cut, and fold the rest of the fabric inward and fix it with hot glue.
10) We glue double-sided tape to the side edges of the chest, and a red satin ribbon 2.5 cm wide on top. We do the same along the perimeter of the chest in the place where the box meets the dome.
11) Take a narrow white satin ribbon 0.4 cm wide and use hot glue to decorate the red ribbon along the edges of the dome.
12) Make a flower from fabric. Take a red satin ribbon 5 cm wide and cut rectangles measuring 5 cm x 6 cm. A total of 25 rectangles are needed.
13) Fold the rectangle in half and cut it into the shape of a petal. Burn the edges of each petal over a candle. The petal will begin to curl and take on a natural appearance.
14) Cut out a circle with a diameter of 4 cm from the fabric and begin sewing on the petals.
15) Prepare a bow from a red satin ribbon 0.7 cm wide and a white satin ribbon 0.4 cm wide. Leave the ends 30-35 cm long. Glue the bow to the center of the flower. The flower, in turn, is glued to the lower right corner of the chest. We lay out the long ends of the ribbons in beautiful patterns and fix each turn with a small drop of glue. 16) Glue 10 cm wide lace onto the dome on both sides of the slot. Decorate the space near the flower with red rhinestones.
Well, that’s all, the master class is over and the wedding money chest is ready. Now you can go accept your first contribution to the family budget as a gift!
Wedding chest for money from a shoe box
A shoebox is perfect for this task. In this case, there is not much work; most of the time will be spent on decorating and giving the product the desired look. The steps for creating a wedding casket from a box are as follows:
- A cutout is made in the middle of the lid and two short edges. So that you can bend them and give the product the shape of a chest.
- An additional sheet of cardboard is glued with tape. It is necessary to get the shape of an arch.
- Two semicircles are cut out from the same cardboard. They should be used to close the side holes in the resulting dome.
- The next stage is covering with the selected material. The fabric is applied, cut to the desired size and carefully sewn around the box. This is a very important step that should be done slowly and carefully so as not to spoil the materials.
- Next, a cutout is made for envelopes with money at the top of the chest. Its optimal size is 10 by 2 centimeters.
- Finally, the box is decorated. At this stage, you should give free rein to your imagination to get a truly unique casket. The seams on the fabric and the edges of the cutout are covered with decorative ribbons. Using a glue gun, the item is decorated with beads, satin flowers and other details.
If you wish, you can not think too much about the shape and just cut a hole for money at the top of the box. Then decorate it well. Such a wedding treasury will also look very good.
How to make a wedding chest out of a box with your own hands: step-by-step manufacturing instructions
If you have a shoebox, it would make a great chest. To do it, you need :
- Give the lid a convex shape by making longitudinal grooves on its surface with a stationery knife. They will give the cardboard the opportunity to bend and take the shape of a semicircle.
- Using additional cardboard and tape, we secure both ends of the resulting lid to the sides of the box. As a result, the box should resemble a small chest.
- After the lid is bent in the shape of an arc, side gaps will form , which will need to be closed. To do this, cut out shapes from a piece of thick cardboard that match the size of the gaps. These cardboards are attached to the sides of the casket with transparent tape. An arched structure should form. To fix everything as securely as possible, it is recommended to use not only tape, but also a stapler.
- Next we make a cutout for the money. In the center of the concave lid we make a hole, the width of which reaches seven millimeters. The length should be such that the envelope can easily fit into the hole.
- Now everything is ready to start lining and decorating the accessory.
- First you need to get the dimensions of the wedding money chest. Also measure the lid separately. Now, guided by the obtained parameters, cut a separate piece of fabric for the lid and a separate piece for the casket.
- First, cover the lid with the material, then the rest of the product, not forgetting to cut the fabric for cards in the right place.
- Touch the edges of the fabric at the slit with a lighter to prevent the threads from unraveling.
- And the final stage of work is decorating the treasury for money. Now give full rein to your imagination and talent.
- Suitable decorations include shells, small mirrors, sequins , ribbons, frills, rhinestones, frills, shiny threads and much more. If you have artificial gemstones, you can use them too.
When decorating a chest, do not overdo it with decorations, combining incongruous items. Make sure that you don’t end up with a tacky accessory that doesn’t fit into the overall style of the event.
Photo of a money chest for a wedding, made with your own hands from a box
DIY money box (chest) for a wedding using scrap materials
Each wedding guest gives a gift to the newlyweds. Currently, the most popular gift is money. With them, newlyweds will be able to buy exactly what they need most. To ensure that not a single bill gets lost, it is proposed to make a money box (chest) for the wedding with your own hands. This material will discuss exactly this.
This is interesting: Comedy club exam in philosophy
Required materials and tools
Previously, if a guest gave money to the newlyweds, it was placed on a special tray. However, progress does not stand still, and new ways of storing donated banknotes are emerging.
The chest is a cardboard box decorated with various decorative elements. It can be anything you want in shape, from a simple rectangle to a curly heart.
The color scheme of the design should match the overall style of the wedding.
Making a money box with your own hands requires the following materials:
- Glue gun;
- Cardboard box of suitable size;
- Ruler;
- Knife;
- Adhesive tape;
- Rhinestones, satin ribbons, beads, and so on. Choose how to decorate the chest yourself;
- Colored cardboard or paper.
As you can see, all of this is easy to find at home.
Design options
According to the masters, even the most unusual and complex shapes of chests can be made independently. For example, an unusual and original solution would be a wedding box made in the shape of a house, symbolizing a family hearth, a box or a cake. In order to make a cardboard chest with your own hands, you will definitely need:
- stationery knife;
- ruler;
- scotch;
- medium-sized cardboard box;
- stationery glue, PVA, or better yet, a glue gun;
- elements for decoration - pictures, pebbles, beads, ribbons, shells;
- colored paper for interior and exterior decoration.
To make truly visually beautiful and high-quality chests with your own hands, photos of which can be seen in the article, you need to have only the right materials and the right tools. As practice shows, almost all the materials needed for this can be easily found at home, in the pantry, or in the garage.
The main thing is to remember that the quality of the glue directly determines how tightly the decorative elements, finishing paper will stick, and most importantly, whether the chest will come unglued during the special event.
How to make a chest from a box with your own hands more neat, without visually visible seams? To do this, it is recommended to give preference not only to double-sided tape, but also to a glue gun, with which you can evenly distribute the adhesive composition over the entire surface of small parts.
When starting directly to make our ceremonial chest, it is recommended to prepare the ground in advance, namely, draw up diagrams or patterns, which can be made from a huge cardboard box.
The back of the chest should be higher than the front. In this situation, the length equals the sum of the width and height of the front of the box. The bottom protrusion should be about seventy millimeters with a slot on top of the entire pattern so that the bottom does not fall out.
The required slot for the money envelopes should be made directly on the pattern, because after the chest is ready, cutting the hole will become a little problematic.
The easiest way to create a money chest
If you don’t want to bother too much with making a box for collecting banknotes or don’t have enough time for it, then you can use one of the easiest options for making it.
To do this you need to do the following:
- Close the box and attach the lid with adhesive tape;
- Then make a hole for the money. Its width should be about one and a half centimeters, and its length should be slightly larger than the size of the bill;
- Cover the product with colored paper or cardboard;
- The edges of the hole can be treated with a satin ribbon placed on glue, or with the same paper;
- You can use everything you have in your home as decor. Unnecessary beads, beads or rhinestones will do. All this is attached with glue;
- Make several roses from a satin ribbon. To do this, you need to take a narrow tape and lay a running stitch along one long edge. Then you need to tighten the thread and tie its ends. The rose is ready. It also needs to be glued to the box.
Using a pattern
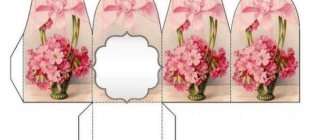
To make a chest, you can use the ready-made pattern shown in the photo below:
You can make a template according to the specified dimensions or change them proportionally to the desired size. Thick cardboard should be used as a base.
After the figure is cut out, you need to fold it along the fold lines and secure the edges with tape. The entire structure can be covered with fabric or covered with paper. You can decorate the box with lace or bows. In general, your imagination will have plenty to run wild.
DIY wedding money box in the shape of a house
Below you can find a master class on creating a box for banknotes in the form of a house:
- To make this you will need two shoe boxes. One of them should have high sides;
- The first box will serve as the base of the house. It is necessary to cut it so that acute angled ends are formed, as shown in the photo below:
- You need to make a roof from the second box. To do this, cut out a rectangle of the desired size and bend it in half. The length of the roof should be equal to the length of the house;
- Then you need to make a slot in the roof one and a half centimeters wide and twenty centimeters long;
- Secure the roof to the base of the house using tape and a glue gun;
- Cover the house-shaped box with colored paper of the desired shade. Process the edge of the slot using bias tape, securing it with glue;
- Glue narrow lace strips along all fold lines of the house;
- Cut a fence out of cardboard and stick it along the bottom of the base;
- Attach a photograph of the newlyweds to one of the ends, and decorate the edges with beads;
- Cut out paper templates in the form of flowers and butterflies onto the roof and glue them in the same way.
You can see the different types of design of a money chest in the video:
Making a gift box for money
Finally, I decided to publish my master class. If anything is not clear, I will be happy to answer all questions. Today I will tell you how I made this unusual box. Maybe something similar has already happened, I haven’t seen it personally. This idea was from some Greek (manufacturer of packaging for jewelry made from semi-precious stones). And this is my interpretation.
1. Cut out this template from watercolor paper and assemble the box. I use a glue stick to assemble the box.
Like this:
2. We tolerate this layout. Green lines - cut, blue lines - bend. We glue the “wings”, marked with hatching, two at a time on four sides.
3. Now we glue the first box into the second. Here I use moment crystal glue. We get this design:
4. We make the so-called cover for our box. The scheme is as follows: we glue the outer “wings” together. Our box will slide out of it.
Our base is ready!
Then we cover our top box on all sides with scrapbooking paper. Cut a size three millimeters smaller than each side.
We decorate everything at our discretion. I did it like this:
For this part I used contrasting paper for greater effect. We glue only the top two halves. Then I drew a heart in the center and cut it out with scissors. The edge of the cut was tinted and dotted with an acrylic outline.
During the decorating process, I further complicated the design - I made a lid for the inner box:
Then we cover our top box on all sides with scrapbooking paper. Cut a size three millimeters smaller than each side.
The heart seemed rustic to me, so I cut out another one, a little smaller, and glued it to the lid. I also toned the edges and provided dots with an acrylic outline. In the middle I put a stamp of love birds.
I also covered the inside with scrap paper and glued a finished die-cut for a signature on the inside of the lid. I cut out a strip of paper, punched it around the edges, and glued half beads in the middle with super glue. I applied glue to the edges and glued it in the center. The rolled up bill will be placed here.
On top, for decoration, I used metal decorations, which I secured with brads, and glued paper flowers. I cut out a shaped element, turned the cut part over to the reverse side (I used double-sided paper) and glued this element onto foam tape with a slight offset.
I think that the recipient of this delight will be interested in every stage of opening the box, this creates some intrigue, and undoubtedly adds originality to the contents of the box 
Thanks to those who read to the end! Soon I promise another master class on an unusual box for money or a small gift (for our beloved men).
How to get money from a chest
After the money is collected, the total amount is usually calculated. And if the chest is closed, they need to be gotten out of there somehow.
If the money box is of no value to you, you can simply tear it up. However, if you want to turn it into a souvenir reminiscent of your wedding, you need to think in advance about how to remove the bills without damaging the box.
You can make a chest with a tear-off lid using ties or Velcro. And if the roof is still firmly glued, then using a sharp stationery knife you need to make a neat cut along the line where it meets the base. After removing the bills, the lid is put back in place and, if desired, secured.
Thus, making a money chest for a wedding is very simple, and most importantly, almost free.
Master class on creating a wedding treasury
If you don’t have a ready-made box, use a template to cut a blank out of cardboard, then glue it together and proceed to further work.
- Use a pencil to mark a semicircular outline on the side edges and cut off the excess.
- Cut the front edge flush with the bottom point of the round part.
- Using a ruler, crumple the lid every centimeter so that it takes on a semicircular shape. The length should be such that it slightly overlaps the top of the front edge. If the length is not enough, then it can be “increased” using cardboard and glue.
- Using masking tape, glue cut-out cardboard elements, semicircular on one side and straight on the other, to the sides of the lid.
- Tape all edges of the chest with masking tape.
- Make a hole in the lid for money approximately 5-7 mm wide and no more than 15 cm long.
- No matter how beautiful the base is, in its original form it is not suitable for a wedding, so the box needs to be covered. Leather, any textiles or designer paper are suitable for this. Here the flight of imagination is not limited.
Decorating a money chest
Particular attention will need to be paid to decorating such an attribute. Here you should not save and choose the cheapest; on the contrary, if you buy ribbons, then choose the most expensive and widest. In addition, we recommend combining satin ribbons with beautiful velvet. If joints or glue are visible somewhere, take a glue gun and decorate the seams with beads.
If you are worried that you won’t be able to make the money chest for your wedding as luxurious as you would like, invite your relatives and your significant other to create it.
Treasury for a wedding in the form of a money box: design of a family bank
A wedding gift to newlyweds is increasingly given in monetary terms. This way, young people will be able to purchase the items they need according to their taste. If you are planning a magnificent celebration with a large number of guests, then the optimal solution for where to put the money would be an accessory - a box for envelopes and small gifts, for example, jewelry or keys to an apartment or car.
Such a box can be made in the form of a chest, casket, reticule of a beautiful geometric shape: round, oval, heart-shaped and decorated according to the event. Therefore, it is important not to forget to prepare and decorate the attribute called “treasury” for the wedding. This responsibility can be taken on by a bridesmaid or a craftswoman from a relative.
A wedding collection box will add style, fun, and bring some convenience to the organization of the holiday.
You can make a cool attribute with your own hands, decorate the decoration of the hall or the bride’s dress with flowers, ruffles, ribbons, beads in the color scheme
store-bought boxes may be suitable , or you can get by with a shoe box or any other.
How to choose a chest?
If you don’t have the time or opportunity to make a chest for collecting money at a wedding yourself, then you can purchase a finished product at a wedding accessories store.
Photo of a wedding money chest
When choosing a casket, pay attention to the following criteria :
- Drawer size . Its parameters should be such that several dozen envelopes and greeting cards of European standard can fit into the chest one at a time without unnecessary difficulties. The optimal size of the box for a ceremony consisting of 80 people is approximately 20 cm by 30 cm, and the height should not be more than 20 centimeters. If you choose a very large chest , then it will attract the attention of guests and cover the young ones in photographs.
- Number of dowry chests. As a rule, only one casket is used, but if you plan to invite more than 150 people to the celebration, then you can prepare two boxes, slightly different in design style.
- The basis of the product . Many people will come to the ceremony and everyone will definitely want to touch the casket. It may even be passed from person to person to deposit money. Therefore, if you choose a flimsy wedding chest for gifts, it may not withstand such torture and will fall apart. A paper product will not work. When choosing a cardboard treasury, pay attention to its corners and joints: they must be reinforced. Better yet, buy a product whose base is made of plastic.
- Safety . This is one of the most important points. The money chest for a wedding must be securely and hermetically closed for the entire period of the event, so that no one except the newlyweds can open it. There will be a lot of people and staff at the banquet And someone will certainly want to covet the goodness of the young couple.
- Compatibility with the overall holiday style . The casket should be designed in the same style with all the accessories at the wedding. For example, if the book of wishes is decorated with a bow, then it should also be present on the treasury. But in this case, hearts and roses will not be “at the box office”. And if the whole holiday is held in eco style, the chairs are covered with burlap, the tables are covered with linen tablecloths, and other items contain cotton, then the chest should be covered with one of these materials .
Photo of a wedding chest for money with accessories in the same style.
The price of the chest starts from 270 rubles, so you can choose the product that is optimal in price and quality.
Shapes and style of money box
A round box for a wedding as a family money bank should be tall so that all the envelopes fit. An important element is the cutout in the top cover. Think about how to place the envelopes : will your box have a cutout or just remove the lid, then locks or tapes are required. The rule - you gave it, you can’t take it back, must be observed. If there is a cut, it should be wide and spacious so that envelopes with voluminous decor can get inside without deforming the decorations. If you prefer front loading, then you should think about how to place stylish locks or magnets.
This is interesting: Causes of Diabetes in Women
Wedding box for money envelopes
The wedding box for money envelopes in the form of a casket is also unusual.
You rarely see a ready-made cardboard form on sale, so you’ll have to make the header yourself
If you use your ingenuity, it is not difficult to make at home a wonderful fairy-tale chest for storing the treasury with rounded shapes, roomy, with handles and a reliable latch for locking and unlocking.
You can paint a money box in the form of an ATM with the “Bride's Bank” logo and a banknote acceptor. Or imitate an old chest in Russian national traditions.
Another option is a pirate treasure chest. The main thing is that the gift box is securely made and does not fall apart during the celebration. With this attribute you can play out a number of money-raising scenes. A treasury decorated with your own hands will become an elegant and cool prop for any wedding.
How to make a treasury for money for a wedding from a box with your own hands?
We offer a step-by-step master class on making a wedding treasury for money with your own hands:
- First, develop a layout, taking into account the volume and geometry of the lid.
- Draw the pattern onto the cardboard.
- Carefully iron the folds with a knife.
- Glue the seams with Moment glue. Additionally, you can strengthen it with a stapler.
- Reinforce the bottom with additional cardboard.
- Securely fasten the frame to the bottom.
- Start decorating.
A good finishing material can be pastel wallpaper Finish the seams for camouflage with lace or braid. An important point is to make a cut in the lid. Add artificial flowers, beads and other voluminous decorations.
You can make a wedding gift box from an ordinary household appliance box. Just cover the box with shiny paper , glue on textiles, and decorate with flowers. The slot in the lid is finished with a thick edging or braid using glue. This will make the cut look neat.
You can make a wedding box for money with your own hands in the form of an old Russian mansion. A more complex calculation of the pattern and time for creativity, and a tower for financial assistance will delight the guests. A balcony, a complex roof, and window frames will add creativity.
Pattern for a treasury for a wedding
You can make a family bank from a shoebox. Wallpaper and decorate. Create a cutout. You can modify the design by inventing a drawer. It’s not difficult to make a money box for a wedding with your own hands. A little effort and a desire to excel contributes to the flight of imagination.
DIY wedding chest from a box
Small chest made from a candy box
Small models can be made from candy boxes; for larger ones, you need to take cardboard boxes of the selected size. Whichever option you prefer, you will need the following materials:
Boxes or several sheets of thick cardboard. If you have skills in working with wood products, you can take this material. By the way, such a box will serve the newly-made family for many years and can be used as a piggy bank in the future.
- Paper tape, paper scissors, stationery knife.
- For the main decoration of the chest, you can take corrugated paper, satin in white, red, blue, purple. The choice depends on the theme of the celebration.
- Accessories for decoration: ribbons, beads, rhinestones, beads, appliqués, photographs of future newlyweds, etc.
To make and decorate a wedding chest, use high-quality materials, then the product will serve you for a long time.
Purple chest for wedding gifts
The process for making a casket for newlyweds is simple. It consists of the following stages:
- It is advisable to choose a box of such a size that its length is equal to the sum of the height of the front wall and the width of the box.
- The lid can be made curly or flat.
- Cover the box with fabric or paste it with crumpled paper.
- Decorate with your chosen accessories.
A template for a cardboard chest can be found on the Internet. The manufacturing sequence of such a model is as follows:
- Cut out parts from a sheet of cardboard according to the diagram.
- Fold along the indicated folds.
- Cover all joints with paper tape.
- Glue the internal joints with a strip of cardboard.
- To give the lid of the product the shape of a casket, you need to make longitudinal grooves on its inner surface using a stationery knife.
- Bend the lid and cut the sides out of cardboard to size.
- Connect all parts using tape. Use it to glue one side of the lid to the casket.
- On the inside of the lid, mark a hole for envelopes with money.
- Cut it out using stationery tape.
- Decorate the lid with your chosen fabric or paper.
However, it is worth following a few recommendations:
- The joints between the cardboard and the side should be decorated with satin fabric or ribbons.
- It is not advisable to place heavy accessories on the lid of the chest so that it does not sag under their weight.
- It is better to choose a neutral color as the main color of the drapery, then contrasting accessories will go well with it.
- An interesting option is to place a photo of the newlyweds on both sides of the chest.
Decorating a wedding chest in the form of a house
Whatever casket you make with your own hands, it will definitely become the subject of admiration and attention of all guests. There are many options for models and design today. The main thing is to use your imagination and put in very little effort.
How to decorate a wedding money box - original ideas
A gift box for money using scrapbooking technique is a luxuriously decorated attribute. Scrapbooking is a technique of cutting out three-dimensional patterns from cardboard and paper. This decor is applied as a separate layer to the product. This is how the casket or box takes on a carved appearance. Everyone, with practice, will be able to compose a lovely wedding-themed composition.
You need to decorate a box for money in a festive and romantic way. The first layer of finishing is the main one. Shiny paper, lace, satin, paper decorations using the scrapbooking technique will create the background. Colors white, cream, lilac, pink, gold will brighten your mood.
Wedding money box decor
Additional decorations with highlights: pearls, satin ribbons, braid will add tenderness and sophistication. Volumetric flowers made of paper, guipure, silk must be included in the design in the form of compositions. Swans, hearts, rings, monograms - symbols of love will be appropriate. When decorating your treasury, show your imagination, and your item will definitely be unique.
Decorating a money box for a wedding will help turn it into a memorable keepsake for many years to come. Perhaps in the future it will store various little things or photographs of the family, including wedding ones.
Watch a video of making a money box for a wedding with your own hands: