- December 24, 2019
- Needlework
- Lyudmila Pichakhchi
Fabric flowers have always been made to decorate dresses, handbags and hair. Even a discreet element pinned to the chest makes a simple dress unusually elegant. Artificial flowers decorated the interior of the house. They were used to frame hairstyles. You can decorate a gift box with a handmade fabric flower. Instead of a bouquet of live roses that will soon wither, you can put in a vase a bouquet created with the help of imagination and inspiration.
Bride's image
To prevent the bouquet from blending into an incomprehensible spot with the dress, you need to choose fabrics that are contrasting in color.
In this case, you can use the same material from which the outfit is made, if possible. It is ideal if the dress has colored inserts or patterns. Then the same shade is selected for the flower arrangement. It can be made in the same palette as other accessories: shoes, handbag, belt or jewelry.
The bride's makeup is selected depending on the rest of the image, but it is better to stick to one of two options: make the makeup completely natural or add one accent on the lips or eyes. It is better not to make the manicure too rich, since the bouquet will probably contain many small and shiny details. It is better to use a single-color varnish or go with a classic French coat.
Volumetric flower
20 blanks are cut out of cardboard and felt - circles of the required size. One circle is collected into a bag, and its tip is glued to a piece of felt. According to this scheme, all the circles are connected. The flower is ready!
DIY decoration
The bride does not have to turn to professionals, but makes a wedding bouquet from fabric with her own hands. Even those girls who have not touched needlework since school home economics lessons can do this. The following materials are most often used to create buds:
- chiffon;
- satin or silk;
- polyester;
- cotton or linen;
- organza;
- felt;
- lace.
The fabric should be selected to match the overall style of the wedding and the desired appearance of the bouquet. It is complemented by standard decorations: ribbons, beads, rhinestones, and in some cases brooches or buttons.
The rose is considered a classic wedding flower; it can also be made from fabric. To do this, select a satin ribbon, which is bent diagonally many times and stitched with a basting stitch. When the required length is processed, the thread is cut and pulled together, resulting in a bud of ruffles. You need to give it the desired shape and tie the thread into a knot. You can additionally glue the base for strength. The wider the stitches, the more voluminous the rose will be.
You can make unusual flowers from polyester. To do this, blanks are cut out of it in the form of flat inflorescences with 4-6 petals, which may be uneven. Then each petal is brought to the fire in turn so that the fabric wrinkles a little - the result is natural buds. For them, it is better to choose fabric in pastel shades. In the same way, a receptacle is made from green polyester, which is sewn or glued to the bottom of the flower. The finished bud is fixed on a wire wrapped in green tape.
You can make peonies in a similar way. 6 circles with diameters from smallest to largest are cut out of synthetic fabric. Each is cut in several places, not reaching the center, to form blanks for the petals.
Each of them is lightly scorched to obtain rounded shapes. The resulting parts are sewn together in the center in decreasing order. Regardless of the colors chosen, the process of assembling a bouquet is the same.
A light, oblong handle is selected, and a hemispherical piece of foam is attached to it with glue. All buds are attached to wires, which are stuck into the base in the right order, but glue can also be used. The handle is decorated with a green satin ribbon, and the desired decorations are added to the resulting flowers.
Making such a composition is not difficult, but the process can captivate the bride and help her forget about more serious wedding worries. A fabric bouquet always looks original and stylish, especially if it is made carefully. It will delight the bride not only during the celebration itself, but also for many years after it, since it will remain unchanged.
Craft in 5-10 minutes
Has your child asked for help making a simple fabric flower that was assigned to them in technology class? Make crafts together in minutes.
- Cut the fabric ribbon 30 cm long and 80 cm wide. Fold it in half and iron the folded area.
- Sew along the edges with large stitches, gather into an accordion and pull out the thread. We close the circle by stitching the product.
- We straighten the flower, decorate it with beads, beads, rhinestones in the center or in a chaotic manner. Done, an A for the craft is guaranteed!
Step-by-step production
Before you start making a satin bouquet, you should study several master classes on the technique that was chosen and practice making the flowers themselves. All other work will not take much time and is carried out step by step according to short instructions.
Step 1. Making the base
First of all, prepare the base on which the buds and decor will be attached. If you buy a ready-made ball made of plastic or foam, then it is simply connected to a long cardboard handle. If you need to make the ball yourself, you can crumple up several sheets of newspaper and wrap them tightly with rope. This homemade ball is also attached to a cardboard handle using a glue gun.
Step 2. Making flowers
The easiest way to make beautiful flowers is the voluminous bud technique. To do this, take a wide satin ribbon and fold it in half with the front side up. Using a needle and thread, such a ribbon is stitched along the edge, after which it is tightened with large gathers and folded into a small bud. To prevent such a bud from falling apart, the ribbons are sewn together at the base with several stitches.
Step 3. Attaching flowers
In order for the satin bouquet to withstand all the active movements of the bride, her photo shoot, dance and, finally, flying into the hands of her friends, the flowers must be well secured to foam or rope. To do this, a small safety pin with a head color matching the color of the ribbon is stuck into their core. The sharp edge of the pin, coming out from the underside of the bud, is firmly and deeply stuck into the base. Additionally, the joint is treated with a glue gun. A well-made bouquet will not fall apart in the hands of the bride and will delight her throughout the celebration.
Popular craft making techniques
- Classic - we cut out according to templates using a brass tool or a soldering iron. Char the edges to hold the shape. The elements are assembled into a composition using a sewing needle and textile glue.
- Thermo - petals are set on fire with a lighter to achieve strength and no tears in the transparent material. The dark edging does not spoil the overall appearance of the model.
- Tape - buy ribbons with braid that do not require heat treatment. Folded and stitched according to the chosen pattern.
- Kanzashi is a technique for complex flower arrangements. Particularly interesting are the small accessories obtained, which are used to decorate albums, bags, belts, and photo frames.
Note!
Wood burning for beginners: tips and secrets for burning pictures
- Plasticineography - interesting options for creating pictures from plasticine on cardboard for children
- DIY scrapbooking for beginners: what it is and how to do it. What you need to create a beautiful album or notebook (photo + video)
From roses on a porta bouquet
Materials and tools:
- roses - 20 pieces;
- gypsophila - 2-3 branches;
- double-sided and single-sided tape;
- floral wire;
- satin ribbon - 70 centimeters;
- Portable bouquet holder with oasis;
- stationery knife, scissors.
Master Class:
- Clean and trim the stems to the length of the bouquet handle from base to end.
- Place double-sided tape on the handle and evenly distribute the chopped stems over it, secure at the top and bottom with wire.
- Cut and peel stems 1.5 centimeters larger than the previous row. Align and secure them with single-sided tape.
- Cover the upper part of the handle with double-sided tape and stick rose leaves on it in a checkerboard pattern, covering the gaps.
- Place a second layer of stems on the handle and secure with wire.
- Wrap a satin ribbon around the handle from the junction of the stems and leaves to the end, then back, from bottom to top, and tie a bow.
- Place the oasis in the water, being careful not to direct a strong stream of water at it and leave it to soak.
- Place the soaked oasis into the base of the handle and snap the top cover onto it.
- Trim the rose stems at a distance of 5-6 centimeters from the bud, peel the bark on the stems.
- Carefully insert the buds tightly into the oasis, starting from the center, forming a sphere.
- Cut off gypsophila branches at a distance of 10 centimeters from the flower.
- Insert gypsophila branches horizontally at the junction of buds and leaves, trying to hide the transition between them as much as possible.
- Place several gypsophila inflorescences between the buds.
- Add a few leaves for contrast if desired.
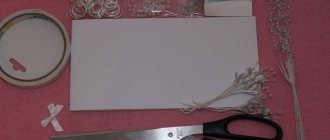
What you need for needlework
To create decorative flowers you will need additional accessories and tools.
- Elements are painted with gouache, ink, photo paint, printer ink, and food coloring. Acrylic-based paint is not suitable for finishing work.
- Brushes with soft and hard bristles.
- Adhesive compositions - stationery and for textiles.
- Wire for forming leaves and stems in bouquet arrangements.
- Transparent fishing line for attaching small elements - beads, beads.
- Felt or crepe paper, cotton wool to create a base and support the shape of the product.
- Needles and thick threads for stitching elements.
- Rubber pad to create a corrugated pattern.
- A set of tools for handicrafts made of brass: scissors, hooks, tweezers, hooks and so on.
Bouquet of artificial flowers for throwing
Why do you need a bouquet-understudy? If your wedding bouquet has a complex shape, such as a teardrop or purse-shaped bouquet, or even a fan bouquet, then throwing it over your head can be difficult. And if it is also heavy, then this will cause concern for the health of your guests. Many girls are of the opinion that the wedding bouquet should be kept as a souvenir and giving it into the wrong hands is a bad sign. You hold the wedding bouquet in your hands all day and transfer your energy to it. It was precisely to solve these problems and superstitions that duplicate bouquets were invented.
Backup bouquets are made artificial, because such a wedding bouquet will remain a long-lasting memory for the girl who catches it; over the years it will not lose either its appearance or its shape. Such bouquets are much easier to create, giving them any shape and adding a variety of decorations to them. A variety of colors and shades will allow you to create a duplicate bouquet that perfectly matches the color scheme of your wedding.
Features of working with synthetic fabrics
Considering that artificial fabrics are often chosen for creative activities, you should first familiarize yourself with the main nuances of processing canvases:
- When choosing a fabric, you need to pay attention to the fabric’s ability to stretch, which will give the petal the desired shape and volume.
- It is better to cut all blanks for the inflorescence with scissors at an angle of 45 degrees. This cutting angle will prevent the threads from shedding and subsequently losing the shape of the bud.
- When heat treating edges, use a lower temperature than for natural fabrics.
- All artificial materials do not absorb paint well, and therefore craftsmen will receive a lighter shade of paint.
Before heat treatment, the edges of the cuts should be treated with a thin layer of PVA glue, which, when hardened, becomes transparent and prevents the threads from falling off.
Choice of services
Wedding bouquet color: ideas and tips
Every bride, when preparing for her wedding, thinks about what color bouquet to choose. After all, it is a full-fledged accessory to the wedding look, therefore it must be harmonious and impeccable down to the smallest detail. This also applies to the palette of the flower arrangement.
- 27 photos
Celebrity wedding bouquets: what do celebrities choose for themselves?
When creating a festive look, many brides are interested in what celebrities looked like at their wedding. Celebrities often hire a team of professionals who select spectacular accessories for the stars, including wedding bouquets that will take your breath away.
- 4134 views
- 18 photos
Various fabrics
If you ask yourself “What fabric can flowers be made from?”, then the answer will be simple - from any. Whether it’s scraps of jeans, chiffon or silk, using your imagination you can make very cute decorations for:
- Gift boxes;
- Interior of a home or workplace;
- Clothes;
- Decorate your hair, accessories with everything you have enough imagination for.
Useful video: master class on creating a cascade composition
Cascade compositions are very popular among modern brides. It will not require serious skills or unusual materials. How to create a bridal bouquet with your own hands step by step can be seen in the video below:
A DIY wedding bouquet is created from the following materials:
- oasis (portable bouquet);
- white roses, freesias and eustomas;
- greens: ruscus and bergrass;
- soft transparent wire;
- pruner;
- satin ribbon;
- pearl beads;
- transparent glue.
A DIY wedding bouquet is assembled step by step as described below.
- First, let’s install the portaquet holder in a position convenient for work. A tall vase that holds the oasis in a vertical position is suitable for this.
- We take three roses with the smallest flowers or buds. We cut the leg at an angle so that it is convenient to insert it into the oasis. We wrap the edge of the leg tightly with wire. These three roses will be the basis of the entire cascade.
- We insert the roses into the oasis from bottom to top, at an acute angle. We fix the wire inserted along with the legs on the other side of the portaquet. This is necessary so that the flowers do not fall out under their own weight. Roses arranged in a cascade should be arranged asymmetrically.
- We also insert the remaining few roses asymmetrically throughout the oasis ball. To do this, you need to cut off the entire stem, leaving a stem 6-7 cm long.
- The free space between the roses is filled with freesia flowers. A flower can be inserted into a portaquet holder 1 time. If you placed it poorly, you will have to make a new hole. The oasis material is fragile.
- To the cascade of roses we add long (along the length of the cascade) branches of ruscus. Since the greens are lightweight, there is no need to secure them with wire. We just stick the branches in like roses – from the bottom up. We insert several separate short branches of ruscus throughout the composition, among roses and freesias.
- We also insert eustoma inflorescences, from bottom to top, into the cascade, filling the space between the roses.
- We string beads onto a wire, scatter them in separate drops and fix them throughout the composition.
- The edge of the porta bouquet's leg is covered with ruscus leaves, the rest of the space is decorated with a satin ribbon. Now you know exactly how to make a bridal bouquet with your own hands.
First time for needlework
To create flowers from fabrics, a simple method of making a peony is recommended for beginners. We take glasses and glasses with necks of different sizes. With their help we make a pattern of circles from fabric. We singe the edges of the resulting petals by holding them with tweezers to an open lighter or a lit candle.
First we string large petals onto the wire, then in descending order. Glue beads, rhinestones or seed beads into the middle. The remaining wire is removed and the ends are bent. You can add ribbons to the fabrics. It all depends on your imagination. The craft is ready!
The beauty of fabric bouquets and their advantages
Fabric wedding bouquets have noticeable advantages over floral arrangements:
- They do not fade; they can remind you of the celebration for a long time after the wedding.
- They will not be damaged or dry out at the wedding itself.
- Lightweight - the bride will not get tired of wearing them throughout the ceremony.
- They can be varied, because the chosen style, type, color, configuration, flowers for imitation, decorations depend solely on the imagination of the bride.
- They allow you to combine the properties of different plants, for example, the appearance of a gerbera bud with the pistils of a lily, or to create a completely new, exclusive flower.
- Inexpensive compared to compositions of fresh flowers compiled by florists, because It takes little material, needlewomen can use what they already have at home, they can use scraps, and they are much cheaper.
- Such compositions will contain a piece of the bride’s feelings if created by her personally. They will reveal the bride’s talents, imagination, and skill to other ceremony participants and her future husband.
- They can be perfectly matched to the dress, match it, fit in shape and appearance.
- Versatile - with the right choice, they suit any look.
- The products are beautiful, elegant, soft, pleasant to the touch.
- They can be created long before the wedding - this removes unnecessary excitement before the celebration.
- Using fabric, it is advantageous to make duplicate bouquets that the bride will throw to unmarried girls, because... Such compositions are light and do not injure anyone.
Product painting
To make it more like a natural flower, its petals are painted. On dark fabric, the folds are painted with lighter colors. And fabrics of white, pale pink or cream shades of brightness will add color to a tone darker.
To obtain a smooth transition, the fabric must be moistened before painting. Flower painting is an incredible art, once you get acquainted with it, it is impossible to stop the flow of creative inspiration.
Within one petal, you can use several shades of a suitable color, and then the effect will be simply stunning. Such painting will add three-dimensionality and a resemblance to naturalness to the products.
After drying, bend each petal in the desired direction. They can be bent inward and twisted outward - the buds will look like a blossoming or blooming flower. The beautiful curves of the petals are given by fabric that stretches in all directions.
Why should you choose white bouquets of fresh flowers?
Since ancient times, white color has been a symbol of purity and purity, freshness and happiness. It is for these reasons that it has become a symbol of the wedding celebration. And how beautiful are the white buds of roses, peonies, alstroemerias, as well as tulips, gerberas, and irises. Looking at them, you begin to smile and breathe deeply. So, stock up on inspiration and white flowers, find a spacious place, and we'll get started.
Materials and tools
- flowers of your choice (peonies, roses, tulips),
- greens (salal, ruscus, eucalyptus),
- floral tape,
- wire cutters
Time: 15-20 min.
Step-by-step instruction
- Prepare the plants for arrangement: cut off thorns, broken and ugly leaves - this will make your floral accessory look neat.
- It is better to start the assembly with larger, accent flowers: roses, peonies. This will help create the correct shape.
- Add flowers in a circle, laying them at an angle so that the stems form a cone at the base and the buds are not pressed tightly against each other. Don't forget to include greenery in the composition, which should protrude above the main buds. Properly assembled bouquets of fresh flowers should stand on their own “legs”.
- Once you have added the desired amount of flowers and greenery, secure the stems with floral tape. Then, using wire cutters, make fresh cuts from the stems. Immediately after this, place the bouquet in water at room temperature. Do not place it in a draft or direct sunlight.
If you do not have the opportunity to properly store your floral accessory, it is worth considering a bridal bouquet made from satin ribbons, or, a more unusual option, making a bouquet from beads.
Use Cases
By arranging a plain, simple bridal bouquet with your own hands, you can be sure that it will suit almost any wedding dress. Whether you complement your cream outfit with a white bouquet, or add a contrasting white arrangement to a bright dress, you will look amazing.
Fabric roses
The process of making roses is very simple:
- Strips 5-7 cm wide are cut from any material. The resulting blanks are folded lengthwise, the ends are smeared with glue.
- One end of the tape is twisted to form a core.
- Next, the remaining shreds are wound onto it. The edges are rolled up.
- If necessary, the fabric is additionally glued.
- The rosette can be made either neat or a little careless. A few roses can create an original composition.
There is nothing complicated about making flowers with your own hands step by step. Every girl can definitely handle this. The main thing is to have a good mood and everything will definitely work out!
Making a sweet bridal bouquet from candies
One of the most original is a bouquet of sweets with your own hands. Such a wedding bouquet will show all the sweetness of your love!
It is also very tasty and you can eat it later. The idea is that each candy is the core of a flower, the petals of which are made of fabric or paper.
We will need:
- Candies;
- Floral corrugated paper in different colors;
- Wooden skewers according to the number of candies.
Now let's start creating the bouquet ourselves:
- We cut out petals for future flowers from corrugated paper in the form of ovals, truncated on one side.
- We take a piece of candy, preferably a round one, and tape its paper tails to it.
- We cut out one large central petal, wrap the candy inside it, and glue it to a wooden skewer.
- We pull the tips of the petals a little to give them a natural shape (if they are roses) or, on the contrary, twist them (if they are tulips).
- Glue them one by one to the candy wrapped in a large petal. We make sepals from green paper and glue them to each flower.
- We collect all the flowers together into one bouquet and wrap them in either corrugated paper, mesh, or tulle.
Unique decor yourself: step-by-step instructions
Rosette brooch
Making a flower from fabric is easy. First, let's master the classic technology of decorating in the form of a brooch. Used for evening dress, belt, bag decor, cosmetic bag, hair clip.
You will need: a 60 cm long scrap, a small amount of felt, textile glue and sewing supplies.
Preparing flowers for the bride's bouquet
In addition, you will need a solution that prolongs the life of cut flowers, decorative tape or a piece of fabric, floral ribbon, thick paper napkin, a stationery knife, and decorative pins.
First you need to prepare the flowers. This is the longest stage, but it does not require much participation. First of all, remove leaves and thorns from the stems. Then cut the stems to two centimeters and split them. You need to pour clean water into the vase and add a solution to it to support the life of the flowers. Place the flowers in a vase for 5-6 hours.
It is not worth cutting the stems immediately to the length you are interested in; it is better to leave them long until the end of the work, and then cut them.
How to use crafts
If you follow the given master classes exactly, you can master the technique of making a wide variety of decorative ornaments from fabric. Such simple, but very beautiful and original elements can be used in needlework for a variety of purposes:
- As an original decoration for gift wrapping.
- To update interior details. You can decorate cushion covers, lampshades, curtains and bedspreads with artificial flowers, as well as make wall panels or topiaries.
- As decorative elements for clothing, hats, bags.
- Fabric flowers are used in the manufacture of headbands and hair clips, various jewelry (rings, necklaces, brooches, earrings or clips).
- For serving a festive table or decorating halls for special events.
- As gifts for friends, acquaintances and colleagues.
- For designing covers of photo albums, notebooks or diaries.
Each piece of jewelry made with your own hands will look original and unique. In addition, such crafts do not require large economic costs and can be made literally from scraps of fabric.
DIY bridal bouquet made of artificial flowers
When creating a variety of beautiful artificial bouquets, use your imagination and give free rein to your emotions. Feel free to use different materials: thin paper, fabric, silk, ribbons, cold porcelain. Almost any jewelry will be useful to you: beads, pearls, stones, lace, feathers, jewelry. If you prefer it to be simple, but tasteful, then a master class on creating a simple, but elegant and stylish bouquet will help you.
Step-by-step instructions for creating a wedding bouquet. Source materials:
- Artificial hydrangeas and chrysanthemums, as close to real as possible. The color, when creating such a composition, is preferable to white, but it is permissible to replace it with one more suitable for your color scheme;
- Floral wire for flowers;
- Natural linen or jute twine. It should match the color of the floral wire, but differ from it in shade;
- Floral ribbon or organza, about 5 cm wide;
- Several buttons;
- A sharp knife or pruning shears.
Process progress:
- Using pruning shears or a sharp knife, trim off all leaves and twigs from artificial flowers. Try to make the stems of the flowers even.
- Then take 3 hydrangeas and put them in a tight bouquet to form a triangle.
Add three more hydrangeas to them, placing them so that they are slightly lower on the “sides” of the triangle
It is important that there is some free space left in the center - the last hydrangea flower will be placed on it. The last flower should be placed slightly higher than the rest so that your wedding bouquet has a more round and neat shape. Next, take three artificial chrysanthemums and add them to the bouquet, but not from the edge, but closer to the center
Try not to place the chrysanthemums close to each other; it is advisable to place them so that they form an open triangle.
- To prevent your wedding bouquet from losing its shape, the flower stems should be tightly wrapped with floral wire, on top (almost under the flowers), in the center and below.
Cut the stems to the length at which you can comfortably hold the bouquet. Trim them. After this, you need to tightly wrap the trunks with floral tape or organza. Start wrapping from the top, stepping back about 2 cm from the flowers, going down. If you want the base of the bouquet to be thicker, then you should wrap it with ribbon in two or three layers
It is important to carefully secure the tape with a button at the top and bottom. In the final version, the buttons will not be visible, since they will be hidden by the twine
You should have a tight handle.
- To decorate the handle, you can attach a bow to it or wrap it in lace. It will look elegant if you wrap the handle with twine. You need to wrap it freely and with imagination - there should be a lot of twine.
- In order to secure the twine to prevent it from unwinding during the celebration, pass the rest of the floral wire through the weaves of the twine thread, securing its rings to each other and to the stems.
For greater clarity, watch the video master class on making an accessory for the bride:
Made from linen
Flax flowers are made from beaded flax. Cut a strip 19 cm long. We retreat 2 cm on both sides and pull the thread 2 cm, that is, remove it completely from the strip. Then we pull the middle through one thread. Coat and glue. Insert a toothpick and twist a strip onto it. Carefully remove the toothpick and coat the bottom of the flower with glue. When it dries, open it. A good set for denim trousers, skirts, jackets, various bags, belts and so on.
Color spectrum
Mono bouquets look beautiful if they have an original color. For example, lilac or purple-orange. Other colors are also used in brides’ bouquets:
- white is a symbol of purity;
- yellow – prosperity;
- blue - family ties;
- blue – great loyalty;
- red – love and passion;
- green – perseverance in life.
Bouquets are good for snow-white dresses in vanilla pink, blue, and lilac shades. It is allowed to accentuate 2-3 wild colors in one bouquet. Modest pink and white, delicate heavenly, red, orange - the main thing is that it matches the dress, makeup and jewelry of the bridegroom.
Pompon
This flower will be large and lush.
You will need:
- Material to your taste;
- Glue;
- Scissors;
- Felt.
Step-by-step instruction:
- Make 25 circles with a diameter of 5 cm;
- Make the same circle out of felt;
- Fold one of the circles 4 times so that a little bag comes out;
- Glue the petal to the center of the felt circle;
- The remaining petals must be glued so that there is no free space left. Ready!!!
Instructions for making a composition from satin ribbons
The version of a false bouquet made of satin ribbons for a wedding is a little more complicated, since the roses need to be formed yourself. To create it you will need scissors, an awl, a foam sphere (for a small bouquet, a diameter of 10 cm is suitable), and a satin ribbon. You will also need a glue gun, chiffon, lace and various decorations - beads, hairpins, etc.
If the roses are different, then you need a ribbon of several colors.
Instructions:
- First, with your own hands, you need to cut off the edge of the foam sphere by 1 cm on one side. Next, chiffon is glued to it from the cut side.
- When creating roses, you should prepare the petals. For one you will need a piece of tape 2.5x6 cm. The edges of the piece are bent so that a right angle is formed, after which it is cut off and triangles equal on both sides are obtained at the ends of the tape. The material is glued together by melting the satin over candles. To make a rose you will need 8 petals.
- When creating a rose, first a bud is made, one petal is twisted into a tube so that the triangles face in a horizontal direction. The remaining petals are glued on top of the bud with a glue gun.
- When everything is ready, the roses are glued to the ball, tightly adjacent to each other. Between them you can insert hairpins and other decorative elements. In this regard, you can fantasize and use any objects.
- Next we form the handle. For these purposes, you can use an awl, whose tip is inserted into the foam exactly in the middle. It is wrapped with a satin ribbon on top.
- The base of the wedding bouquet and the handles are decorated with lace to make it look complementary.
Options for crafts made from different types of materials
Made from satin fabric
Flowers made of satin fabric are made as follows.
Using a compass, draw a circle with a diameter of 12 cm and 9 cm on cardboard or thick paper. Using a blank, cut out 4 circles of 12 cm and one of 9 cm in diameter from satin. Burn with a lighter. The petals should bend slightly inward. Now on each workpiece we make 4 cuts in pairs on both sides. We put them on top of each other and sew them together. For the middle we use beads.
Felt poppy
You will need pieces of material in red, green and black. Additionally – a glue gun, scissors, a pencil.
The first blanks are made on a red flap. This will be four petals. It will be easier to make flowers from different materials if you first prepare and then cut out the paper parts.
Then:
- Parallel cuts are made at the bottom of each petal. Then they are connected with glue.
- For assembly you will need a red felt circle. The petals are attached to it by fixing with hot glue. The first two are opposite each other, then the rest.
- The middle is made black. First, a small strip is cut out, then rolled into a tube, the edges are glued together. Then they cut out another strip of greater width and make frequent cuts along the edges.
- The finished strip is wrapped around the workpiece. The middle is glued in the center.
All that remains is to make a leaf of green felt and add it to the decoration.
Basic materials used in flower making
To ensure that the work goes without annoying delays, prepare everything you need in advance. Let's start with choosing fabric. It is better for beginning craftsmen to use densely woven fabric; it holds its shape well. Please note that coarse, ugly fabrics will not make an elegant product; use shiny dense silk, satin or velvet. Try combining different types of fabrics, this way you will better reflect the diversity of the floral world. Perhaps you have some beautiful scraps left from some handicraft - do not neglect small scraps, it is very convenient to work with them.
The material has been selected, but before cutting can begin, it must be treated with a special compound.
Pour 3 teaspoons of gelatin with a glass of water, let it brew and heat until completely dissolved.
Soak the fabric in the solution and dry without wringing. After complete drying, the fabric is ready for cutting.