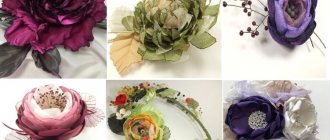
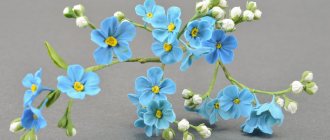
Topiary is an art that became popular in the mid-20th century. Cute trees decorate holiday tables or simply use them as interior decoration.
The materials you can use are artificial flowers, plastic, napkins, as well as natural plants. Size, shape, style, color - all this is left to the imagination of the master who has to do the work. Below you can find a detailed master class.
Materials and tools for creating topiary
Before you start work, you need to collect all the material and tools. Beginners should definitely have on hand:
- You can use a simple foam ball as a base. This is a classic option where the barrel and other components will be attached.
- Sticks, clean brush.
- Paints - gouache.
- Glue.
- Varnish.
- The basis for the trunk can be petals from cones.
Before you start making topiary for the holidays, it is advisable to study all the nuances and details. Many craftsmen have professional tools - brushes, paints, various fasteners and pliers for parts.
An artificial grass topiary will be a great addition to any area.
Topiary: history of origin
The Ancient era is considered the initial stage in the development of topiary art. Gardeners of wealthy residents of the Roman Empire were among the first masters of this decorative genre. They were called that - topiaries. They made patterns, animals and abstract shapes from the crowns, which was unusual for that time. The historian Pliny claimed that the first topiary gardener was Calvenus, one of Caesar's courtiers. However, modern scientists have an assumption that the Romans adopted skills from the masters of Western Asia and Egypt. For several centuries after the fall of Rome, art did not develop. The creators of the Renaissance took it to a new level. From landscape design, topiary gradually “transitioned” into decorative and applied art. One of the alternative names, “European tree,” indicates the focus of masters of the topiary genre.
Base for topiary
Finding a large foam ball is not so easy, so the craftsmen found other options that will allow them to get the job done quickly and accurately. Here are several options for a topiary ball:
- Make a base from paper, water and glue. The technique is called papier mache. You can find instructions in the public domain.
- A small cardboard box can also replace it.
- A ball of thread stuffed with padding polyester.
- Polyurethane foam ball.
- Knitted threads pre-impregnated with glue.
There are a lot of ways to make a base; all that remains is to choose the most suitable option.
Who can I give it to?
One of the main questions is who to give it to. First, understand why compositions are created. There are many options: for beauty, a feeling of happiness and well-being. In addition, topiary trees are a good idea for decoration.
It will be an original gift for the holidays - from New Year to anniversary.
Ideas for who to give it to:
- relatives and family;
- Friends;
- familiar;
- colleagues, etc.
Such a gift is not cheap. Firstly, materials, which can cost up to several thousand. Secondly, the effort and time invested.
Topiary made from napkins
Making crafts from scrap materials is fun and easy. You can include children in the activity, since the creation uses safe devices that cannot harm the baby. Brief instructions for topiary made from napkins:
- First you need to take care of the foundation. How and from what it can be made was described above.
- Next, you need to find wooden skewers or sticks on which the finished flowers will be glued.
- Napkins - it is advisable to choose plain, bright and different colors.
- Glue, brush, tape may also come in handy.
The manufacturing method is simple; you need to make a large number of flowers from napkins. One option: fold each sheet into a triangle and roll it up. You will get roses, the ends of the paper are glued and dried. Next, each part is attached to a skewer, which is stuck into the base.
Satin flowers
You can decorate your wedding topiary with your own hands with chic satin roses, as in Fig. 4. To create a flower you need ordinary ribbons, which can be bought at any craft store. The size of the flower will depend on the width of the ribbon, so the source material should be selected according to your needs.
Making a flower from a ribbon is not easy, but very simple. A master class with step-by-step photos will help you correctly understand the job description:
- Fold the corner of the fabric strip towards you so that the fold line is at the top. Roll up to half the fold.
- Bend the ribbon away from you and wrap the roll, forming 1 petal.
- Bend the tape away from you again, while wrapping it around the central part.
- This must be done until the flower reaches the desired size.
In this way you can make delicate rose buds that have not fully opened. If you want to make lush flowers of a larger size, then you should do it differently. Using the algorithm described above, make the central, denser part of the rose. For the outermost, wide open petals, you need to cut out parts from satin (Fig. 5).
Burn the edges of each piece over a candle or lighter flame. Make tucks on the underside of the petals. Wrap the middle part with one of the petals and attach it with glue. Place the next one next to it so that it partially overlaps the finished part. You can take a real flower as a sample. Having achieved the desired size and splendor of the rose, glue its unprepared base covered with fabric.
Topiary made of satin ribbons
Atlas is regularly used for crafts; it is an excellent material that is accessible to everyone. The process of making topiary, in this case, will be similar to the quilling technique. What should be done:
- The barrel is made from a clean and neat stick.
- Small details are created using the quilling technique. Each ribbon is carefully twisted into a flower; it is better to use double-sided tape to secure it.
- The parts are attached with glue to a stick, which is inserted into the base.
At the end, add other decorations if desired.
Ideas for creating topiary for a wedding table - photo
Newlyweds from all over the world have already implemented many ideas for decorating a wedding tree. Newspapers, ribbons, lace, corrugated paper, floral mesh, flowers, butterflies, angels and doves can be used as decorative elements. Not only the details of the crown decoration are interesting, but also the containers in which the tree is “planted”. These can be glasses, round, square pots, jars, watering cans. Often, instead of the classic base - a ball - the heroes of the occasion prefer a heart-shaped topiary, emphasizing the romantic nature of the newlyweds' relationship.
Heart made of napkins
A heart-shaped topiary for a wedding, decorated using napkins, is easy to make. You will need the basic elements (pot, solution for attaching the trunk, the trunk itself, the heart base) and napkins of a suitable color that are rolled into balls. The resulting parts need to be completely covered with the heart so that there are no gaps left. See the photo below for this and other types of heart-shaped topiary.
"Cooing Doves"
A pair of doves at a wedding celebration is a symbol meaning reverent love between spouses, peace and harmony in the future family. Beautiful birds can be created using paper, felted wool, and ready-made feather and glass figurines are often used. You can “plant” touching doves on a pot, on the crown of a topiary, or choose a flowerpot with an appropriate design.
Tree with photos of young people
A topiary with a photograph of the newlyweds will decorate the wedding event. A tree with a joint photo of the heroes of the occasion is usually facing the guests. After the wedding, the newlyweds will be able to take the topiary home to eventually insert photos from the wedding celebration. Check out photos of these interesting topiaries below.
Corrugated paper topiary
Bouquets of flowers are often wrapped in similar paper. Therefore, after the holiday, it is recommended not to throw it away, but to use it for creative purposes. Instructions:
- Take a foam ball - this is the upper base.
- You need to prepare the pot in advance.
- Next, neat roses are made from paper and placed on the base using hot glue.
A wooden skewer or stick is used as support. Its characteristics will depend on the weight of the upper structure.
New topiary ideas 2022 made from money and artificial grass
Let's look a little more at what types of topiary there are. Maybe you will now get excited about the idea and run to create. I propose to pay attention once again to the so-called “money trees”. Just look at how many options for crafts you can come up with on this topic!
You don't have to use banknotes - coins are fine too. Or you can combine both in one topiary.
As soon as you add up the money differently, the tree takes on a completely different look.
We looked at how to make such flowers. It turns out very tender, doesn’t it?
If you have time and desire, create a composition from several topiaries. They will attract twice as much money.
Sisal is perfect for decoration, as well as figurines of birds, insects, beads, etc. In general, everything you like.
This is where the bird took refuge.
You don’t have to cover the entire base with money flowers, but use them only as an additional element, as in the work below.
In general, as you can see, you can do anything. Creativity is wonderful because no one limits the flow of your imagination. What you succeed depends only on yourself. Be sure to write in the comments under this article whether you liked my selection, and which of the ones discussed above you would like to implement. Good luck to everyone and have a nice day!
Candy topiary
This is a great way to surprise a work colleague or relative. Such a bouquet will definitely be remembered for a long time and will appear on all social networks of the birthday boy. Make the craft according to the following instructions:
- It is necessary to take any of the bases proposed above.
- Be especially careful when choosing a treat; regular long caramels are not suitable. It is necessary to take chocolate ones, decorated in a bright wrapper, preferably triangular in shape.
- Next, each candy is coated with hot glue on the bottom and placed on the base.
A beautiful pot is also used as a structure holder. Candy is heavy, so you need to fill the pot with something heavy, such as stones or sand, in advance.
Magic coffee tree
Coffee beans symbolize prosperity and wealth. This tree exudes a pleasant aroma. If you want to attract good luck and financial well-being to your home, coffee topiary should be done during the waxing moon. Place the talisman in the southeast of the room. According to Feng Shui, this is the wealth sector.
Don't forget to care for the tree! You can remove dust using a hair dryer (cold air) or a soft clothes brush.
Manufacturing process:
Sort the grains by size and quality. Leave them whole and beautiful for the top layer.
Important! You should not take coffee with additives and flavorings. They are sticky and don't stick well.
Some may find this process tedious and tedious. But this is a kind of meditation. Play your favorite music or audiobook. The smell of natural coffee has a beneficial effect on a person, relieves stress and fatigue.
You need to glue the grains in two layers. The first layer is grooved down. The second - grooves up. Secure the trunk in the crown and fill the space around it with grains.
To extend the life of such a tree, cover the top with several layers of acrylic varnish. If you want a fragrant souvenir, leave it in its natural form. But keep in mind, over time the coffee will dry out and may crack.
“Plant” the topiary in the pot and let the plaster dry. And one more secret! You can pour gypsum at the initial stage, when the crown is not yet ready. To do this, glue a piece of foam plastic in the center to the bottom of the pot. And fill the voids with mortar. While the plaster dries, you will work on the crown. Then make a hole in the foam, apply hot glue to the barrel and install it.
Decorate the base of the pot with sisal, pebbles, pebbles or coffee beans. Decorate your tree and add a little magic!
This is interesting! Cinnamon attracts good luck and symbolizes tenderness and love. The acorn is a symbol of growth and potential. Dried orange slices, coins, bills, a small figurine of Hotei or turtles work as a magnet to attract money into the house.
Two coffee hearts decorated with a satin bow and a figurine of angels will be a sincere gift for the newlyweds.
You can involve children in the creative process. Make a topiary out of napkins with them. Video tutorials on how to make such a tree are easy to find on the Internet.
Wedding topiary
The craft is in demand among future newlyweds. This is an ideal option for decorating holiday tables. Candies and napkins are not suitable in this case.
Experts recommend using high-quality artificial flowers to make your work look neat and expensive. For production you will need:
- Several reasons - it depends on the client’s request; they definitely use foam balls, they are more stable.
- Artificial flowers - purchased from a good supplier.
- Identical pots.
The manufacturing process is similar to the previous ones. To ensure that the flowers stick and can withstand the holiday, a hot glue gun is used.
It is advisable to do the work a day before the event.
Wedding topiary made of organza using the cutting method. Master class with step-by-step photos
One of the gifts for newlyweds could be a wedding topiary made of organza using the cutting method, and I will show you how to make it with your own hands in this master class.
To make a wedding topiary we will need:
- foam ball d=10cm
- white organza
- scissors
- glue gun and glue for it
- stapler and staples
- ruler
- white satin ribbon 2.5 cm wide
- white beads and beads
- dried flower lagurus white
- white sisal
- Corylus trunks
- dove
- rattan ball
- alabaster or plaster
- white pot
Wedding topiary from organza master class.
First, we make 2 holes in the foam ball with scissors, drip glue inside and insert the trunks one by one.
We cut the organza into 7x7 squares; if not all of them turn out the same, that’s okay. You need a lot of these squares.
Next, take 2 squares and place them on top of each other so that the edges do not overlap.
Fold in half.
And in half again.
We fasten with a stapler, leaving a small corner.
Before gluing, I cut off these corners with a paper clip, but you can glue it this way.
We begin to glue the end pieces to the ball.
So we cover the entire surface of the ball.
Next we take alabaster or plaster.
Pour halfway into the pot.
Dilute with water until it becomes thick sour cream. If there are holes in the pot, they need to be sealed first. We insert our made base. You need to work quickly, hold it and wait until it dries. Leave for about half an hour to completely harden.
Let's move on to decorating the wedding topiary. We cut the satin ribbon ~5 cm, fold it in half and glue the ends.
We insert and glue them along the entire crown.
We cut a piece of organza so that it is larger than our pot.
We wrap the wedding topiary pot and seal the ends inside.
Wrap the pot with ribbon and tie a bow.
We take white sisal and cover the base of the trunks with dried alabaster.
We wrap the beads around the trunks and secure the ends with glue.
We plant and glue the dove onto the pot.
Glue the lagurus and rattan ball, glue beads along the entire crown.
Organza wedding topiary is ready.
Prokudina Anastasia
Add a comment | Comments to the news “Wedding topiary made of organza using the trimming method. Master class with step-by-step photos" already 0: Interesting on the web:
- 05.01.2014
- 803
- 0
- 1
- 2
- 3
- 4
- 5
E-book “The best handicraft master classes.”
To receive the book, you just need to enter your EMAIL and NAME in the form below.
After that, click the “Get book” button.
We promise that your data is completely safe. You will find additional information in our Personal Data Storage Policy. "Masterclasses" © 2011-2017. All articles on the site are copyrighted, copying is strictly prohibited. In case of partial citation, a direct indexed link to the “Masterclasses” website is required.
If you liked our site, express your “thank you” by clicking on the buttons below:
Attention! It is forbidden to use expressions in the form of obscene and insulting. HTML tags and URLs are not allowed.
Topiary “Money Tree”
A pleasant activity for those who want to add a little symbolism to the interior of their home or give an unusual gift. You can use both real and counterfeit money, which can be purchased at any joke store. Master class on making a money tree:
- Take a base - you can quickly make it from polyurethane foam.
- Next, each bill is twisted into a flower or tube.
- Double-sided tape is used for fastening, especially if the money is real. If glued, a person will not be able to use them in the future.
The design is placed on a small pot, which is stylishly decorated with additional elements or simply a wish.
Step-by-step master class on making topiary
To make a topiary with your own hands, first of all prepare the basic elements:
The trunk, if it is not a natural branch, is wrapped with satin or other ribbons, twine, covered with fabric, and covered with materials selected for this composition. If the barrel consists of several elements, for example, several thin knitting needles or kebab skewers, you must first tighten them with electrical tape. You need to think about how to fix the tree in a pot and prepare all the necessary materials
When using a flower pot with drainage holes, it is important to seal them first. If the pot or bucket is heavy enough so that the crown does not outweigh the base, then foam plastic, pieces of polystyrene foam, or even polyurethane foam are sufficient for fixation.
The trunk in such a pot is placed in the center, sunk to the ground, burst with prepared materials and filled with polyurethane foam or alabaster in the consistency of sour cream.
If the base for the tree crown is made in the form of any figure, for reliability it should be secured with glue.
The “skeleton” of the tree is ready – you can decorate it.
The near-trunk space of the pot can be decorated with pebbles, shells, and covered with floral mesh or fabric.
The pot itself can be covered with fabric to make a beautiful paper “wrapper”.
The crown can be attached to the base using glue, flowers can be pinned with wire, or placed on wooden skewers.
Topiary made of pine cones
After a walk in the forest, many people bring home a large number of real Christmas tree decorations. Children's competitions are often limited to ordinary crafts that everyone gets bored with. There is a solution, you can learn how to make topiary from cones. Instructions:
- For work, it is better to collect small cones of the same size.
- For the base, take a dense foam ball.
- Next, each cone is glued using PVA glue.
The teacher and judges will definitely like this hedgehog.
Progress
Topiary is a handmade decorative product that looks like a tree. It is also called the “tree of happiness”
or
“money tree”
, symbolizing wealth and prosperity in the family. In ancient Rome, the art of topiary was the cutting of garden trees, and the slave who monitored this and maintained their ideal appearance was a topiary. Later, the fashion for topiary tree trimming appeared in Europe. To this day, interest in topiary continues.
We offer you a master class on how to create this unusual item for interior decoration with your own hands. The most popular options are napkin topiaries.
And so let’s start creating a tree from napkins with our own hands.
Step 1
Pour some water into the pot, add the hardening material and stir.
Step 2
Insert a branch into the center. If you want it to be hidden, you can first wrap it with satin ribbon or electrical tape in our case, or other decorative material. Until the base hardens, you can decorate it with pebbles, shells, grass or other decor at your discretion. Leave for several hours until the material hardens completely.
Step 3
Let's make a ball. To do this, take a newspaper and crumple it along its entire length. We wrap the crumpled newspaper around the top of the trunk. We wrap several layers on top and make a ball shape. To keep it in shape, we wrap it with thread. To make a ball you can use an inflatable balloon. It’s good to cover it with newspaper and paint it. Then we pierce the ball, and it turns out to be a light and neat ball.
Step 4
The base for the tree is ready. All that remains is to decorate it.
Step 5
Place three napkins together, trim the edges and roll them like an accordion. Then we tie it with a thread in the middle and tighten it.
Step 6
We unfold the flower, lifting each layer of the napkin up, this is how the flower is formed
Step 7
Using glue, attach the flowers one by one to the tree ball. We decorate with various decor. To glue the crown from below, turn the tree over, very carefully so as not to crush the roses, lean it on the wall. Fill the remaining space with flowers, keeping the same order throughout the tree.
Topiary is just the kind of tree that requires absolutely no maintenance. It does not need to be watered, fertilized or replanted. It will delight you with its appearance regardless of the season. Caring for it involves placing it away from direct sunlight, as the material may fade. It won't be necessary to blow off or shake off dust very often.
The tree of happiness is a wonderful talisman and amulet. According to Feng Shui, it is a symbol of wealth and prosperity. You can make one for yourself or your family with your own hands.
Thanks for the work!
Introspection
master class on the topic “Topiary Technique. Tree of Happiness"
conducted by M. V. Reshetnikova, technology teacher
MBOU "Zarubinskaya OOSH"
The purpose of this master class was to introduce unconventional ways of working with paper napkins and the art of Topiary.
To successfully implement this goal, I have planned the following tasks:
• Learn to use the non-traditional Topiary technique in your work.
• Develop children's thinking, imagination, creative skills, practical skills, and artistic taste.
• Create conditions for active interaction between master class participants.
I believe that during the master class, the goals set at the beginning were achieved. The logic was followed. During the work, participants became acquainted with the main types of active learning methods, and the goals of each stage of the lesson were discussed.
Participants of the master class gained an understanding of the art of topiary. In addition, the colleagues present were not only passive listeners, but also active participants in the master class. I believe that the set goals and objectives were fully achieved. The introductory part consisted of a greeting and an announcement of the topic of the master class.
All participants completed the task, i.e. I was able to intensify the use of paper napkins in making the “Tree of Happiness”
In the final part, I summed up the results of our joint work:
Conclusions:
• The stated goal of the master class was achieved.
• The topic of the master class did not leave the teachers indifferent; there was an opportunity to learn something new.
• The stages of the master class had a logical sequence.
• The psychological atmosphere was friendly.
• Everyone successfully completed the practical tasks.
File "/upload/blogs/detsad-1107154-1489830122.jpg" not found!
Autumn topiary
Everyone at least once in childhood collected a bouquet of autumn leaves. Variegated colors filled the houses and pages of books. Now there is another way to brighten up an autumn evening and fill your apartment with a pleasant smell. Master Class:
- The leaves and autumn flowers are quite light, so you can take any option suggested above as a basis.
- It is better to collect different leaves so that the bouquet looks bright and unusual.
- Each branch is carefully stuck into a round base.
There is a drawback, such a craft will not last long. However, this option can be used as a holiday table decoration. How to make a frame for a topiary - use plaster or sand.
How to make topiary for a wedding with your own hands?
To make the gift beautiful and delicate, like the wedding itself, you need to carefully select the materials from which it can be made. Shades of pink, gold, white - these are the colors in which it is best to create a souvenir. Organza and satin, crepe paper, lace and pearl beads in light colors will help create an airy composition. Figurines of doves or swans, photos of the bride and groom (if this is topiary for a wedding anniversary), hearts, flowers, and butterflies can be used as additional decor.
A master class on how to make a small wedding topiary, which can be used to decorate a formal table or give to the bride, will help you get the job done correctly and quickly. You need to prepare:
- squares of fabric (crystalline, tulle, organza);
- satin ribbons;
- container;
- Supermoment glue or similar;
- a plastic or foam ball;
- tree trunk stick;
- building gypsum.
To make the gift beautiful and delicate, like the wedding itself, you need to carefully select the materials from which it can be made.
This master class recommends bird figurines, artificial grass, and large mother-of-pearl beads as decoration. A flower pot with a finished pattern can be used as a container.
The tree crown is made by trimming. You need to do this work like this:
Decoration for events: how to create a holiday What color should you paint the outside of the house? 3D floors: modern technologies, recommendations from designers, photos of finished interiorsBeautiful decoration for a beautiful celebration: decorating the wedding hall with your own hands
- Puncture the plastic ball, insert a stick (a thick kebab skewer) into the hole and fill it with glue. Wrap the ball in a piece of fabric and secure it to the leg with thread. Fabric elements are much easier to glue to a related material than to plastic. Cover the attachment point with a pink satin ribbon and wrap it around the entire stem of the future tree.
- Place a thin stick in the center of the square of fabric, wrap the material around it and hold it (Fig. 1). Apply a drop of glue to the place where the end of the stick is located. Press firmly onto the cloth-covered ball for a few seconds. After the stick is removed, you will get a flower with sharp petals. By placing similar elements close to each other, you can achieve the effect of a lush flower ball.
Such a crown can already be quite decorative. If desired, you can add rose flowers or beads to the tree.
Prepare a container by pouring a solution of building plaster into it. When the mixture begins to set a little, insert the already formed top of the composition into it. After complete hardening, you can continue to decorate the container by placing artificial grass in it. Glue the dove figures, as in the photo (Fig. 2), or plant them on a tree.
Felt topiary
A large number of toys and useful household items are made from this material. Therefore, if there is some free felt left in the house, you can make a cute gift in a pot. Peculiarities:
- Flowers play a key role. Making them is not so easy, since the felt is not so voluminous. The equipment can be found in the public domain.
- Each flower should be attached to a round base using hot glue. The tape will not support the weight of the material.
To make the decor item look neat and unusual, you should add a little greenery. Leaves are also cut using scissors.
Other options
There are a huge number of materials for creating a tree of happiness. Felt topiary looks beautiful . You can cut beautiful flowers and petals from it. Felt goes well with beads and satin ribbons, so it looks gentle and attractive.
By the way, look at the previous article. There is a lot of useful information for you - How to make a bird feeder with your own hands?
Such a wedding topiary will not go unnoticed during the celebration. It will attract the attention of guests and catch the gaze of others.
It is difficult to make topiary from flowers . This requires a long time to prepare the material. Find suitable flowers, dry them correctly and only then use them to decorate the tree of happiness.
Please take a look at the following article. It contains more useful information - How to make a birdhouse with your own hands?
These flowers can be attached with regular glue. A special protective varnish will help them maintain their shape.
It is much easier to make topiary from organza . For this, squares of this material are usually prepared. Their length and width should not exceed 7 cm.
Difficulties will be encountered when processing the edges, so it is recommended to purchase floral organza, ideal for creating a tree.
We recommend placing organza topiary in an empty flower pot.
Shell topiary
A similar technique was used in ancient Rome, only instead of improvised objects and materials, it was used to maintain areas of palaces.
Gardeners did this, cutting various shapes from bushes. Therefore, topiary is not just a round decoration, but a whole art where there are no boundaries. Manufacturing Features:
- You won't be able to find shells that are the same size. Therefore, for the base you need to make a foam plastic figure of any shape.
- To make the process easier, small shells are taken from which patterns can be made.
- Many craftsmen use squares and triangles onto which elements are glued.
It is not recommended to work with children, as shell fragments can injure their hands.
DIY wedding tree: finishing touches
You can use anything - beads, feathers, rhinestones, ribbons, lace. Usually “on the spot” it becomes clear what and where will look best. If you have a tree as a gift for your wedding anniversary, then attach a cute card that will be filled with good wishes.
After the celebration, this decoration will not be removed as unnecessary, like most items from wedding decor, but will migrate with the newlyweds into family life
You can decorate a tree with your own hands like this:
- If you are making a tree in the shabby chic style, which is now fashionable, allow artificial scuffs, and complement this decorative element with others - an old vintage watch, a retro figurine of newlyweds, etc. This is a great solution for an anniversary. This composition can also decorate a holiday table.
- You can indicate the reason for which such a tree was created like this - just buy a pot on which a composition has already been made with wedding rings and other attributes of the celebration. And this souvenir will definitely decorate the festive table, the zone of the young.
You can also put a ring at the foot of the tree, and thus present another gift to your wife. Or earrings, or some other piece of jewelry. This is the best decor for a tree.
Coffee topiary
This option will definitely appeal to coffee lovers. The peculiarity is a pleasant smell throughout the room. It is unlikely that it will be possible to make coffee from such beans in the future, but the master will definitely receive positive emotions from the process. How to make topiary from coffee beans with your own hands:
- It is better to make an original table decoration on a foam base. In this case, the coffee ball will look beautiful from an aesthetic point of view.
- Each grain is glued using PVA glue.
- Next, the ball is placed on a skewer and into the pot.
The weight of the product is large, so the pot must first be filled with a putty solution.
Topiary for the wedding “Bride and Groom”
Coffee topiaries have become the most popular . To do this, you just need to completely cover the ball base with natural coffee beans - this is a very simple craft. For a wedding, you can make a composition that is a little more complicated.
This decoration will not only be an original gift for newlyweds, but also a source of a pleasant coffee aroma
What you will need for work:
- two balls with a diameter of about 6 cm (made of foam rubber or polystyrene);
- a smaller ball (about 4 cm);
- cotton pads;
- threads;
- brown acrylic paint;
- coffee beans;
- hot glue;
- acrylic lacquer;
- wire;
- scotch;
- white and beige satin ribbons;
- flower pot;
- alabaster and water;
- cardboard;
- aerosol cap;
- decorative details: beads, feathers, ribbons.
Step-by-step progress:
- Use a knife to make small cuts in two identical balls, so that you can then insert wire stems into them. Cover the surface of the bases (including small ones) with cotton pads, leaving the slits uncovered.
- Wrap the balls with thread and paint with brown paint. Wait for it to dry completely.
- Cover the balls with the first layer of coffee, placing the beans with the convex side up. Then apply the second one, but vice versa – cut side up. If there are “threads” left from the glue, they can be scorched with fire.
- For a small ball, make a loop of thread. On one side, draw a heart made of pearls using glued beads. Cover the balls with acrylic varnish - it has no smell, so the craft will still exude a pleasant coffee aroma.
- Make 2 trunks from the wire: bend them so that they form a heart shape when placed side by side. Make another similar heart, but small so that it fits inside the large one.
- Wrap the edge of the wire with tape, coat it with glue and insert it into the slot of the ball.
- Wrap the barrel tightly with white tape, and then put beige tape on top of it.
- Dilute alabaster with water, stir and pour into a pot. Install wire trunks into it.
- Glue a circle of cardboard to the lid of an aerosol can to create a hat. Paint it brown and attach it to the “groom”. Additionally, you can decorate with a bow tie made of satin ribbon.
- Decorate the “bride” with white feathers, ribbon roses, and beads. You can make a small organza veil .
All that remains is to hang a small ball from the center of the composition, and the wedding topiary is ready!
Coffee topiary “Bride and Groom”
New Year's topiary
This work is done with children, there are no dangerous elements. Instructions:
- You need to find fir cones.
- You can complement the composition with balloons or candies.
- A ball of polyurethane foam is used as a base. Usually, this material remains after repairs and is not difficult to find.
Next, each branch is carefully stuck into the base. After which, it is placed on a strong stick and placed in a pot filled with a heavy solution. Fasteners are definitely needed, as it will harden for about a day. Next, the work is decorated with Christmas tree decorations.
Marine themed topiary
The outer shell of the crown should be created by beads, shells, stars, ribbons, and solid objects of organic origin (coral fragments). The trunk is made from thick wire, dry twigs or pencils. It is better to wrap it with colored material. The range of colors is not limited, but to preserve the association with the sea coast, it is recommended to stick to white and blue colors, less often green.
Materials such as polyurethane foam, silicone, pebbles, sisal fibers, organza scraps, sea salt, newspapers, threads will be useful. The base for the crown is made from crumpled newspapers. The walls of the base - the pot - are covered with a piece of organza. The trunk is wrapped with twine (then it is decorated). The upper end is lubricated with glue for subsequent installation of a ball made of newspapers. The lower part of the rod is fixed in the pot. After this, the crown is trimmed and the entire tree is decorated.
A little about the symbolism and meaning of the coffee tree
According to the Chinese teachings of Feng Shui, the coffee tree is a specific type of money tree. Accordingly, such a topiary brings material well-being and stable prosperity to its owner’s home. A coffee tree made with your own hands or received as a gift will enhance financial flows and protect against lack of moneyif placed in the right place.
The coffee tree, like any seed, is a symbol of the origin of life and development . Thus, topiary made from coffee beans ensures harmony in the home, mutual love and a positive vector for the development of interpersonal relationships. By the way, topiary can be made from real coins - here we already wrote how easy it is to make a money tree .
Homemade topiaries have a noticeable impact on the overall atmosphere in the house in accordance with the feelings invested in them. That is, if you experienced positive emotions and worked with complete dedication when making a coffee tree, those around you will feel warmth , joy and feel very comfortable.
Secrets of the tree of happiness
The floristic tree carries a very important meaning. It is a symbol of fertility, wealth and health. This amazing decoration has a beneficial effect on the energy of the house, because topiary not only attracts good luck, but also generates powerful energy of happiness.
Advice! If the interior of the house is designed in classic grayish tones, topiary made from ribbons in cool shades (blue, light blue) can highlight it. In “warm climates” where there are many sunny shades, choose darker colors for the tree.
An original DIY topiary will be a great gift for any occasion. Such a miracle can be created from paper, artificial flowers, fabric, grains, feathers, shells, pine cones, coins, beads - everything that can be found in the home of needlewomen.
Topiary will be appropriate in any situation:
New Year.
An ideal gift or decoration item for the winter holiday. A sisal topiary decorated with pine cones, small spruce legs and shiny balls will look especially original. And if you add glitter, lurex, tinsel and gold decorations, the snowy tree of happiness can be an excellent substitute for a Christmas tree.
Advice! Silver and gold go perfectly with contrasting shades (blue, green, red). Shiny elements optimally set off light, pastel colors.
Romance of Saint Valentine.
A love tree or topiary heart, decorated in red and white colors and decorated with satin or paper roses, valentines, fluffy feathers, will be a real romantic gift.
A colleague's party.
Give your coworker a coffee topiary. Decorated in the colors of coffee pleasure, decorated with fragrant beans, this tree will perfectly decorate the office and fill it with a sensual aroma.
Mystical Halloween.
For fans of the Celtic holiday, a topiary designed in the shape of a pumpkin is suitable. Decorate it with canvas, place a figurine of a witch on top, and the spirit of mysterious celebration will burst into your home.
Gift for a friend.
For the birthday of a close friend, you can create a delicate topiary of roses. To make flowers, take ribbons, napkins, fabric or corrugated paper. Small artificial flowers are also suitable.
Advice! It is better to plant a flower tree in containers of white, light, pastel colors. Glass figured vases would also be ideal. You can write a memorable greeting on them.
Wedding.
A romantic wedding topiary will be a real highlight among gifts for newlyweds. Decorated with satin, lace, pearl beads, sisal, a flower topiary will remind young people of a wonderful day for a long time.
New settlers.
Our ancestors, when laying the first log for the construction of a new hut, put a handful of grain under it so that prosperity reigned in the house. The best housewarming gift would be a modern topiary made from grains. You can take any large grains (sunflower, pumpkin, beans, peas).
For decoration, use canvas, twine, and buttons.
How to decorate topiary
You can use any materials for the tree of happiness. After all, topiary can be coffee, floral, sea, or money.
For decoration most often used:
- dry flowers;
- flowers made of ribbons, fabric or paper;
- quilling style decorations;
- beads and seed beads;
- coffee beans;
- candies;
- coins;
- shells and pebbles;
- cereal grains;
- cones;
- artificial fruits and leaves.
