- 7217
- 02-09-2020
- Author: Mysekret Team
- 0
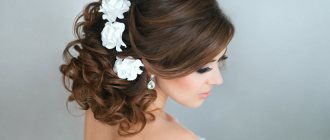
The wedding look should be thought out to the smallest detail in advance. Having decided to opt for a wedding hairstyle with loose hair, the bride needs to decide on such an important point: the presence or absence of a veil on her head.
Recently, many brides are abandoning the veil and giving preference to stylish wedding accessories , believing that such decoration has gone out of fashion. In fact, today the veil is in trend more than ever. Products made from tulle and organza are considered popular. But lace, silk and chiffon have really lost their relevance.
The most fashionable veil model is a long one made of tulle without additional decorative elements.
Despite the assurances of stylists that a veil goes harmoniously with loose hair, brides most often refuse this idea. There are several reasons:
- Firstly, it seems that the accessory does not hold well on loose hair;
- Secondly, many people think that loose hair does not go well with a veil;
- Thirdly, some brides are sure that the accessory must be attached together with the crown or tiara.
So, let's dispel all these myths...
Attaching a short veil to your hair
A short veil looks very flirty, bold, but at the same time elegant.
This is an excellent choice for very young brides - petite, fragile and slender. Such products are harmoniously combined with laconic straight-cut dresses, including short ones. Since a short veil is practically weightless, securing it in your hair will not be difficult. To do this, it is enough to use one or two pins, which must be used to pierce the fabric at the attachment point and fix them in the hairstyle. If you don’t want to make a torn hole in the veil, the pins can be sewn on unnoticed with white thread.
Retro-style veils, which are now fashionable, are secured with bobby pins or decorative pins decorated with flowers or feathers.
An original and unusual way to secure a short veil is with a hairpin or tiara. Sparkling jewelry looks very stylish on smooth dark hairstyles.
Choosing the right decoration
In order to choose the right comb, you first need to decide on the type and style of the veil, as well as the hairstyle and hair on which it will be attached.
For example, for short and not too thick hair, small, six-tooth combs with elegant decorations, rhinestones or pearls on the rim are best suited.
But owners of luxurious hair should choose a product with a large number of teeth, as well as a more massive one, so that it does not fly off the head of the hero of the occasion and ideally fulfills its function.
Conventionally, all combs can be divided into two types, depending on what effect is planned to be achieved: the most inconspicuous transparent ones, or, on the contrary, beautifully decorated and eye-catching.
The comb should not only match your outfit, manicure, or suit your hairstyle, but it should also be ideally compatible with the veil. If it is richly decorated with pearls, beads or lace, then you should choose a comb to match, as too pretentious will attract unnecessary attention and, in general, will spoil the impression of the outfit with its tackiness.
If you do not want to focus attention on this accessory, then you should think about choosing a transparent comb or one that matches the color of your hair and an inconspicuous configuration.
This decoration can be made from various materials, such as:
- metals, both precious and not so precious, sometimes the combs are woven directly from thick wire, and the ideal complement to them are precious or semi-precious stones in the edging;
- plastic is the simplest material, as well as cheap and easily replaceable;
- the wood can be different, dark or light, a combination of two species, smoothly polished, or with patterns burned on its surface;
- bone is quite an expensive material, but it is ideal for dresses in pastel shades, and also sits well on the hair of brunettes and brown-haired women, successfully contrasting with their color;
- stones like amber or malachite are a very good combination and look interesting on the bride’s hair;
- polymer clay with unusual details or enameled in various colors.
It is worth remembering that the material from which your comb is made must be of high quality, otherwise it will look ridiculous, or even break at the most inopportune moment, which will only add extra trouble to you.
Since colored veils have now become popular, the comb not only can, but should also match it, since it is necessary for these two elements to be combined with each other.
On top of that, there are also various decorations on the combs:
- pearls have been and remain the main detail of any wedding, they were used in the past and continue to be used to this day, because they are not only convenient, but also incredibly beautiful;
- rhinestones are an interesting and fairly cheap substitute for natural jewelry. They are often used to assemble various figures, in the form of bows, flowers and other details, which looks beautiful and elegant, especially if you don’t overdo it;
- flowers, both natural and artificial, look very romantic and tender, this is a soft detail that will add a touch of nature and freshness to your image;
- feathers are a very interesting detail, and also unusual, you can rarely find it in hair, but at the same time it looks simply incredible and attracts the eye.
As you can see, there are a lot of options for combs; all you have to do is choose the one that you like and that will fit perfectly into your wedding look.
How to Attach a Veil Using a Comb
For girls who have chosen a hairstyle with gathered hair, it is better to secure the veil with a comb. It not only holds the veil well, but also complements the bride's image. The size of the comb and the number of teeth on it depend on the thickness of the hair, the weight of the veil and the volume of the hairstyle.
There are several types of combs:
- Transparent. This type is suitable in cases where the veil is already decorated with rhinestones or embroidery. Therefore, too many small details may seem like bad form.
- Bright or plain. You can choose this accessory to match certain details of the image.
- Decorated with rhinestones or flowers. Such scallops create a solemn and incredibly beautiful image. Sometimes they are decorated with flowers.
Typically, a comb is used in cases where the veil is too heavy and it is impossible to attach it with pins. The comb with the veil is attached to the finished hairstyle.
Another popular accessory used to decorate hairstyles is a crown. If previously it was worn only by representatives of the royal family, now it is available to any girl. It should be remembered: the richer the crown looks, the simpler and more concise the hairstyle should be. Crown styles are suitable for long as well as medium hair, especially on loose hair.
Hairstyles with a veil are very popular among all brides. A wedding is an extraordinary event in the life of any girl. This day will be remembered for many years, and therefore everything must be perfect
The image of the bride is given the greatest attention, so it is thought through to the smallest detail.
The first thing you need to choose is a dress. The whole image depends on its cut, color and style. When the girl has decided on her outfit, she needs to choose a veil
Pay attention to the material, as it determines how the veil will lie. In salons you can see veils that repeat the pattern or lace from the dress
It’s worth taking a closer look, because everything will look more harmonious as a set.
A consultation with a hairdresser will help make the bride's decision in choosing a veil easier. It’s worth initially discussing all the girl’s wishes and the master’s capabilities, and then going shopping. Once the veil has been purchased, you can do a test installation.
The master will offer a fairly wide selection of hair styles for different hair lengths. Hairstyles with a veil always look gentle on their own. If the newlywed has medium hair, but wants to style her hair with long hair, then today this is not a problem. You can use false hairpieces. Fans of short haircuts should not despair either, because they look stylish and bright.
When to wear a red veil?
A red veil is an amazing wedding attribute, the history of which goes back to the deep past. Even in ancient Rome, beautiful girls, when getting married, covered their heads with flowing red cloth, leaving their faces open. In this case, the scarlet veil meant their submission to their spouse, unquestioning adherence to the rules of his house. Chinese brides wear a metal “crown” decorated with feathers, pom-poms and red silk fabric for the traditional ceremony.
This unusual headdress is considered an imitation of the empress’s crown; it is designed to protect the newlywed from evil forces and guarantee happiness in the future family. Red in China is the color of joy, celebration, and grandeur, which is why many Chinese girls fully dress in it during their wedding. A scarlet veil covers the heads of Indian girls - it is matched to match the wedding sari. Since ancient times, the color red has symbolized wealth, wealth, passion and love, so the bride can’t go wrong by choosing a wedding attribute in this color scheme.
For a wedding
When choosing a red veil for a wedding, you need to prepare for the surprised and sometimes incomprehensible glances of passers-by. Despite the gradual expansion of the scope of wedding fashion, not everyone is yet accustomed to the bold experiments of brides. The scarlet shade of a formal wedding accessory looks shocking, bright, and suits extravagant girls who know exactly what they want. As with a regular veil, the hero of the occasion should select it according to the style and style of the wedding dress,
Such a veil is not suitable for a church wedding, even if its style complies with the canons, but there is a way out of this situation. A red wedding attribute goes well with a snow-white dress: the bride can use a white scarf or other veil during the wedding, and then change into the red version of the accessory. Separately, you will need to think about your hairstyle: it should be strong so that the headdress can be easily removed and put back on, for example, you should use a comb.
A red headdress is perfect for a girl who has chosen a wedding dress of the same shade. The veil must be tried on together with a formal outfit, because even a slight discrepancy in tones will be noticeable. Scarlet, garnet, burgundy, wine, carmine colors - they all belong to the red range, but will not harmonize well with each other as details of a wedding look
For a celebration, some girls may prefer an original combination of red and black, but it is important not to overdo it so as not to make the outfit too gloomy
For a bachelorette party
At many bachelorette parties, the veil has become a popular accessory - it symbolizes the imminent marriage of one of the party participants. So that there is no doubt about who is getting married, the bride's headdress is different in color from the bridesmaids' attire, or the future wife is the only one wearing a veil. If a girl chose a classic white dress with a light veil for the celebration, this is where you can show originality - during the bachelorette party, wear a bright red accessory. On this day, bridesmaids can safely decorate their heads with white versions of the wedding attribute.
Attaching the veil-cap
An original and unusual solution for a celebration in the hair style of the 20-30s of the last century is a veil cap or “Juliet’s cap.” The retro look is suitable for romantic and dreamy brides, emphasizing their fragility and elegance. It is best to combine such an accessory with a long, closed dress and an American wave hairstyle.
Sometimes you can find a ready-made hat. But most often it is made on the basis of a long rectangular veil. The edge of the fabric is wrapped tightly around the head and secured at the back of the head, gathered into a knot or secured with decorative hairpins or elastic bands. Around your face, you should insert several bobby pins into your hair for security.
The easiest way to attach.
Of course, it is easiest to attach a wedding veil when it comes with a comb right away. There is nothing complicated here: just attach it to your head, approximately at ear level or slightly higher.
Many girls ask how best to attach a veil, and what to pay attention to in this matter? In fact, it all depends on the hairstyle. For example, if a girl chooses a very high hairstyle, it is not worth attaching this important accessory to her at the very peak, because it will not look very beautiful with any face shape.
If your hair is loose, it is best to attach it at ear level, as mentioned earlier. The most important thing is to look in the mirror and try to put a veil over your face. If everything fits as it should, then there’s no need to redo it.
It is much more difficult to solve the problem if the veil does not have a comb. Of course, you can take it to a workshop, where they will quickly solve the current problem by attaching this part. However, this is only additional waste and unnecessary loss of time.
In fact, you can attach the veil yourself using a few pins and bobby pins. Even a girl who has never been particularly involved in hairdressing can cope with this.
So, how to attach a veil, and what is needed for this?
First you need to do it on your head. Attach several bobby pins at ear level, about 6
Next, after the bobby pins are attached to the head, the girl needs to take the veil by its inner part and carefully present it to her head. After this, the veil must be straightened the way it will lie in the future.
If any irregularities or waves are visible on the veil, they should be eliminated immediately.
Using large pins, you need to attach the veil to your head. In total, for such an “operation” you need three large pins. How to attach a veil using these pins? In fact, everything is very simple. It is necessary to insert one pin directly, and the other two on the sides at an angle of 45 degrees. Ideally, this process should be done by the bridesmaid. The fact is that the girl herself can ruin her hair while she tries to insert hairpins. If it is damaged, then there will be many more problems, because it is necessary to completely redo the entire image.
After this, you need to bend the ends of the pins and carefully hook them under the invisible ones. This design is durable and reliable. In most cases, girls use it, because they can be confident in the beauty of their image on such an important day, and at the same time not limit their movements.
After the veil is attached, the girl must check the reliability of the created structure. To do this, you need to turn your head in one direction or the other. It is advisable to do this as sharply as possible. If the veil stays in place, then everything is done correctly, and the image will not be disturbed even with active movements.
How to attach a veil to your hair is one thing, but removing these hairpins is a completely different matter.
It must be removed carefully at the end of the celebration. Otherwise, you can not only pull out a few hairs, but also disrupt the structure of nearby growing hairs.
Usually, gags are difficult to remove.
Step-by-step process for attaching various pads to clamps
Attaching a set of strands
The photo shows how to attach hair with bobby pins.
So, these devices have been purchased, now you need to figure out how to properly attach your hair to hairpins?
There is a traditional instruction for this, consisting of the following steps:
- If wavy strands were chosen, then at the first stage the hair will also need to be curled. When you plan to attach straight hair extensions, you can simply straighten your curls with a hairdryer.
- Next, from the set of strands you will need to separate those that are wider. They are attached closer to the crown and at the back of the head. Those that are narrower will be located in the temporal region.
- Next, the head should be divided into sections. First, a horizontal parting marks out a place at ear level. To keep it open, the top head should be secured with a hairpin.
Wedding hairstyle made of strands with clips.
- After this, for better fixation of the overlays, the roots need to be lightly combed along the entire length of the parting.
- Then the widest strand with open clips is located along the parting line. After it is laid evenly, the combs on all existing hairpins should be hooked one by one from bottom to top onto the roots, while each element is snapped well.
- Next, when the first strand is fixed, the next parting is made at the top again so that the native curls cover the clips. The approximate distance between the pads should be 2-3 cm.
- All other occipital and temporal strands are attached in the same way.
- At the last stage, you should mix the artificial and your hair, lightly ruffling the hair with your own hands. After this, you can begin to shape any hairstyle.
Attaching bangs
This is what different bangs look like (oblique, straight and long with side strands) on clips.
Sometimes the hair loses thickness only in the front area, and locks of hair with clips in the form of bangs can help hide such a defect. Also, these extensions are convenient to use when you don’t want to cut your hair, and sometimes you really want to wear bangs.
In order for such devices to look most natural, you should know how to properly wear hair with clips in the form of bangs.
Although in fact there is nothing complicated about this, you still need to follow the steps in the following sequence:
The process of attaching oblique bangs.
- First, a parting is made in the front hairline, where the bangs should begin, so that later it can be covered with your upper strands. It can be either horizontal or oblique. This will depend on what kind of extension is used and what kind of bangs need to be shaped. In this case, excess curls are secured so that they do not interfere with the work area.
- Next, the overlay is placed strictly along the parting, and then the clips are attached in the manner described above. For better fixation, the roots can be sprayed with varnish.
- After this, the attachment points must be disguised with native strands, arranging the hair in the desired hairstyle.
Tail attachment
The photo shows a step-by-step process on how to secure your hair with ponytail clips.
How to attach hair with clips in the form of a ponytail?
For these purposes, you need to do the following:
- First, the curls are combed and then gathered into either a high or low ponytail.
- Next, the pad is placed on the tail so that the clamp (there may be several of them) is located strictly in the middle in its upper part.
- Next, the clamp catches and snaps into place.
- After this, you will need to wrap the ribbons around the base of the tail, and then tie them tightly. This is necessary so that the lining is beautifully distributed around its circumference and holds better.
- Afterwards, you need to take a strand from one of its sides and wrap it around the base again. This will allow you to hide the fasteners.
- After this, if desired, such a ponytail can be braided, and then you will get a chic braid.
Various hairstyles made from clip-in extensions.
https://youtube.com/watch?v=i9JKuN0uJjQ
How to beautifully sew a comb to a veil?
To do this, in addition to the comb itself and the wedding attribute, you need to prepare a satin ribbon of suitable width, thread and a needle.
Progress:
The product must be folded in such a way that the veil thrown over the face has the required length. This place should be stitched with an accordion. The length of such an accordion must match the width of the scallop.
- The tape must be pulled through the teeth of the comb and firmly attached close to its top.
- Now you need to sew the veil to the ribbon secured in this way.
Recommendations for choosing a comb
The width and number of teeth of such an accessory must be selected in accordance with the length of the wedding attribute, the weight and thickness of the hair and the volume of the hairstyle:
- transparent combs or those matching the shade of the hair are an excellent option for attaching a product richly decorated with embroidery, rhinestones or pearls;
- products decorated with flowers or rhinestones will help create a solemn and romantic image of the bride;
- monochromatic or bright ones will add an original zest to the image, but in this case you need to take into account that a single-color comb of a contrasting color should be harmoniously combined with other elements of the image.
Fashionable long veil 2022 - super current new items, photos
Long veils are considered the most traditional, since according to ancient wedding rites, the veil had to cover not only the head, but also the upper part of the body. A long wedding veil will be appropriate with almost any hairstyle, from long, chic curls to a stylish short haircut. The veil can have a multi-tiered design, when in addition to the overall length there are also shortened upper layers of fabric that cover the face (again paying tribute to traditions!). A long veil is usually attached to the back of the head, on the top of the head or under the hair; the most important thing is to ensure that the fastening is secure so that you can think about the celebration and not about your hairstyle!
A long wedding veil looks good with dresses with a narrow silhouette that flares out at the bottom. If a long veil is attached to the top of the head, then it is appropriate to complement the wedding hairstyle with a tiara or other jewelry in accordance with the overall style of the outfit. However, a veil attached under the hairstyle gives lightness, so it is not recommended to weigh down your head with decorative accessories. A long veil visually lengthens the silhouette, which allows you to correct figure flaws, but at the same time it is not suitable for short brides. It is worth considering whether a veil that is too long would be appropriate if it completely covers the beauty of the dress.
A few more ways to secure it.
Of course, the question of how to attach a veil to your hair can be solved in a variety of ways.
You can attach it using special combs. They are usually inexpensive, but they help you quickly and efficiently create a festive look. It is necessary to attach the combs under the hairstyle or on top of it, and then, using special hooks that already exist on the surface of the comb, attach the veil. You must immediately take into account that if the veil is attached to the top of the hairstyle, then, of course, it will completely cover it. Typically, long, two-tiered versions of a wedding veil are attached using this method. It is better to attach the short version from below so that the veil does not cover the entire hairstyle, but rather fully demonstrates it.
You can also always use additional elements. For example, you can attach a veil to a small hat using the same invisible pins. This option will look very interesting, elegant and stylish.
Here everything depends not only on the girl’s personal preferences, but also on her outfit, dress and hairstyle. If all this is taken into account, then the attached veil will only further decorate the image, giving it elegance and some innocence. The bride will definitely be the most beautiful of all.
If problems with the veil arise immediately before the celebration or ransom, then there is no need to worry. There are many ways to secure it, which will definitely help the bride cope with difficulties.
Secrets of fastening from professionals
A securely fastened veil will allow the bride to completely relax and get maximum pleasure from what is happening around her. Therefore, be careful when putting on the accessory and do not skimp on additional elements.
“Spanish flu”/“Mantilla” is good on both loose and pinned curls
Important nuances
When wondering how to attach a veil to loose hair, there are a few things you should consider.
- Firstly, the accessory must be attached very well. Rehearse all possible methods of fixation in advance, wear the veil at home for several hours. This will also help you figure out how to secure the piece so that it doesn't pull on your scalp.
- Secondly, do not use a lot of fixatives. They still won’t hold the veil, but loose curls can become unpleasant to the touch and look.
- Thirdly, decide whether you will wear the jewelry on your head all day long or whether you only need it for registration/wedding. The second case will require a less durable fastening.
These nuances need to be taken into account not only by girls with long hair, but also by those with haircuts.
A large wreath is suitable for original and romantic girls
Spectacular tandem
Loose hair and a veil look very organic and feminine. The bride in this image becomes like an unusually romantic young lady.
When considering options for attaching an accessory, listen to the advice of professionals.
- The best aids for discreetly attaching a veil are small crabs. A sewn-in simple comb (or several small ones) is also perfect.
- Be sure to comb the intended place of attachment at the roots. Moreover, it is better to do this from the inside: this way the hair “from the face” will look unburdened by styling products.
- Remember: the curls may not be completely loose. For example, several facial strands gathered at the back will greatly simplify the fixation of the accessory.
- To avoid hassle, choose light and stylish accessories. There will be no problems with fastening if you prefer a wedding veil-hat, a “pirate” veil, or a weightless train secured with a spectacular stripe in the “boho” style.
A few collected strands will make the task easier
Short hair is not a reason to refuse a veil
Not only loose strands can confuse the bride. Many beauties are concerned about the question of how to secure a veil on short hair. After all, just for one day, you don’t want to radically change your appearance with extensions or wait for your curls to grow on their own.
If you want to decorate your head with a spectacular accessory and be sure of its steadfastness throughout the holiday, proceed according to the following scheme:
- Create a “base” at the very top of your head. The best option is a small ponytail, secured with a transparent silicone rubber band.
- Comb the part of the hair in front of the ponytail a little - this volume will perfectly hide the place where the accessory is attached.
- Attach the veil using bobby pins/bobby pins, placing them around the ponytail.
- An excellent alternative option would be a comb, which will hold perfectly in the created comb. It is also suitable for very short hairstyles with a pre-created base of bobby pins.
A light headband is a great way to secure a veil on a short haircut.
As you can see, stylists have long figured out how to attach a veil to short hair quickly and easily. You can easily cope with this task yourself without much effort.
https://youtube.com/watch?v=yj4EvRUYr7w
Sew the comb to the veil
Photo by Catherine Hall from Flickr.com
It would be good if the bride was able to buy herself a veil with a comb already attached. But there are often cases when girls cannot choose a combined accessory, and they prefer a separate veil and a separate comb. Don't be discouraged, now we will tell you how to attach a veil to a comb. In addition to the comb, you also need to prepare a needle, thread, satin ribbon, as well as stock up on desire and free time.
Photo by alexabdra1818 from Flickr.com
We fold the veil so that the veil thrown over the face is the desired length. We sew the place with an accordion, the length of which should be equal to the width of the scallop.
- We pass a satin ribbon through the teeth of our comb and secure it well close to its top.
- Sew the veil to the attached satin ribbon.
Now you know how to sew a comb to a veil, and you can make your bridal look the most vivid and memorable.
But do not forget that not only the bride should be beautiful, but also the wedding glasses
How to attach a veil correctly?
If the bride uses the services of a hairdresser, then this, naturally, is not her concern. If a girl prefers to deal with her curls on her own, then a sales consultant at a wedding salon can tell you how to attach a veil to her hair.
Initially, this wedding accessory is equipped with a special comb. It is transparent and sewn to the fabric using fishing line, so it will not be noticeable in your hairstyle. The comb can be easily sewn off if the veil is secured with bobby pins. If the bride wants a full veil in her hair, then the comb will add volume due to the gathers at the base of the comb.
If the wedding accessory will come out of the hairstyle, then, of course, in this case it is appropriate to use only bobby pins.
There is one little trick for loose hair. It’s just that a veil with a comb or bobby pins won’t stay on loose hair. Therefore, in the place where the veil will be attached (usually the crown), it is necessary to braid a thin horizontal braid. You can easily hook both a comb and bobby pins onto it.
Who is it suitable for?
Almost everyone, with the exception of young ladies with very dry and damaged hair. In their case, first you need to bring your hair into proper shape - cut off split ends, take a course of moisturizing and nourishing masks, and do lamination. All of the above will not be superfluous even if the curls are in good condition, because at the wedding you will have to shine, constantly be under the gun of cameras and cameras, which means your appearance should be perfect. Important! Loose hair requires moderation. If your dress impresses with an exquisite finish, then it is better to stick to natural, slightly styled curls, but a simple A-line dress involves weaving, decorations, and ribbons. Loose hair looks good at any length , adding femininity and charm to both long-haired women and girls with very short hair. Free-lying hair has a number of advantages:
- men like it much more than complex tall cake structures;
- any problem with loose hair can be quickly and easily corrected with hairspray and bobby pins, which cannot be said about more complex variations;
- If you have the desire and skill, you can easily do this styling yourself, saving on the cost of a stylist;
- It takes little time to create a hairstyle on loose hair.
Types of veils
On the shelves of wedding clothing stores you can find many options for veils.
Depending on the length, four types of veils can be distinguished:
- short – up to 60 cm;
- standard – up to 80 cm;
- long – up to 110 cm;
- veil train – over 110 cm.
The accessory can have a round, oval, square and rectangular shape. Sometimes a veil consists of several layers of fabric cascaded relative to each other. Most often it is made from transparent tulle, tulle or organza, less often - from lace and silk.
The veil is decorated with embroidery, beads, ribbons and openwork inserts, but modern brides usually prefer simple models without decorations.
As a rule, not a single type of veil has a ready-made fastening, so it should be carefully thought out so that the veil is fixed securely and beautifully.
Veil for loose hair
Choosing a hairstyle is a responsible matter. The image of the bride depends on this choice. What should those girls who prefer loose hair do? How to attach the veil in this case? Don’t despair, because there are several rules for how to fix a veil on such a hairstyle. To do this you need:
- Wash your hair and style it.
- Use an antistatic agent to avoid electrifying your hair.
- Determine the location of the veil.
- At the chosen place you need to separate a small strand of hair and braid a thin braid along the entire head.
- Take the veil and insert several pins into it.
- Then we attach the veil to the braid using pins.
- After this, you can decorate with hairpins or other accessories.
Thanks to these actions, the bride does not have to worry about the veil falling off at the most inopportune moment. However, there are several nuances that need to be taken into account when attaching a veil to loose hair:
- You shouldn’t use too much hairspray, it can damage your hair and won’t hold the veil in place;
- Try to style your hair in advance and wear it at home to test its durability;
- Girls who choose this hairstyle should avoid multi-layered or heavy veils.
Choosing a style
A veil was once an obligatory attribute of a newlywed, giving the image a flair of purity, innocence, tenderness, and lightness. The airy fabric, enveloping the girl, further enhances sensuality, making the entire look complete. Therefore, if you want to shine on the most important day of your life, you should make your own veil.
But before we get to work, we need to decide on the tasks that face us. Do you need to make a veil for a wedding ceremony? Or do you need decorations for a bachelorette party? What is the style of the dress? These nuances determine the model of the veil, which will have to be taken into account when creating a pattern and choosing a sewing technology and finishing method.
Attaching the mantilla
Currently, the mantilla veil, which completely covers the head, is becoming increasingly popular. Long, lace-trimmed veils go well with retro-style dresses. The more decor on the mantilla, the more laconic the rest of the bride’s outfit should be. Richly decorated items should be secured with bobby pins around the face.
If the mantilla is a piece of transparent fabric without embroidery or lace, it can be secured by wearing a wreath of artificial or fresh flowers. If the veil is long, it is recommended to additionally secure it with a pair of bobby pins above the ears.
From a wedding story
In ancient times, a wedding veil was preceded by a crown, or wreath. This is a circle of flowers and herbs woven in an arc, which was placed on the bride’s head and symbolized the unity of the future family. Since on Ivan Kupala the girls wove wreaths, dipped them in the water and asked the betrothed to find her by the wreath.
Among the eastern peoples, the girl was completely clothed in a blanket and removed by the young husband after the wedding, or even after the wedding itself. It was believed that in this way the bride was protected from the evil eye, envy and evil intentions.
Among other peoples at different times, the wedding veil and its variations performed the same function: protection of the bride and her future family, protection of the sacred sacrament.
There are many traditions and superstitions regarding the bride’s wedding dress, but some of the most fundamental ones relate to the veil.
Main types of veils
Wedding fashion this season is represented by a large selection of hairstyles, as well as various types of veils. The most popular:
- Classic veil. This is an ordinary veil, decorated with a thin satin ribbon.
- Pirate. This veil is distinguished by the presence of a huge flower on the side.
- Juliet. This look was popular many years ago. And, as you know, fashion returns. A Juliet veil resembles a headdress decorated with rhinestones or lace.
- Mantilla. This is a long lace veil. It goes well with a gentle steal.
- Colored veil. Such a veil does not need additional decor; the only thing you have to match is shoes or a belt.
- Single tier veil. It looks like a solid canvas with patterns along the edges. Usually European-style hairstyles are done under such a veil.
- Multi-tiered veil. It was specially created for fluffy dresses.
The fixation of the veil depends on several factors, such as:
- Type of hairstyle;
- Hair length;
- Veil length.
Types of combs for a wedding veil
Depending on the volume of the hairstyle, the thickness and severity of the hero of the occasion’s hair, and the length of the veil, the number of teeth of the accessory and its width vary. For light-weight hairstyles that do not have much pomp, use combs with a small number of teeth - usually six are enough. If a girl has thick, long hair and her veil is heavy, it is necessary to use wide combs that will tightly secure the accessory. In case of unforeseen weather conditions, for example during strong winds, the fastening must be thoughtful and especially strong.
If the comb does not hold onto the hair well or its teeth are too short, stylists often additionally use hairpins or bobby pins to attach the accessory to the hairstyle in a criss-cross manner - this securely fixes the veil with the comb. In addition to functional differences, comb hairpins vary in appearance, which allows the bride to create an original look using a certain type of veil accessory. Below we will look at several of the most popular types of combs for attaching headgear.
Transparent or matching hair
If a girl has chosen a veil for her wedding look, generously decorated with lace, pearls, embroidery or rhinestones, the option with a rich scallop design is not suitable
Too many attention-grabbing details will look tasteless, so brides often prefer simple transparent combs or hairpins that match the color of their hair.
If the hero of the occasion chooses a comb to match her hair, it is important that the shades match perfectly, otherwise the fastening will stand out unfavorably against the background of the bride’s hairstyle and veil
Plain or bright
The future spouse has many options when choosing a comb for attaching the veil. If during a wedding celebration you want to stand out and add zest to the festive look, a girl can choose a comb to attach the veil in an original color or use colored hairpins. A single-color comb in a contrasting color, for example, blue, red or green, should go well with the rest of the image (jewelry, manicure)
It is important that the material from which it is made is of high quality, otherwise the hairpin will look ugly
A colored veil is becoming a popular trend: if the future wife has chosen this accessory, then a comb of the appropriate shade is not a whim, but a necessity. It will highlight the color of the headdress, the main thing is to choose the right tones. In addition, the beauty can choose bright scallops, for example, multi-colored or decorated with unusual details. Such combs can be decorated with feathers, decorated with flowers made of polymer clay, and decorated with colored enamel. See options for unusual combs for a veil in the photographs:
With decorations in the form of rhinestones and flowers
The scallops, which the manufacturers decorate with shining rhinestones, look gorgeous. These artificial stones look no worse than precious stones and help create a chic, formal look for the bride. Rhinestones can laconically decorate the top of the comb with a thin strip of neatly laid stones or be inlaid into the details of the comb (flowers, butterflies, fancy metal patterns). Some veil pins are made with a mini tiara: with such an accessory the hero of the occasion will resemble a real princess.
Flowers are especially popular as a decorative element, because they help emphasize the romantic, touching image of the bride. These can be small artificial flowers located along the edge of the comb or chic buds of decorative roses, orchids, etc. Live plants are also used when decorating the comb, but decorating the accessory with them is much more difficult: you first need to tape the stems and take care of reliable fastening.
Master class on sewing a veil on a comb with your own hands
It happens that it is difficult for a bride to find a veil that would look perfect, but there is a way out: a beautiful headdress can be easily made with your own hands. The following fabrics are usually used to make the accessory: tulle, mesh, tulle, organza. They all differ in cost and quality: for example, tulle is hard and dense, so a headdress with it will be more voluminous in shape, and a veil made from light, airy tulle will not be so voluminous. Making it yourself will cost the bride much less, and besides, the girl will be able to choose the most suitable decor for the dress.
The next master class will help the bride to make her own wedding headdress, which is attached to a comb. In order to make such an accessory, you need to use a rectangular pattern. A veil based on this geometric figure, as a rule, becomes romantic, fluffy and beautiful; look at the photos for the pattern with the finished result:
Necessary materials
- White tulle or mesh for a veil.
- A colorless comb or comb that matches your hair.
- White threads.
- Needle.
- Satin ribbon or lace for decoration.
- Scissors.
Stages of creation
- To create a veil, you first need to decide on its splendor. The wider the fabric, the more voluminous the accessory will be. Try different options, cut and get to work (the cut can be done with the help of a seamstress so as not to spoil the material). Clean your desk or other area where you will be working. Then fold the fabric in half twice.
- Now you need to round off the edges of the cut with scissors. To do this, fasten the layers of fabric so that the material does not fidget, mark a line along which you will need to cut off part of the future veil. If you are not confident that you can create neat rounded edges by eye, you need to use the following trick: lay a cardboard template on the layers of fabric. Use this tool to make a cut.
- Cut out the veil blank, check the drawing: you should get a similar cut.
- Next, fold the future veil in half again before proceeding with the final preparations - you will get a two-layer accessory. If you prefer a cascade option, the top edge should be about ten centimeters higher than the previous one. Check whether the length of the future headdress is suitable for you. If necessary, trim one of the edges to the required size of the veil.
- Start assembling the veil: first you need to decide how to do it. In the first case, the accessory can be partially assembled, in the second - completely. After partial assembly, the headdress will not be too fluffy; after complete assembly, it will be voluminous. The final choice depends on your personal preferences.
- Start stitching the fabric with a needle, collecting it, at the same time securing each new seam well so that the material does not come apart. The assembly should be about five centimeters wide. Try to use thick, double-folded threads to prevent them from breaking during sewing.
- Carefully sew the comb to the place where the veil is assembled.
- The wedding veil is almost ready, all that remains is to decorate it slightly, if desired. To do this, take a satin ribbon and sew it to the bottom edges using a sewing machine. Leave a small distance from the end before decorating (about a centimeter or two) so that the fabric does not diverge. Once the satin ribbon is sewn on, cut off any excess fabric. The wedding accessory is ready!
Hairstyle with braid and veil
Wedding hairstyles with a long veil and braid 2022 are romantic solutions for brides of any age and body type:
Weaving can be very diverse, let's look at the simplest styling that can be done at home:
- Apply clay or styling powder to dry hair - the hair should not appear stuck together.
- Start weaving from the center of the forehead - separate three small strands and weave a reverse spikelet, placing the side strands under the central one.
- Gradually move along the crown to the crown, picking up loose strands and attaching them to the braid.
- From the top of your head, start moving the braid to the side so that the braid comes out from behind your ear and forward over your shoulder.
- Continue braiding when all the hair is already in the braid.
- Secure the braid at the bottom with an elastic band and decorate with a flower.
- Gently pull out the side loops of the entire braid so that the braid becomes airy and voluminous.
- Beads can be placed at the intersections of the strands.
- The veil is attached with pins or clips under the crown in the place where the weaving begins to go to the side.
The photo shows wedding hairstyles with loose hair and a veil based on straight strands; they look most impressive with straight, even bangs:
Simply straighten the strands with an iron and attach a veil to the top of your head
For this style, the condition of the hair, especially the ends, is very important.
Trim the ends a few days before the event, make a nourishing mask, and when styling, you can use setting powder.
Summary
Choosing a method for attaching a veil is an important point in preparing for a wedding. Especially if your hairstyle is short or you want to let your curls fall freely.
The video in this article will help you better understand the nuances of fixing a formal accessory.
Did you like the article? Subscribe to our Yandex.Zen channel
Text \ Photo Ekaterina Posted 03/24/2015
0
To favorites
To print
If you want to thank, add clarification or objection to the author - add a comment!
Currently being discussed:
- Lyubov Burkina
20.08.2018What hair color should I choose? Please give me some advice. I don't know which one I have...
- I
19.08.2018I had eyelash extensions for 6 months and took a break. After 3 months I increased it again...
- Vasilisa
18.08.2018Cool hairstyle
- Marina
18.08.2018Hi, can I dye my bleached hair (currently red) bright purple...
- Daria
16.08.2018Hello! I am a dark girl with black eyes. I want to dye my hair dark...
- Loredana
15.08.2018The photo shows young beauties. Can older ladies have their eyebrows done? Age...
Comments »
Hairstyles with a veil for medium hair
All universal styling is done on medium hair. This length allows you to make all the wildest desires of the bride come true.
So, now wedding dresses in the Greek style are very popular; they require appropriate styling of the hair, namely, low-gathered hair in a bun. This hairstyle can additionally be decorated with thin braids. In this case, the veil should be hooked at the very bottom from under the styling.
A French braid decorated with a veil will look very beautiful and unusual. In addition, the bride can braid such a braid herself if she wishes; she just needs to practice the day before.
Ornate high styling will look harmonious with any veil
You just have to pay attention to some nuances. If the bride wants to focus on the veil itself, then a simple bun will look best
The veil will give it solemnity. A tiara would also look good in such an ensemble.
Summarizing
So, a veil is an integral attribute of a wedding dress. It symbolizes the purity and beauty of the bride. Hairstyles with a veil look truly noble and make the bride’s image complete and thoughtful.
Regardless of who does the bride’s hair (the master or herself), the veil will in any case decorate the image. Moreover, attaching it is not difficult and any girl can do it. The main thing is that everything is beautifully selected and makes the bride happy on this special day.
Source: 100strizhek.ru
The secret to securely attaching a veil with hairpins
To ensure that the veil stays in your hair, there is one trick:
– At the place where the veil is attached to the head, you need to pull a little hair into a ponytail - hairpins will be threaded into its base.
– Take the required number of hairpins and prepare them: bend one “leg” on each hairpin in half.
– Attach the veil: use a long “leg” to either pierce the veil itself, or thread it through a special loop for fastening and insert a pin into the base of the ponytail. Now the veil will be almost impossible to remove, because... a bent “leg” will prevent the pin from moving in the opposite direction.
– Before removing the veil, you will need to undo the ponytail and straighten the pins in your hair, only then take them out.
Short haircut with bangs and tiara
A short haircut, as usual, is not very variable - it does not give as much room for imagination as long curls.
That is why all kinds of accessories, decorations and additions are so helpful for owners of short haircuts.
If length allows, curl your hair using a curling iron or roller.
Graceful curls will be an excellent base for a crown or tiara.
It is the lush curls that look elegant and harmonize best with accessories like a tiara.
Short hair can be curled using wooden bobbins, then you will get incredible volume.
A tiara will help tame curls, but if the accessory is difficult to fix, pin the parietal strands with bobby pins back or on the sides.
It’s easier to attach the main decoration to this base.
Hairstyles for short hair with a tiara and bangs are very simple step by step: separate the bangs, form a hairstyle from the main body of hair, secure the tiara, and then arrange the bangs to your taste:
If the tiara runs strictly along the border of the bangs and the main body of the hair, the styling looks most harmonious.
If you have a pixie haircut with long bangs from the very top of your head, you can use a tiara to press the bangs to your forehead, thereby fixing them and enhancing the hairstyle as a whole.
On one side
The asymmetrical wave, resting on one shoulder, gives the look a daring yet elegant look. This hairstyle is perfect for both a classic corset and a mermaid tail dress. If you have wide shoulders, but at the same time you want an open-top outfit, then combed hair to the side will be a real salvation and will make the image more harmonious and make your shoulders narrower.
Idea! The cascade styling looks elegant and fresh, in which the upper strands are curled and pinned at the back of the head to increase volume, and the lower ones fall in a loose wave over one shoulder.
The hair itself can be straight - in this case, you need to take care of smoothness and mirror shine, or curled. In the second option, it is permissible to weave some accessory into the curls - thread, beads or small flowers. You can secure the wave lying on your shoulder either with invisible hairpins and varnish, or with an elegant comb.
Combination with various hairstyles
A beautiful and elegant veil will go perfectly with any type of hair. These can be buns, high braids, spikelets. The remarkable thing about such hairstyles is that you can easily hide any fastening in them.
Fastening on loose hair
Hairstyles with voluminous curls sometimes baffle many girls. The comb can easily slip down, and the invisible ones can even jump off and get lost. It's hard to imagine, but in reality everything is much simpler than it seems.
- First, style your hair the way you want. If they become electrified and “stick,” coat them with an antistatic agent. It is sold at any hardware or cosmetics store.
- Decide on the mounting location. Most often it is attached to the very top of the head.
- Separate a few strands from the crown and braid the length of your hair.
- If the veil was sold without a comb, you should take several pins (at least six pieces) and secure them at the assembly point.
- After attaching it to your hair, add jewelry if necessary. These can be beautiful stilettos or beads that will add luxury to the look.
You can sew the veil to the tiara and headband and not worry about it falling off while dancing. It is also worth attaching bobby pins and hairpins to them for greater reliability, but hiding everything with decorations.
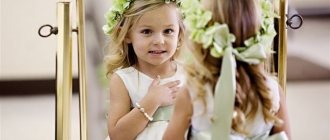
Popular headbands with flowers are often used. They look beautiful and separate from wedding dresses, but a veil flying behind the shoulders suits them perfectly.
Decorations with fresh flowers have been popular in the distant past. Almost every girl could afford something like this. Everything depended only on her material well-being: some used bright roses, while others had enough cute and delicate wildflowers.
The fashion for hats has also reached modern times from the distant past. Only ladies did not take off their hats in enclosed spaces, because it was their accessory, and not a headdress.
This type of decoration is suitable for informal dresses or dresses in retro style. The mesh is attached to the cap using invisible Velcro.
Options are possible!
If you absolutely don’t like the idea of a veil for various reasons, then there are many other wedding decorations that can easily replace it.
Some of them can be used even if the bride has short hair, on which it will be quite difficult to fit the veil so that it does not fall off the newlywed’s head at the most unexpected moment.
Hats and bonnets
They can be either wide-brimmed or tiny, purely symbolic.
The option with a hat is best suited for a themed wedding (for example, in retro style), for a beach ceremony or for a second wedding - in this case, many brides and their relatives consider a veil not very appropriate, especially if the bride is no longer 20 years old.
Hairpins with ribbons and rhinestones
Wedding hair jewelry has become very popular in recent years, mainly due to the fashion for minimalism.
Lush headdresses have now become a sign of bad taste, so more and more brides are choosing elegant and sparkling hairpins - it looks great, and it’s difficult to overdo it with hair decoration.
By the way, you can easily find similar handmade accessories on the Internet if you want something unique, created in a single copy, to adorn your head.
Bridal scarf
It will definitely come in handy during a wedding, but even if the newlyweds are not planning a ceremony in a church, some models of such scarves will look great in the registry office, at a regular wedding.
In essence, the bride's scarf is the same veil, but in a slightly more original design. Lace, volume and delicate transparency are welcome!
Flowers
Another example of luxurious wedding minimalism. It would seem that a flower hairpin or a floral wreath are quite simple accessories, but in a bride's hairstyle they can look absolutely amazing!
This decoration is best suited for a young bride, whose purity and impeccability is itself associated with a delicate flower. This accessory is also useful for a themed wedding - in boho, country style, etc.
Or you can weave flowers into a complex braid, and then do without a veil or other hair decorations, because such a hairstyle in itself looks like a work of art.
Bandage
After the release of the film “The Great Gatsby,” there was a wave of weddings decorated “based on” the film, using elements of fashion from the beginning of the last century.
And although the movie has already become a little forgotten, the headbands and ribbons on the brides’ heads still adorn themselves. And it’s not surprising, because this is a very original solution, and also incredibly beautiful.
Tiaras and tiaras
Almost every woman in childhood dreamed of turning into a princess, at least for a short time.
A wedding is the most suitable day to make this dream come true. Moreover, it is difficult to “spoil” a wedding tiara with chic and brilliance - even a very luxurious one, it will look appropriate at this celebration.
The only condition is that the tiara or diadem must be combined with the bride’s dress so that the image is complete and harmonious.
Let's hope that after reading this article you have no doubts about whether a veil is needed for a wedding, and you have your own ideas on how to replace this traditional, beautiful, but slightly banal bride's accessory.
By the way, if you don’t want to completely give up the veil, then you can put it on directly at the very moment of marriage registration (the ceremony at the registry office), and then carefully remove it - and have fun until you drop at the most important holiday in the life of any bride. Such a reasonable compromise will help to simultaneously comply with all the traditions, and at the same time not feel constrained under a long transparent canopy, which tends to get caught on something or get dirty
Such a reasonable compromise will help to simultaneously comply with all the traditions, and at the same time not feel constrained under a long transparent canopy, which tends to get caught on something or get dirty.