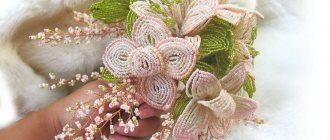
The bride's wedding look is completed with jewelry. And they should be in harmony with the dress and all accessories. It can be difficult to find suitable ones on sale, especially if the dress is something special or made by yourself. In this case, you can make a wedding beaded necklace yourself. Beads are perfect for a wedding dress and will complete any look.
What is required for production
To start working with beads, you need to properly prepare your workplace, remove all unnecessary things and organize good lighting.
Materials needed to make a necklace or choker:
- beads of the desired size and color;
- beads (may be needed to complete a specific design or additional decor);
- thin fishing line or nylon thread;
- needle;
- scissors;
- lobster clasp
The size of the beads is indicated by numbers from 6 to 15 mm. The larger the number, the smaller the beads, since this number indicates how many beads fit in 1 inch. Don't forget about the shape of the material. It largely determines the final result.
Beads can be Chinese, Japanese and Czech. The last two options are more expensive, but of high quality, so it is better to use them for making jewelry. Beads made in China may differ in size, shade, color, and are more susceptible to fading. Their shape is not always perfectly round and the surface is smooth. These beads are best used for training and honing the skills of different weaving techniques.
How to do it yourself
Hand made always remains in trend. Creating something with your own hands is always an exciting and addictive process, especially if you have a sufficient amount of free time at your disposal. Perhaps the biggest advantage of a handmade product is that the master himself determines what the decoration should be.
Let's look at examples of several basic beading techniques for necklaces and necklaces, patterns that, having mastered them, can easily make any image unique and memorable.
A simple necklace weaving pattern for beginners
The simplest scheme is “rings”. This technique is an excellent exercise for those who are just learning the art of beading.
Here is a step-by-step diagram that clearly demonstrates that even a novice needlewoman can handle this technique.
Description of work:
- 8 beads are strung on a thread, after which it is folded into a ring and re-passed through beads 1-6.
- Then 6 more beads are put on and the previous algorithm from point 1 is repeated.
- The product is woven to the required length.
Scythe
To make a braid necklace, you just need to put beads on long pieces of fishing line, and then intertwine the resulting threads together.
A necklace made of strands using the braid technique looks very stylish.
Assembly
The embroidered necklace is cut out without touching the threads.
The outline is traced onto cardboard or felt and a blank is cut out smaller than the decoration itself. Everything is glued together.
Let the glue dry. Then the reverse side of the product is cut out of leather or suede. The blank should be slightly larger than the necklace.
The layers are glued together and waited for complete drying. On the reverse side, a thread is inserted between the leather and the cardboard.
They put a bead on it, pierce the skin, and then pass through the beads again. These steps are repeated until the entire edge is filled with a row of beads.
Sew a lock or ribbon along the edges. The necklace is ready.
Necklace-harness
A strand of beads is a fairly versatile accessory that can highlight an image; the main thing is to skillfully and tastefully choose a pattern and color scheme.
When weaving strand necklaces, you can bring your wildest ideas to life!
The easiest way to make a beaded rope for beginners is to weave a beaded fabric, roll it into a tube and sew the edges. However, you can do without stitching if you know a few secrets of weaving a single piece. Let's look at them using the example of a regular mosaic strand.
You need to start weaving it with an odd number of beads: the fewer there are, the more accurate the decoration will be. It is necessary to weave with the same line tension so that the product is dense and at the same time remains plastic.
The operating algorithm is as follows:
- We string an odd number of beads onto the fishing line, for example, 7 pieces. We make a ring out of them by threading the fishing line through the first bead. At the base we leave a free end of the fishing line (about 15 cm) to secure the harness.
- We weave the 2nd row according to the mosaic principle: we string the beads and pass the fishing line through the 1st, 3rd, 5th and 7th beads of the first row.
- We weave the 3rd row by analogy with the 2nd, connecting it with the beads of the second row, but skipping each bead.
- Using this technique, we weave a tourniquet of the required length.
- Attach the clasp.
Wedding necklace
The choice of a wedding necklace depends primarily on the image of the future bride and the style of the dress. In terms of colors, the most suitable beads and beads are white, artificial pearls, beige, pearlescent muted tones. The beauty of a deep neckline will be emphasized with an elegant V-shaped necklace.
An openwork airy round necklace will help complete the bride’s delicate look.
Let's take a step-by-step look at how to make a wedding necklace with your own hands.
For work you will need the following materials:
- beads (6 mm);
- beads No. 15;
- beads No. 11;
- transparent thin fishing line.
We do the weaving as follows:
- We string 16 beads No. 11 onto a monofilament thread and close them with a ring.
- Next, add 1 more of the same bead and 1 bead, thread the fishing line back into the bead and through the 2 closest beads. We continue weaving in this way around the entire circumference of the ring.
- We braid the beads with small beads No. 15.
- We use the same beads to make a finishing row and get a beautiful flower.
- We weave several of these flowers and collect them into a beautiful necklace.
Wedding decoration can be made even according to the simplest pattern of rings, weaving mother-of-pearl beads into them and decorating them with rock crystal pendants.
If the wedding dress itself is already embroidered with a large number of beads, beads, and also richly decorated with other elements, you should not choose too ornate patterns for weaving a necklace. The image will be too pretentious. In this case, you should adhere to minimalism in decorations.
You can also make 3-5 threads of different lengths by stringing white beads onto each of them, and then tie them together, aligned from the shortest (top) to the longest (bottom). Thin elegant threads can be decorated by attaching a beaded flower or a beautiful stone bordered with a beaded openwork frame to the side.
An airy necklace will look unusual and very beautiful, in which beads and beads of different sizes are appropriately combined.
For those who already have experience in weaving using various techniques, you can come up with a necklace pattern yourself. This will definitely guarantee that the product will be exclusive.
Who is it suitable for?
Any decoration emphasizes a woman’s character, mood and style. Creating wedding necklaces from beads and seed beads is easy. You can easily do them yourself. The decoration looks airy and goes perfectly with the wedding look.
The most common beaded necklace for a wedding is a string of beads with airy crocheted loops that add volume to the decoration. Another option is to use beads and beads in the form of clear diamonds. But a straight dress would be more suitable for this type of decoration.
Ogalala necklace
Ogalala is one of the most popular beading techniques today. It received this name from the Indian tribe of the same name, whose representatives invented this type of jewelry. This tribe lives to this day on the Dakota State Reservation, and its members continue to practice beading.
An ogalala style necklace looks airy, graceful and very feminine. Depending on the chosen color scheme, jewelry made using this technique can emphasize the ease of light summer outfits, as well as complement a casual business look.
Externally, the product somewhat resembles openwork coral scallops or sea waves. The technique of working with beads is based on a regular mesh. A distinctive feature of the finished product is its wavy shape, twisted into a spiral. To achieve this result, you need to weave the mesh in length, increasing the number of beads in each subsequent row.
Necklace in red colors
The blue waves of the “ogalala” under Gzhel will remind you of a summer vacation at the sea.
White lace looks very delicate
A black necklace made using the ogalala technique will highlight the luxury of an evening outfit.
Master class on weaving necklaces using the ogalala technique
The necklace consists of 6 rows: 5 main ones and the last one, which serves to fix the resulting waves. The correct length of the first row depends on the size of the product. For example, if the finished product should be 45 cm long, then the first row must be woven 60 cm long (15 cm will be spent on a wave-like shape).
What you will need:
- beads size 10-11 (it is best to take 2-3 shades of the same color, or several colors that combine with each other);
- beads 6-8 mm (about 50 pieces);
- fishing line 0.3 mm;
- clasp;
- thin needle;
- scissors.
To make jewelry look neat, it is best to use small Japanese beads to make it. It is of the highest quality, and its shades are rich and saturated.
Before starting weaving, it is recommended to carefully disassemble the pattern and practice performing the basic elements.
Sequencing:
- 1st row: fix the first bead on the fishing line, then put on the required number of beads to the required length;
- 2nd row: count two beads of the 1st row and stretch the needle through the 3rd bead, then string three beads (so until the end of the row);
- 3rd row: stretch the needle through 2 beads of the 2nd row, then string five beads and thread the needle through the central bead of the turn of the 2nd row (so until the end of the row);
- 4th row: thread the needle into 3 beads of the 3rd row, then string seven beads and pass the fishing line through the central bead of the turn of the 3rd row (so until the end of the row);
- 5th row: frame the product with beads of a different color, for which we pull the needle through 2 beads of the 4th row, then string three beads and thread the needle through the bead from which the fishing line comes out, and through two more (so until the end of the row);
- 6th row: fix the product along the 1st row, for which we stretch the fishing line through the first bead, collect symmetrically the nth number of beads - bead - nth number of beads, thread the needle into the 16th bead of the 1st row and return first through a broach (so until the end of the lace pattern);
- We secure the clasp on the necklace with knots.
Watch the video for a master class on weaving a necklace using the ogalala technique.
Progress
Transfer the sketch of the necklace onto felt or non-woven fabric, or a piece of leather.
For the largest rhinestone, cut out a smaller hole and glue it in the center. It is necessary so that the felt does not wrinkle, but is even.
Begin stitching the rhinestone with beads forward to the needle. Place two beads on a thread and thread them through a needle at a distance equal to a pair of beads. Bring the needle from the inside out to the face, retreating the distance of a couple of beads. They collect beads again and insert the needle into the outermost bead of the row. The row must have an even number of beads, otherwise the embroidery will not work.
For the second row, remove the needle from any bead and pick up one bead. In this way the entire second row is braided. In the third row, dark golden beads are introduced. They cover the entire third row with it.
For openwork braiding of rhinestones, remove the needle from a golden-colored bead and pick up five of the same color. The needle is removed from the next golden bead.
The braiding is completed by bringing the needle to a point at the top in the form of a golden bead. Collect a couple of green beads and insert the needle to the next point from above.
Start embroidering according to the sketch. Place a needle under the rhinestone in the center and pick up one rondelle bead and a golden seed bead. The rondel is fixed by pulling a thread with a bead through it.
The rondel bead is trimmed in the same way as the rhinestone.
Bicones are placed on the sides of the beads and trimmed. The bottom of the bead is decorated with green beads.
Leaves are embroidered along the outline. Then they are filled with alternating green and golden beads.
Cut out small holes for the remaining rhinestones and glue them according to the design. The glued elements are trimmed with green beads. The number of beads should be even. The second row is trimmed with green beads through one bead. The third row is decorated with golden beads.
The top leaves are made according to the previous principle. Then the side leaves are filled with beads. It is necessary to ensure the evenness of the drawing. To do this, it is better to use a ruler.
Fill the gaps between the leaves with bicones. They are trimmed with two rows of beads.
The borders of the uppermost leaves are trimmed and filled with beads.
Beaded beads
For the decoration to acquire its own zest, it is enough to complement it with airy beads. They can be used as a decorative element for any product (to decorate a bracelet or make a pendant for a necklace).
The next master class will be devoted to the technique of weaving volumetric beads. Let's look at it using the example of the Blackberry beaded necklace.
What you will need:
- pearl beads 3 mm blackberry shade;
- large pearl beads;
- thin fishing line;
- needle;
- scissors;
- clasp.
When weaving, it is important to tighten the line well each time so that the product keeps its shape.
Main stages of work:
- We string 5 beads onto a fishing line, tie them into a ring with a knot, which we hide inside the beads.
- We string 4 more pieces onto the monofilament thread and thread the needle from bottom to top through the first (closest) bead of the first ring.
- We bring the fishing line into the second bead of the first ring.
- We collect 3 beads, thread them through the last bead of the second ring and through the bead from which the fishing line comes out.
- We pass the needle through the nearest bead of the first ring and repeat the technique described in point No. 4 twice.
- We again thread the needle through the nearest bead of the first ring, as well as through the nearest bead of the second.
- We collect 2 more beads and pierce with a needle 3 things standing in the same row. Along the edges you get paired beads.
- We pierce one of the nearest paired beads from top to bottom and collect 3 more, after which we pierce the second bead from the top pair and the one with which we started this point.
- We thread the fishing line through the next two beads standing along the edge.
- We string 2 beads, pass through the nearest bead of the ring we just made and through the next 2 beads located along the edge.
- We repeat points No. 9 and 10 twice.
- We thread the next 3 beads in a row in a row, string 1 bead and pass the fishing line through the fourth and first beads of the ring.
- We bring the needle up and thread the fishing line through all the beads standing on the edge, tightening them into a ring.
- We complete the composition by combining freshly woven airy beads with large pearl ones.
- Install the clasp on the necklace.
After completing the weaving of the air bead, you need to re-secure all loosely stitched elements with fishing line.
Watch a master class on making a Blackberry necklace. It turns out very stylish. Together with the right outfit, it is quite suitable for both a summer cocktail party and an important business meeting.
The perfect bridal look for an accessory
To ensure that your outfit matches your jewelry, you need to choose it carefully.
- If your dress has open shoulders or a neckline, make an openwork airy necklace.
- If the neckline is V-shaped, the bride's beaded necklace should be the same shape.
- The dress should have the same elements as the necklace to create a unified look.
Thus, everything should complement each other: earrings, bracelets, handbag, shoes. But don't overdo it. The main thing should be the dress, and everything else just complements it.
When choosing shoes for your outfit, you need to think about the fact that you will be on your feet all day. Therefore, shoes should be comfortable, but matching the color of the dress.
Attention! Shoes should not look like a separate element, otherwise you will look ridiculous.
Necklace "Wave"
Another interesting beading method is wavy. Necklaces and bracelets made in this style look very unusual. A delicate pink necklace is suitable for sophisticated ladies.
A simple wave of large beads.
Necklace "Wave" on one side.
Let's take a closer look at the stages of weaving a beaded necklace with your own hands using “Wave” patterns on both sides.
To work you will need:
- beads (B) size 10;
- bugles © 12 mm;
- beads 8 mm;
- nylon thread or fishing line;
- clasp;
- thin needle;
- scissors.
To make the beads glide better, the thread can be pre-lubricated with wax.
Manufacturing instructions:
- We dial 1 B, 1 C, 5 B.
- We pass the thread back into the 2nd B from C and tighten everything.
- We dial 1 B, 1 C, 1 B, go through the lower B and through the C standing in front, we go up with a thread.
- We dial 5 B, repeat points No. 2 and 3.
- We pass the thread through two Bs, which are located between the 2nd and 3rd C and through C itself and come out with the thread down.
- When the thread comes out from the bottom, cast on 1 B, 1 C, 5 B.
- We repeat point number 2.
- We collect 1 B, go down through the adjacent C and 1 B, then through the last C we bring the thread up.
- When the thread comes out from the top (between the two tips), repeat steps No. 4 and 5.
- We carry out the work using the weaving technique described above, depending on whether the thread is located at the top or bottom.
- We continue weaving until we get a fan with 9 small tips.
- Then we dial 1 B, 1 C, 1 B and go through all the Bs that are located below.
- We collect 1 bead and again go through all the lower Bs several times. We get a small fan.
- We dial 1 B to go to the production of the next wave.
- We weave the next fan in such a way that its tips are on the opposite side (so until the end of the necklace).
- We fasten the clasp to the thread.
Tips for brides
Properly selected jewelry will highlight your refined taste. The main thing is that it matches your image. If the necklace is voluminous, then the dress should be more modest, and the decoration should follow the neckline of the dress.
Accessories in light or silver shades will go well with a white dress. Gold jewelry will go well with cream-colored clothing. If the dress is of different shades, it is better to choose jewelry with precious stones.
If you want to impress, make a wedding beaded necklace, a master class for which we offered. It guarantees impressive results.

