Buy
Home Tutorial Video from wedding photos
A wedding is always a reason for joy. It is not surprising that every guest wants to give the newlyweds a special gift, one that will be remembered for a long time and emphasize the significance of the event. If you don’t want to be limited to an envelope with money and dream of surprising a loved one on the day when he decided to connect his life with his soul mate, give him a touching slide show. In the article you will find several universal tips and effective techniques that will help you easily create a similar video from wedding photos in PhotoSHOW PRO.
Subject for a photo film: how to tell a story
The most important thing in creating greeting videos is developing the concept. By deciding which idea to start with, you will make your future work easier. Below are described perhaps the 3 most popular and winning ways to tell a beautiful love story.
★ Slideshow – biography
The concept is based on a simple idea: two complete strangers found and fell in love with each other. Typically, such videos have a linear plot and are based on the biography of the bride and groom. You can talk about important events in the lives of both, pick up fun facts and incidents, ending the story with a moment of acquaintance. To implement the idea, you will need childhood and teenage photographs of the couple.
★ Parable about love
The second interesting decision is to shift the perspective and focus not on the personalities of the newlyweds, but on the development of the romantic story. To do this, you can take as a basis a well-known love story from a film, book, fairy tale, or use a beautiful parable. If you wish, you can make up a story yourself. There are two ways to implement your idea in a slide show - add text to photos or record voice-over comments.
★ Slideshow – wish
This idea involves putting together a slideshow of kind words and wishes that you would like to convey to the newlyweds on their wedding day. A great option is to contact other guests in advance and insert video or photo greetings into the video.
These ideas are universal; they will work perfectly for creating a video from photographs for a silver wedding, preparing congratulations for an anniversary, as well as for creating an original wedding portfolio for agencies and photographers.
The advantage of producing wedding videos with us is not only prices
The main advantages of the studio are a creative and experienced team that works on creating wedding videos. We don't create standard clips and don't churn out tired ideas. Each client can count on an individual approach and a creative solution to the task at hand.
Modern studio equipment and the high qualifications of all specialists, without exception, allow us to guarantee the highest quality of results: from screenwriters to sound engineers.
Examples of wedding congratulations are presented above. You can appreciate how fully we take into account the wishes of customers, and what different and unusual video clips we produce.
Impressive tricks that everyone can repeat
Of course, the visual component of the video is as important as the content. I want the slideshow to look decent and surprise with its unusual design and colorful photographs. The capabilities of PhotoSHOW PRO more than satisfy this requirement! Multi-layer editing, collage and effect templates, 3D animation and all kinds of decorations - these and other editor tools will allow you to create a unique video that will reflect your style and vision.
The program will allow you to create amazing videos from photos at a professional level
Even if this is your first time working in PhotoSHOW PRO, you will not get confused in the settings. Everything is as logical and convenient as possible. You can create a video in literally 5 minutes using the template. The program catalog includes a selection of ready-made videos with romantic wedding decorations - all you have to do is replace the gaps with your photos and add text.
Using wedding templates, you will get a spectacular video in just a couple of minutes
If you decide to create a project from scratch, you can manually configure all the effects and animations. The result will be exceptional! You will understand the principles of operation in a few minutes. The two tricks described below will definitely be the highlight of any video. Any beginner can repeat them - follow the tips below and receive enthusiastic compliments from every viewer.
No. 1. Smooth sliding within the frame
☛ Adding and editing photos
To replicate the first slide from the video at the beginning of the article, you will need pictures of women/men. You can find a ready-made collage online or create one by hand. Try choosing photos of actresses/actors or models - this will create a kind of humorous effect.
Create a blank slide by right-clicking on the timeline and selecting the appropriate command.
Create a blank slide on the timeline
In the editor, change the slide duration to 18 seconds and upload the photos.
If, as in the example, you want the portraits to be the same size, use the “Crop”
.
Drag the selection over the desired area of the photo
Place pictures close to each other. If you wish, you can leave the photos in color, however, a black and white filter will help make the composition more harmonious due to monochrome. To apply an effect to a photo, in the “Layer”
Click the
"Photo Filters"
.
After that, all you have to do is check the box next to the line “Black and white photo”
and apply the result.
Apply a black and white filter to all or several photos for a more harmonious look
☛ Highlight overlay
You can add a bright and stylish accent to a two-color slide using animated lighting. To do this, click “Add Layer”
and select the option
“Highlights and textures”
.
Select a highlight from the collection and apply it on top of the collage
In the window that appears, find a suitable effect and place it on the slide. To customize the movement, go to the “Animation”
.
Add a keyframe near the end of the timeline and use the arrows in the Position
to move the highlight to the opposite side of the slide.
Customize the flare animation to your liking
☛ Camera control
Click on the button with the image of a video camera, which is located on the top panel of the editor.
Click on this button and you will be taken to the slide camera control window
You will be taken to the slide camera control window. All animation in this mode will be applied to all layers at once. Let's set up the camera movement so that portrait shots follow each other, like film frames.
— On the first key frame, zoom the camera 100%.
- Use the arrows to move the viewpoint to the top left corner.
— If you wish, you can add a 3D rotation of 10-15 degrees.
- After 2-3 seconds, place the 2nd key frame.
— Reduce the zoom level to 70-80%.
— Move the camera to the right. Make sure that the frame contains only photographs, the background should not be visible.
- After another 2-3 seconds, add frame No. 3.
— Reduce the camera zoom to 50-60%.
— Move the viewpoint to the very bottom of the slide.
— Add a 4th key frame.
— Reposition the camera so that it is at the opposite end of the slide.
- Remove the 3D rotation effect.
After a second, place the final keyframe and return the camera zoom level to 0.
All is ready! You can return to the layer management mode (see screenshot) and continue experimenting with the slide - add a logo to the slideshow, text, shapes or clipart to your liking.
Click on this button and you will return to normal layer management mode
No. 2. Transparent text
To customize the animation with transparent letters, like in the video, you will need stencils. You can try to make them yourself or download them from the official PhotoSHOW PRO VKontakte group.
Select an image that will become the background and customize its animation. Let it move smoothly on the slide and increase in scale. The photo should be bright and contrasting so that the letters are clearly visible.
Adjust the path of the background image
Place the stencil layer on top and stretch it across the entire slide.
Place the stencil on the background image
If you wish, you can add animation with lighting to the composition, as described in the previous technique, or clipart and other decorations.
As you can see, in order to please your loved ones with a touching video greeting, you do not need any special skills. Enough and you will have access to unlimited creativity. Give sincere, meaningful gifts, and PhotoSHOW PRO will help you with this!
Share with friends:
YOU WILL LOVE THIS:
Slideshow for husband's birthday
Slideshow for mom's anniversary
DIY video birthday cards
How to make beautiful transitions
Start creating your unique slideshows now!
Buy at a discount Works great on Windows 10, 8, 7, Vista, XP
More about the program
Versions of PhotoSHOW PRO Examples of bright slide shows
Help and support
Educational articles and videos Collection of design templates Help Center
Decoration of tables for guests at a Marsala wedding 2022 photo
The use of this color does not imply lightness and frivolity. This is more of a choice for a serious, expensive event. Heavy fabrics and burgundy-colored ribbons are suitable as decorations. With their help you can decorate an arch, a podium for newlyweds, or decorate tables in a banquet hall. Balloons will be inappropriate at a wedding. Soft, fresh flowers can bring tenderness and romance into an event. Antique items will serve well as decor. These can be lanterns, flower pots and elegant vases. Wooden chairs can be placed in the banquet hall and ceremony area for guests. To decorate a photo zone, you can use an old fireplace and lightly patinated candelabra. Since Marsala is one of the shades of wine, it is appropriate to place bottles of this alcoholic drink on the tables as decoration. You can also place lit candles here. The consistency of the event will be emphasized by crystal glasses, gilded cutlery and snow-white dishes.
Wedding accessories for a wedding in white and blue
Following the basic color concept will help you achieve subtle beauty in detail. Design invitation cards and place cards in a white and blue combination. For printed text, use blue or silver foil, designer paper, decorative ribbons made of white satin and blue organza. In addition, paper wedding accessories can be decorated to match porcelain painting.
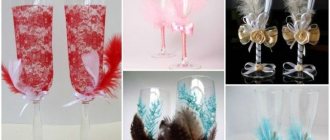
Work hard on decorating wedding glasses and bottles. One bottle can be decorated in white with blue decor, and the second in blue with white decor.
Make a cushion for the rings from blue satin and white lace. Various decorative decorations will help support the white and blue theme of the holiday: butterflies, ribbons, flowers.
You can’t do without a white and blue color scheme when decorating a wedding procession. Order dark blue cars and decorate them with white balloons and butterflies.
Design of invitations in white tones
White wedding decorations do not mean that you need to style your invitations in a minimalist spirit. To create a festive ambience, you can use ribbons of suitable shades, printed patterns or golden designs with contour paints. There are no restrictions on the style of invitations, so you can make them at your own discretion. You can also add several background shades to the white color, chosen to match the main theme. It is worth making sure that the dress code and theme of the wedding are indicated on the invitations. By taking this measure, the newlyweds will protect themselves from embarrassment with the style of the invited guests. To reduce the risk of misunderstandings, you can provide guests with details in the chosen color: gloves, headbands or other little things that are pleasing to the eye.
