Decoration of the hood of the newlyweds' car
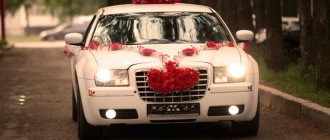
The hood of the newlyweds' car is usually covered with organza or tulle and/or decorated with various flowers and bows. This article provides information on how to make a composition in the form of two hearts.
Required material:
- three large cardboard sheets;
- pen or pencil;
- roulette;
- scissors;
- two skeins of satin ribbon 5 centimeters wide of one color and one more of a different shade;
- thread and needle;
- glue gun;
- matches or lighter;
- two rolls of tape.
- You need to cut out two large hearts from cardboard, as shown in the photo below:
2. Their thickness should be 8 centimeters. Using the first template, we cut out two more shapes from hearts. All three combinations of cardboard must be placed on top of each other and rewound with tape and a satin ribbon on top of it. Moreover, each turn of the latter must be secured with glue so that the edges do not diverge and the cardboard is not visible.
3. Such a composition must also be secured with tape. This will require four pieces of two meters each. Their edges must be scorched with matches or a lighter.
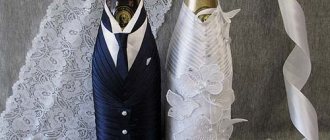
KNOWLEDGE BASE: Decoupage of a champagne bottle for a wedding
4. From ribbons of two colors you need to make so many roses or bows so that they cover the entire surface of the hearts. It is expected that small and large will differ in color.
5. It’s not difficult to make flowers to decorate the composition. To do this, you need to take a meter-long piece of tape and also scorch the edges with fire. Insert a thread into the needle that matches the color of the ribbon.
6. Place a running stitch along one long edge of the satin, and then pull both ends of the thread. The ribbon transforms into a rose. The thread must be tied, but not cut off. It will serve as an attachment to the hearts. Also, each flower for insurance must be planted on glue.
7. The decoration is ready, all that remains is to attach it to the hood.
Master class on making 2 wedding hearts from flowers for a wedding car
When you have enough funds, or weather conditions do not allow you to use a paper option for decorating wedding cars, you can create hearts from artificial flowers. They look more impressive, especially if you pick up large buds.
- foam sheet 5–7 cm thick;
- construction knife;
- marker;
- satin ribbon;
- glue gun and rods;
- plastic clamp, 4–5 pcs.;
- tailor's pins, 20–30 pcs.;
- large white buds of artificial flowers, 10–12 cm in diameter;
- large blue buds;
- a strong piece of fabric or tape (for securing to the machine);
- plastic stems for artificial flowers;
- polyethylene foam backing, 5–10 mm wide.
First of all, hearts are drawn on a sheet of foam plastic with a marker, which can be either contoured or monolithic.
How to decorate a car for a wedding with ribbons with your own hands?
A master class on wedding car decoration will help everyone who wants to do it themselves, guided by their own taste, the general theme of the wedding, and its color scheme.
Photo of ribbon for a car for a DIY wedding
How many meters of tape do you need for a wedding car? In order to calculate the footage that is needed, the length of the car hood should be multiplied by 1.5-2, depending on the mounting method. Then one end of the tape is folded in half, and an elastic band is sewn to it. When you put the ribbon on the hood, the elastic is tucked inside and the other end of the ribbon is folded under and sewn to the other end of the elastic. As a result, everyone sees only the feed. Everything is very simple.
You can decorate your car like this:
- Take a tape twice the length of the hood, 3-5 cm wide.
- Pull it through the radiator grille so that the metal bar of the grille is in the middle of the strip.
- Stretch it on different sides of the hood so that the letter V is formed, and secure it with tape or an elastic band under the hood or tie it to any part inside the hood.
- Then make your own small bows or flowers from satin or tulle. Their number will depend on your imagination: they will be located on the ribbon either tightly or at a distance of 10-15 cm. Between the flowers, if desired, you can tie long white or pink ribbons - the same tone as the flowers. While driving, they will fly freely in different directions.
- You can make a large bow out of white organza by attaching it to the radiator grill so that its ends hang down almost to the level of the wheels.
Today, newlyweds are offered a wide variety of wedding decorative elements and attributes, many of which are made carelessly and inaccurately, but their prices are “off the charts.”
Many people recklessly buy them, without even thinking that all these accessories for the celebration can be created with their own hands.
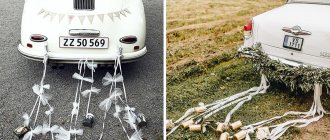
Long ribbons of various colors are the most popular detail for decorating wedding cars. To laconicly decorate a car, simply attach several beautiful ribbons to its hood.
Long ribbons of various colors for a wedding car
Still, it’s better to make your own ribbons more original and unusual. For example, fix them not parallel to each other, but arrange them so that they have the shape of a rhombus, square, or triangle. And to make the decoration from them even more unusual, it is decorated with flowers or bows. To make the picture look organic, flowers are attached to ribbons in advance, so that the finished decoration can then be attached to the car.
To sew a ribbon on a wedding car, you will need very little:
- hard tulle;
- satin ribbons (wide white and thin green);
- artificial flowers;
- spools of white and green threads,
- scissors;
- needle.
To create such a ribbon for a wedding car, you need to buy garlands of artificial flowers and some of the same roses. This decor has a V-shape, with the length of each strip being 1.7 m. First, four strips of tulle are measured (length 3.5 m, width 20 cm). The stripes are sewn one by one in the center, making folds. Each fold is ironed. The two strips are sewn together. The result is a ribbon 3.4 meters long with folds. Then a wide satin ribbon 3.8 m long is placed centrally along the folded ribbon and stitched three times: along the edges and in the center. To make it more convenient to attach the tapes to the hood, leave 20 cm of tape at the edges. The strip is folded in half, a corner is formed and stitched.
Photo of ribbon sewn onto a wedding car
Two 40 cm long ribbons are sewn onto the corner of the resulting sketch - they will then be tied to the car grille.
They start making decorations. Fold a green ribbon 3.4 m long in half. The garland with roses is divided into an even number of particles. They are strung on a green ribbon and sewn to tulle. The same thing is repeated with the second garland - with daisies. It is divided into equal particles and, sewn to tulle, they fill the intervals between the roses in the first garland.
When sewing flowers, they are raised so that the inflorescences cover the gaps. If desired, the decorations are decorated with roses, which will close the gaps between the flowers sewn to the tulle.
In this form, the tape is already ready for use. For greater effect, a ready-made flower arrangement, which was purchased along with the garlands, is added to the center. Having straightened all the flowers, they are sewn onto the corner of the V-shaped ribbon with flowers.
Decorating wedding cars with tulle
Lightweight fabric - tulle - looks great both as an addition to other decor and as an independent element. Flowers and skirts for toys, such as wedding dolls, are made from it. Lush bows and satin ribbons of different colors will be a luxurious and fun addition to the tulle.
You can use live or - even better - artificial flowers. Lush pompoms are made from tulle to decorate cars. The big plus is that this fabric does not require large expenditures; it can be used a lot in combination with floral arrangements.
What you need for decoration
- Chiffon in pastel shades or thin white tulle - 2-2.5 meters.
- Branches with artificial flowers - white, blue and red.
- 3 meters of linen elastic (preferably white).
- Blue and red satin ribbons.
- Scissors and glue gun.
Decoration options for car handles
Accessories on the handles can be a complement to the main composition of car decorations or act as an independent bright accent.
Various door design options are possible.
Bows and boutonnieres
These can be simply bows in the classical sense, or complemented with appliqués, beads and other accessories. Mini copies of a large bow decorated on the hood or trunk will look impressive on the handles. If you decorate the bow with flowers, you will get a boutonniere for the car handles.
Ribbons
Ribbons blowing in the wind, selected in accordance with the main wedding style, can also be an excellent decoration. Everything ingenious is simple! Ribbons, like bows, can be interestingly decorated or even turned into garlands.
This decoration is a combination of a bow and long ribbons coming from it.
Balloons
Balloons are an eternal element in decorating anything, however, they are very boring and not very practical. Balls can burst in the cold and from any unexpected mechanical impact. To make a truly beautiful ensemble for a wedding car out of balloons, you need a highly professional approach.
Pompoms
Pom-poms are a great alternative to balloons; they are just as bright and voluminous, but they don’t burst or fly away! They can be made from paper, thread or fabric. Paper pom poms are the cheapest option, however, you need to be careful with them as they will not survive the rain.
Flower arrangements
Flowers are perhaps one of the most beautiful and trendy options for decorating a car. On door handles there can be either single, but bright and lush flowers, or whole bouquets. Artificial flowers are often used. Floral masterpieces made from fresh flowers are worthy of the highest praise, but they are short-lived and may not survive until the end of the wedding events; they need to be replaced by something more universal.
Pendants from various themed items
You can hang beautiful pendants in the form of hearts, doves or any other wedding symbols on the doors.
Of the variety of jewelry options, most are not particularly difficult to make with your own hands, so all that remains is to make your choice and watch a suitable master class.
Two-color and gift item
Using ribbons of two different colors you can create an elegant and stylish decoration. This technology is suitable even for beginners. This product can be used to decorate a stylish elegant dress and a beautifully styled hairstyle. It is necessary to prepare a wide and thin piece of tape, each 15 cm long.
Step-by-step instructions for creating DIY ribbon bows:
- First you need to measure the tape of the required size.
- Place one on top of the other and roll it into a ring.
- It is necessary to connect the product blank with glue, and then iron it.
- Tie a narrow ribbon in the center of the bow to cover where the ends meet. You should get a knot.
- The ends need to be cut and glued.
- If you decorate the gift box with a handmade bow, it will look much better. Depending on the situation, it can be made lush and voluminous or modest but elegant.
This option is very simple and easy to make if you follow the instructions:
You need to take a tape up to 2 meters long. It should be wound around the open palm of your left hand, and then carefully removed. The end must remain free. On one side of the workpiece you need to cut off both corners, approximately 5 millimeters. To ensure that the tape does not unravel when cut, it must be carefully burned. The same procedure must be done on the second side. Next, the workpiece must be aligned so that the cut parts are connected in the center. The ribbons should be tied with the free end. After this, each petal is straightened to give shape and volume.
In order to make such a bow, you need to have 6 pieces of ribbon 5 cm wide and 12 cm long, as well as 6 blanks 3 cm wide and 11 cm long. Each one will need to be burned carefully around the edges so as not to unravel. Additional materials will be a piece of feta, small beads and thin elegant braid.
How to make a beautiful bow from a ribbon step by step:
- First, take the wider pieces and fold them in half.
- After this, sequentially assemble onto one thread, pull together well and secure.
- Repeat the same manipulations for narrow segments.
- Cut a circle of feta, the diameter of which should be approximately 4 centimeters, and then glue a large blank to it.
- Take a thin braid, the length of which should be 12 centimeters. You need 6 such pieces. Fold each into a ring.
- Place it on the petals and glue them on the front side.
- Fix the product on top with a narrow variation.
- Pour a small amount of glue onto a piece of fabric with a diameter of 1 centimeter.
- Place the beads tightly in a circle and cut out.
- Place the decor in the center and secure with glue.
Using a fork you can make a small decoration for a card. The process should include the following steps:
- You need to take a fork in your left hand.
- Loop a small ribbon over it so that the edges are on the right.
- Next you need to throw the far end behind the fork over the lower front end.
- To do this, it needs to be brought out between the teeth in the center and brought out from behind.
- The other end must be inserted into the same hole, only from above.
- After this, you need to turn the fork over and tie both ends with two knots.
- Remove the resulting decoration from the fork and trim the ends. To prevent them from blooming, they need to be carefully scorched.
How to make a wedding heart from roses for a car with your own hands - instructions
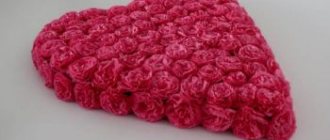
When newlyweds have a desire to make a wedding heart for a car, but there is no opportunity to spend a large amount of money on it, then they can make it themselves. The easiest way to decorate a wedding car with your own hands is a heart made of paper napkins. This material easily takes the desired shape and can be found in the most incredible colors. You can even create a colorful symbol of lovers.
Materials for creation:
- thick cardboard, it is advisable to choose packaging cardboard, 4–6 mm thick;
- scissors;
- a breadboard knife (can be replaced with a construction knife, but you will have to be careful about the accuracy of the cuts);
- a circle, slightly smaller than a quarter of a folded napkin;
- glue gun and rods for it;
- a simple pencil or pen;
- stapler;
- double sided tape.
The first step in creating a car decoration is to decide what size it will be. After this, a heart is drawn on the cardboard and cut out using a dummy knife. If you use a construction tool, the edges will be rougher and more uneven.
This must be taken into account in advance and the workpiece must be made 3–5 mm larger than required.
When using a non-specialized device, you need to ensure the accuracy of the cut.
The second stage will be cutting out a straight strip, which is 1-2 cm larger than the perimeter of the heart. The width of such a workpiece should be 50–60 mm. This segment will allow you to make a convex heart.
After the cardboard is cut, a straight line is drawn along its entire length. You must ensure that the mark is exactly in the center of the part. When the line is ready, it is gently pressed with scissors or the back of a kitchen knife, which is done to make bending the cardboard easier.
The strip must be bent along its entire length. After this, apply it to the heart, where it begins to move away from its perimeter, you need to make an incision. For greater accuracy, mark the bend with a pencil, after which it is cut. They do the same until the circuit is closed. The steeper the curves, the more often you will have to cut the cardboard, but it is important to maintain a 1-1.5 cm gap.
On the top curves of the heart it can be difficult to get the cut ends to fit properly, so you can make small triangular cuts to help the cardstock fold better.
After the strip is ready, double-sided tape is glued to the base along its edges. To do this, you will need several segments, the number of which depends on how round the sides of the heart are. After this, they begin to glue the sidewall, freeing one piece of tape from the protective tape. It is better to do the work from a sharp edge, then you can be sure that no mistake has occurred and one side will not be longer than the other.
Once the base is ready, you can start creating flowers. To do this, take 2-3 folded napkins, apply a circle to them and carefully outline it. You can do this immediately over the entire surface of the paper.
When the mugs are ready, you need to connect the napkins together. To do this, take a stapler and fasten the paper with 2 crossed paper clips. Then they do the same in other circles. The finished circles are cut along the contour using scissors, and then each piece of paper is folded towards the center, giving them light wavy edges.
When all the roses are ready, you need to take a glue gun and apply a small amount of the substance to the underside of the bud. It must be immediately applied to the designated area so that the glue does not have time to cool. This is done until the inside of the heart is completely filled.
The last stage of creating a decoration for the car is to paste the side walls. This must be done so that the cardboard base is not visible. This decoration is well suited for spring and summer holidays, but it is not recommended for use in late autumn and winter.
The paper does not tolerate high humidity or precipitation at all and will gradually become soggy, turning the decor into a colored mush.
How to make and attach bows to the handles of a wedding car
Decoration of the wedding cortege cars should be done in the same style. If the main decorative element is a large bow, then the handles and mirrors also need to be decorated with bows. These parts will have a significantly smaller size, but their manufacture will require a material whose color and texture exactly matches the main decoration of the car.
Making a small bow to decorate a car handle is not difficult:
Fixation must be thorough and of high quality. Otherwise, the product will quickly lose its attractiveness and become unusable. Fabric bows also serve as an excellent decoration for the handles and mirrors of the cars that make up the wedding procession. To make such a bow, you need to cut out a rectangular piece of organza, tulle, or mesh. The sides of such a rectangle will be equal to 70 cm and 25 cm. Mark the middle and, folding it like an accordion, fasten it with a nylon thread.
Wedding boutonnieres on a car door are one of the most popular decorations. Rosettes made from several lush bows are most often used as the basis for such decoration.
To make them you will need tulle or floral mesh. The squares cut from the specified material have different sizes. The side of the largest is 25 cm, and the smallest is 5 cm.
The prepared bows are placed one on top of the other, creating a rosette. A flower or a beautiful bud is placed in the middle, tied with a decorative ribbon intended for arranging bouquets. You can secure the flower with thin wire, thread or narrow satin braid, the ends of which will be pulled to the wrong side and tied directly to the handle of the car.
You can put all the ribbons together and tie them with one bow, but many, when decorating motorcade cars for a wedding, prefer to make each small bow separately, so that later they can create various compositions from finished products.
To decorate bows made from wide satin ribbons, there is no need to knit complex bulky knots. The middle of each selected ribbon is stitched with silk or nylon thread and pulled together with an accordion to create uniform folds.
Now you can form the petals of the bow and fasten them in the middle with a stapler. The loose ends will serve as decoration, and a thin, strong thread can be used as fastening. When decorating a car for a wedding using such bows, modern newlyweds prefer to decorate the core of each individual bow with additional elements.
This video will teach you how to make a bow for a wedding car yourself:
What is the best way to make a bow from organza or tulle, which will serve as decoration for the hood of a wedding car? How to quickly and easily make a unique decoration? What fabrics should I use? An experienced expert or decorator can answer these questions. However, most young people prefer to decorate the cars of the wedding procession on their own, showing their imagination and emphasizing their individuality.
Source
Decoration of car handles in a wedding procession
Doors are usually decorated with boutonnieres , but you can decorate the handles with bows or ribbons. Bows can be made by analogy with large bows, only using a piece of fabric of the appropriate size.
Photos of decorations for the wedding procession
If the wedding is planned in the warm season, then you can use fresh flowers in the decor. But you need to keep in mind that such decorations are short-lived. Therefore, artificial flowers are also quite suitable for decoration.
A video on how to make a decoration for a car for a wedding with your own hands can be viewed at the link:
Basic ideas for decorating car handles
Idea 1. Decoration with ribbons.
Ribbon jewelry - what could be simpler? Ribbons can be used both nylon and satin. The width of the tape can also be different. To create a fluffy bow you need a wide ribbon. A narrow ribbon is used as a main or additional decorative element if it is necessary to emphasize a certain color. The color of the ribbon is chosen to contrast with the color of the car being decorated. So, light ribbons look good on a dark car and vice versa.
Idea 2. Bow made of fabric (tulle, chiffon, satin, etc.).
Such bows look beautiful and magnificent on the car handles. Cut the fabric long enough (usually 40-80 cm), crumple it in the middle and tie it around the handle, make 2 knots and then tie a bow. Thick fabric should be placed under transparent fabrics, i.e. chiffon under tulle, etc.
By the way:
if you take 2 or more pieces of fabric, you get a more magnificent bow. You can combine tulle with chiffon or satin. A multi-colored bow is made from a combination of pieces of fabric of different colors.
Idea 3. Balloons.
You could say this is a classic car decoration. The most budget-friendly and simplest option, but the balloons quickly deflate, burst and come off when the car is driving, which is also the main disadvantage of this decoration. It is better to tie the balls to a ribbon; if you tie them to a thread, it may break itself or damage the ball. If there are several balls, then the best option is to weave them with tails, and tie them to the handle with a ribbon at the “main” knot, make several turns of the ribbon and a knot on the tail itself and then knit to the handle.
Advice:
inflate the balloons only halfway, or better yet a third, this will increase their “survivability.”
It is important to know: silicone glue will help glue the structure or make a flower arrangement, but it will not give it strength. Without proper reinforcement of the structure, flowers are likely to fall off when the car is moving.
By the way:
You should not make large butterflies, as they will not hold their shape and will look like a bow.
Idea 7. Rattan decoration.
Rattan jewelry is gaining popularity. They look quite unusual, striking the imagination with the thin rounded shapes of decorative rattan. Decorating the car handles with rattan is permissible only if the car is fully decorated with rattan decorations. They are attached to the hood, roof, and trunk using suction cups in the form of free-standing “flower beds” woven with rattan branches. The handles are made in the same style as the rest of the car's decor.
(An article is being prepared on this topic and will be published in the near future.)
Idea 8. Floristry.
In the art of decorating a car with floristry, there are many techniques and materials. However, the creation of designer jewelry is resorted to only at themed weddings or luxury weddings, when it is necessary to surprise and amaze everyone with luxury. The materials can be different, here are just a few of them: painted flowers (from paper, fabric and other materials), wickerwork, herbarium, tree branches (for example, spruce paw), beads, rhinestones, pearls and much more.
By the way, pens
cars
need to
at all
if: a)
the hood or roof of the car is decorated with large compositions;
b)
car windows are decorated;
c)
the side mirrors are decorated with a massive design.
