An elegant wedding bouquet is part of any bride's look. He accentuates her outfit and participates in the ritual that all unmarried girlfriends look forward to - the bouquet toss. A well-known belief says that whoever catches the bride’s bouquet will soon get married.
However, not everyone agrees to part with their bouquet, which, according to another belief, brings happiness to the newlyweds’ home. To resolve this contradiction, a second wedding bouquet was invented - a duplicate. It is often made from artificial materials. A popular bridal bouquet with peonies made of corrugated paper.
Everlasting beauty with your own hands - a bridal bouquet with peonies made of corrugated paper
An elegant wedding bouquet is part of any bride's look. He accentuates her outfit and participates in the ritual that all unmarried girlfriends look forward to - the bouquet toss. A well-known belief says that whoever catches the bride’s bouquet will soon get married.
However, not everyone agrees to part with their bouquet, which, according to another belief, brings happiness to the newlyweds’ home. To resolve this contradiction, a second wedding bouquet was invented - a duplicate. It is often made from artificial materials. A popular bridal bouquet with peonies made of corrugated paper.
Photo
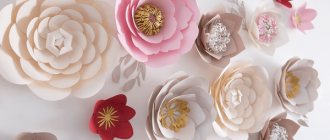
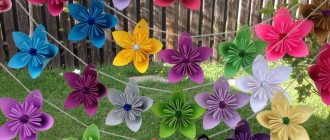
Corrugated paper allows you to create a wide variety of shapes. They look very cute and trendy, ideal for a themed or colorful celebration. Examples of bouquets in the photo below:
Artificial flowers
who knows how to handle scissors and glue can create a bridal bouquet with peonies made of corrugated paper
It looks very elegant and is inexpensive. Does not require any special materials or skills. It can be safely used both as a main bouquet and as a backup.
A wedding bouquet of paper flowers will look great in winter, when fresh flowers become much more expensive and weather conditions do not allow for a street photo shoot or walk with them. In addition, artificial flowers do not cause allergies and are stored for a long time.
Of the minuses, it can be noted that when stored for a long time in open space, the bouquet becomes covered with dust and fades.
Interesting! Consider other options for artificial compositions. For example, bouquets made of beads or foamiran look beautiful.
Useful video: master class on how to make it yourself
Peony is one of the most popular flowers among brides; it is used more often than many others in wedding compositions. Therefore, we will take peonies as the basis for our corrugated paper bouquet.
To make a bride's bouquet out of paper with your own hands, we will need:
- corrugated paper;
- scissors;
- a little imagination.
The flower can be monochromatic or contain several shades. You also need green paper for foliage, glue, scissors, pieces of thick cardboard and strong thread.
Important! To create a non-uniformly tinted peony, select paper tones with minimal variation in the palette so that the color smoothly transitions from one to another.
For the peony flower we need a cardboard base. To do this, cut out a circle with a diameter of 4-5 cm (the size can be changed depending on the size of the flower). The manufacturing instructions are quite simple.
- Take the paper and cut a long strip from it. The width of the strip should correspond to the height of the flower and will also be approximately 5 cm. We fold the strip several times and begin to cut it in height, without cutting all the way through. We make cuts at intervals of approximately 1 cm. You should end up with a strip with cuts that look like a tear-off ad.
- We process the square edges of our “ad”. We cut with scissors on both sides, giving them a pointed, rounded shape.
- Unfold the tape. It turned out to be a long paper fence. Gently twist each clove with your fingers to create slightly uneven spines.
- When all the spines are twisted, we fold the ribbon with the teeth several times and tie it tightly with thread. Can be rolled into a roll. You should end up with a kind of shaggy bunch of paper needles.
- For peony we need 3-4 pieces. such blanks. Do not pay attention to the fact that now the workpiece is an incomprehensible piece of paper. After finishing the work you will get a decent flower.
- We cut the paper into identical long, narrow rectangles, 1.5-2 cm wide and 6-7 cm long. Using scissors, we give them the shape of a petal. We sharpen the top and bottom, and slightly round the sides. We twist the top and bottom of the petals with our fingers so that they become sharp. We extend the center of the petal to the sides so that the petal becomes more rounded and slightly concave. We will need approximately 12-15 pieces of such blanks.
- Cut the next rectangles wider, about twice as wide. Just like last time, use scissors to give it the desired shape. We twist the bottom into a point with our fingers, and stretch the top into a wide concave petal. We will need approximately twice as many of these petals as the first.
- It is difficult to achieve even petals of such a width by hand, so it will be more convenient to stretch the paper on a ball of a suitable size. Handicraft stores sell foam blanks of different diameters; they do not slip, are easy to use and inexpensive.
- Cut out long and narrow leaves from green paper. We stretch it slightly with our fingers and run our nails along the sheet to the outer sides, imitating the veins.
- We take a piece of cardboard and start from the top, gluing narrow petals in a circle. After the first circle is glued, let the workpiece dry a little, and glue the bunches that we made first into the center. We glue it tightly so that the cardboard bottom is not visible. Afterwards, we begin to paste over the outside of the cardboard blank with the remaining narrow petals, in a checkerboard pattern.
- At the end, the largest petals are also glued in a circle.
- The last to be glued are the green leaves, which will slightly peek out from under the flower.
Peony is ready. It can be decorated with rhinestones, or the edges can be tinted with a spray paint. The number of flowers for the bouquet will depend on the size of the inflorescence itself and the size of the porta bouquet.
Magic Atlas
Satin ribbons are ideal for creating wonderful flowers. Even a novice needlewoman can make a wedding bouquet with her own hands. Advantages of the material:
- shiny surface with a silk tint, many shades;
- durable, with machined edges, different widths;
- suitable for satin robe;
- repels dust, does not contain allergens;
- lasts for a long time and will not lose its original shape.
Before starting work, carefully consider the color combination that will advantageously emphasize the beauty of the outfit. The bouquet is allowed both in the tone of the outfit, and in a contrasting, bright one.
If the wedding dress is abundantly equipped with beads, sequins, and other decorative elements, the bouquet is made with a minimum amount of decorations. A modest outfit, in which the emphasis is placed on the quality of the material, is suitable for a catchy option, strewn with beautiful shiny elements.
A rounded composition suits a bride of Balzac age. For a young newlywed - any shape. To make a bride’s bouquet from ribbons with your own hands, you need certain tools and materials:
- porta bouquet holder (plastic base, resembles a ball with a handle, bought in a specialized store or made independently);
- small glue gun for fabrics;
- ribbons of the required colors, their length and width depend on the size of the future flowers;
- stapler, pins, threads in satin color;
- wire, toothpicks for connecting the handle and the top part, if the frame is assembled independently.
Decorated with rhinestones and beads. Lace and organza will come in handy. Themed bouquets are decorated with small toys, figurines of birds and animals.
Basis of composition
The skeleton of the motley doubler is a foam ball attached to a handle. The bouquet is made in the shape of a hemisphere or round. For the first case, you will need a circle with a hole in the middle, onto which the upper part of the structure is fixed. If it is not possible to purchase the necessary component in a retail chain, make a frame for the bride’s bouquet from ribbons or satin with your own hands:
- The handle is made from a cardboard tube from baking foil with a diameter of 2.5-3 cm. The length is optional, but not less than 10 cm.
- Form a dense ball with a diameter of no more than 15 cm from newspapers. Coat it with glue and wrap it with twine. It turns out to be a compact ball.
- Thread a wire through the top of the handle, lift the ends, and push the round piece in until it stops. Toothpicks are suitable for this action; they are inserted into the cut of the tube. Wrap a wide tape around the frame starting from the bottom of the tube, and secure the edge of the tape.
Useful video: performing roses
Rose is an equally popular flower used in a wide variety of compositions. It occupies a special place of honor in a wedding bouquet. There are several options for making a wedding bouquet out of paper. One of them is in the video below:
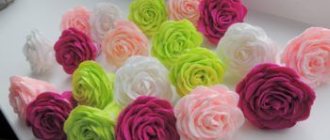
To make your handmade corrugated paper bridal bouquet look light and airy, create buds of several colors. The sequence of actions is in the following list.
- We cut the paper into long strips, 7-8 cm wide. The length of the strip is selected individually - the longer the strip, the more magnificent the flower will be. The required minimum length is 40 cm.
- We stretch the cut strip slightly and bend the upper right corner by about a centimeter. Smooth the fold.
- Then we bend the resulting angle again by 1 centimeter, at the same time, we pull half of the bend back with our right hand. It's like wrapping candy. A kind of wave is formed along the top of the strip. Such manipulations must be continued until the end of the strip. You should end up with an even stripe with a wavy, voluminous top.
- We begin to twist the finished strip into a little bag, which will become the base of the flower. It is assembled on the right side, from where they began to bend the top. The curl should be loose so that the paper lies freely and does not deform from excessive tension.
- When the entire roll is ready, you need to tie the stem tightly with thread so that the rose does not unwind back.
- We straighten the petals outward. The rose is ready! If the leg turns out to be too long, you can trim it a little. Additionally, you can decorate the inflorescences with small green leaves.
Preparing a porta bouquet
For it we need a foam plastic blank, a cardboard roll made from foil or other rolled material, a circle of cardboard corresponding to the diameter of the blank, or an unnecessary CD, glue, ribbons, lace.
- Take a cardboard roller and cut off the length needed for the handle. We decorate with ribbons, cords and secure them with glue. The edges of satin ribbons must be burned with fire so that they do not unravel.
- Take a cardboard circle and cut a round hole in the middle, slightly larger than the diameter of the handle.
- We decorate the cardboard with a wide satin ribbon, wrapping it in a circle and threading it through the central hole. We secure the edge of the tape with glue on the side where the foam will be attached. The tape can not be passed through the hole, but placed on the glue in small pieces.
- We thread a shaped handle into the hole in the middle.
- We make a hole in the foam blank the same size as the handle. We insert the handle inside the sphere and carefully fill it with glue. The foam is covered with decorative material.
- A cardboard circle, pre-decorated with ribbons, is threaded onto a handle and tightly fixed to the foam with glue.
The bouquet holder is ready, all that remains is to decorate it beautifully.
- To do this, from the center, we begin to glue our prepared flowers, in a checkerboard pattern. We plant the inflorescences tightly so that the base is not visible. We plant the last flowers so that the edges of the foam blank are not visible.
- We decorate the bouquet with beads, rhinestones, and tie a bow made of satin ribbon or lace on the leg.
- A similar bouquet can be decorated in the form of a ball, then instead of a handle, before gluing the flowers, a loop of satin ribbon is glued into the blank.
A mono-bouquet made of corrugated paper will look original. The whole trick to making it is that, instead of flower buds, individual flower petals are glued onto the prepared porta bouquet. The result is one large flower on a stalk. If you make several of them and collect them in a bouquet, decorating them with artificial greenery, it will be very original.
Below are some useful tips.
- If you cannot find glue that does not react with foam, attach a small piece of wire to the base of each inflorescence. Pre-coated with glue and stuck into the portaquet holder, it will hold quite tightly.
- To make a corrugated paper bridal bouquet have a pleasant aroma, add a drop of your favorite perfume to it.
- If you can’t buy a foam blank, you can make it yourself. It is not necessary to cut out a hemisphere or a ball. You can get by with a square or rectangle. In this case, you need to attach the flowers using a wire leg to give the bouquet the desired shape.
How to make a bridal bouquet with your own hands
Hello friends! Today you will find another addition to our “Sweet Design” section - a master class with step-by-step photos on how to make a luxurious bridal bouquet with your own hands . Under the guidance of Svetlana Matveeva, you will master another method of making a rose from candy (and in different versions - in the form of an open or unopened bud), and also learn how to assemble a wedding bouquet with a tail on a port-handle.
Decor
The main principle that should be followed in choosing decor is moderation. The composition should not look vulgar or tasteless. The variety of decor for floral arrangements made from crumpled paper allows you to realize any of the bride’s fantasies. The most common choices are ribbons, beads of different sizes and colors, as well as imitation pearls.
Interesting! An accessory made from corrugated paper with natural materials looks original. Small tree branches are placed between the buds, giving the composition a more realistic look.
The wedding bouquet is complemented with rhinestones, lace, and fabrics of interesting textures and colors.
It is also important to take into account the image of the bride and the theme of the upcoming event. For a wedding in a rustic style, for example, natural materials are quite suitable, and for a royal lavish celebration - pearls and beads.

