Consider the practicalities!
Before you dive into invitation design, you and your newlyweds need to sort out some practical issues.
Boring, I know, but still absolutely necessary! First, what size will the invitation be, and what orientation will it be - vertical or horizontal?
Most invitations are designed to fit into a regular envelope. If you're having your design printed by a professional studio, they may have their own standard sizes for invitation envelopes, so your first priority will be to contact the print studio and ask for advice on sizing. If you are planning to save money and make your own envelopes, then you should start there and adjust the size of the invitations to the chosen envelope size.
Another piece of advice - the sizes of the envelope and the invitation must under no circumstances match, otherwise it will be impossible to fit them inside one another! Leave a couple of extra millimeters at the edges of the envelope.
Once you are happy with the dimensions of the invitation, you can choose horizontal or vertical orientation. Both look great, but if you have to deal with a lot of dough (such as long names or addresses) then a vertical orientation will be more appropriate
This way you don’t risk making the text illegible, which can happen in a horizontal format (important: “Memorable Date” and “Reply to Invitation” look especially cute in horizontal format)
Art Deco Wedding Invitation and RSVP
Secondly, you need to decide how and where your invitations will be printed.
Special printing effects such as gold plating or glossy printing can make a big dent in the budget, so make sure you don't go overboard (remember, beauty is in simplicity!) and shop around and choose the best one if you need something more original.
How to Create an Invitation in Word
The almost limitless possibilities of Word allow you to use it to create not only dry documents or complex tables, but also to dilute them with graphics, beautiful text labels and other elements. Based on such tools, you can easily create an invitation using only Word.
The fastest and most convenient way to make, on the one hand, a simple, but, on the other hand, high-quality invitation is to use the templates that are in the program. To do this, go to the “ File”
" and open the "
Create
" item.
Then enter “ Invitation
” in the search field. In this case, the Internet on the device must be turned on. By clicking on the template you like, you can read a short description and download it for further work.
Text pre-entered in templates is used for example purposes only. You can simply rewrite it, change the design settings, choose a different font, and so on. The same goes for graphics that may be present on these templates.
The number of templates specifically for creating invitations is quite large, so there is an option for any event and purpose.
But if you still need to create something truly unique, then you can use the full potential of Word.
The following option is just one of many possible for creating a high-quality and attractive invitation to Word.
First of all, you should create a blank document by going to “ File”
» à «
Create
».
Then we go to the “ Design
” tab. You can put a backing there. A simple but very attractive tool. Use either your own images or images found using Bing. You can also fill the page with solid text or a gradient. And finally, add borders. In the settings, you just need to select the design style, thickness and color of the borders.
Next, you can work on the design of the invitation itself. Add a welcome banner to the top of the page. To do this, either find your own image or on the “ Insert”
» Click “
Images from the Internet
”, and then enter the desired query in the search field.
The same can be repeated at the bottom of the page. After this comes work with the text.
Modern WordArt styles are perfect for our purposes. They can be found on the " Insert
" in the "
Text
" section.
Click on the letter “ A
” icon and select the style you like. Less important text can be entered simply by changing only the color, style or font.
Using many other tools, you can write text in multiple columns, add a table, leave a blank space to fill out a name by hand, and much more.
A certain set of templates for creating invitations is also available in older versions of Word. The above instructions are relevant for the latest versions of the program. But most of the actions can be performed with similar success in Word 2003. The only thing is that it is not recommended to use old WordArt styles. They are significantly outdated and will spoil the entire design of the document.
Options for making monograms
A wedding monogram is an inscription that is located in any of the shapes: heart, oval, circle. Some couples use templates to develop. You can come up with them yourself or find options on the Internet. If future spouses are afraid to make a coat of arms with their own hands or want to create the perfect symbol, then it is better to turn to a designer for help. He will work on the sketch, show it to the young couple, and then begin work. All necessary elements are created in the vector program. If this is not possible, then it is sent to a workshop or printing house, where three-dimensional structures are made.
A wedding monogram can not only be created on paper, but also made on other materials:
- polystyrene foam;
- tree;
- gland;
- plywood;
- glass
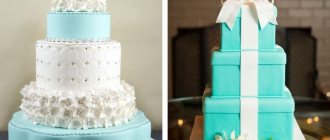
Family symbolism looks good on a topper. It is made of wood, and the coat of arms itself is located on a stick. It can be placed on a cake or other dishes from the presented menu. The wooden coat of arms will be preserved as a memory of the celebration for a long time.
The monogram should emphasize the overall style of the wedding celebration, match the design and match the appearance of the future spouses. Some designers experiment with colors, make the coat of arms on a white background or give it an airy feel. Others choose large fonts, thus showing the importance of the event.
A monogram can be made not only from the first letters of the newlyweds, but also from the last name and the date of the celebration.
First of all... Make them personal!
Whatever style of invitation you choose, try to keep in mind who the couple is and what their personal preferences are.
If you're creating an invitation for your own wedding, you're unlikely to have any problems with this. But if you're creating an invitation for a relative, friend, or client, try not to get too carried away. People turn to designers when they want expertise and advice, but wedding invitations are especially personal, and newlyweds can be deeply disappointed if they wanted a liberated floral design and got flashy Art Deco instead!
The only sure way to avoid conflicts of taste is to briefly discuss everything with the newlyweds from the very beginning. Ask them what styles they like (eg vintage, elegant, modern) and show them a few examples to spark their interest and give you a better understanding of what they want. Newlyweds who prefer vintage style and furniture may also like this fun retro design.
Retro style wedding invitation
You will never know a person's preferences until you ask! It's also really helpful to ask the couple what they definitely don't like. There's no point in spending centuries perfecting a floral frame if flowers just aren't an option.
Another important practical issue to consider is the couple's budget, take this into account when you're doing the design - gold plating can look great but may be unaffordable for a couple looking to go cheaper.
Wedding questionnaire
In the West, they simply adore all kinds of wedding questionnaires, tests, questionnaires from the series “How well do you know the bride and groom?” (filled out any time the guest has time), “What do I think about your wedding?” (a simple questionnaire about how much fun the guest had, whether he liked the program, etc. - filled out at the end of the wedding or sent by mail), “My advice to the future family” (filled out, for example, before the wedding dinner).
Such questionnaires are printed on small forms and can contain any questions. For example, we liked these:
- When I found out that Seryozha and Marina were getting married, I...
- When I saw Igor's bride for the first time, I thought that...
- When I met Katya's fiance, it seemed to me...
- For the first time I saw the guys together...
- My advice: Lena, always...
- My advice: Sasha, never...
- Today during the ceremony I...
- I want you to always...
We think that such questionnaires are very nice and are a wonderful memory of your best day, painted in colors and reflecting the living emotions of the guests.
The list of types of wedding printing can be endless: these include popular cards for a buffet table/candy bar/cheese table, cake toppers, stickers, stamps, bottle labels, candy wrappers, wish cards, wish books, press boxes, decorations, etc.
But in our article we tried to pay attention to the most important “tricks” of wedding printing. Of course, all wedding printing should be in the same style and ideally should be developed by one designer
What fonts should you use when creating a wedding monogram?
Limit yourself to a maximum of 2 or 3 fonts for use in wedding printing, including logos: invitations, wedding programs, place and thank you cards, menus. Use the same element throughout and all the wedding pieces will tie together. So which font should you choose?
- At one time, handwritten fonts were recognized as an example of wedding design. For example, the following fonts are suitable for a classic wedding: LAVANDERIA, FABFELT SCRIPT, WISDOM SCRIPT.
- If the wedding is in a modern style, use sans serif fonts. You will like the fonts: Chivo, Comfortaa, Aileron, Aganèyu.
- Vintage fonts are timeless. You can add brightness and originality to your wedding design by using fonts from this particular group. For example: Bauru, Streetwear, Paralines.
Reading this article on how to choose the right font will help you visualize different styles and figure out what works best for you.
Align text to center
When it comes to laying out the text for your invitations, it's best to stick to traditional, time-tested formulas. Even if your invitations have a modern, unconventional style, you should still center the text.
Why? Centering the text appears to be more formal and important, and characterizes the invitation as something important and meaningful. Small pieces of text (such as names or dates) also look more organized and elegant when centered
Off-center text can make the title look sloppy.
So when it comes time to tidy up your text, make sure to draw a center line across the entire sheet, and no matter what software you use, double-check that all text frames are centered. You can also create a hierarchy in the text by applying different font weights and sizes to different sections
Try writing the couple's names in large italics, the date and time of the event in bold (you don't want anyone to forget about it!) and additional elements such as the dress code in a smaller size and in a thin or regular font.
You can also create a hierarchy in the text by applying different font weights and sizes to different sections. Try writing the couple's names in large italics, the date and time of the event in bold (you don't want anyone to forget about it!) and additional elements such as the dress code in a smaller size and in a thin or regular font.
Consider dividing text blocks with special dividers (try ribbons for vintage styles, or elegant handwritten flourishes for a traditional design, like the elegant invitation below) to make the information more digestible.
Simple Wedding Invitation
Creating a wedding monogram design
When designing a wedding logo, you need to pay attention to several important points:
- Create your wedding monogram or monogram in high resolution format . If you plan to download a monogram from free stock services, then be prepared for the fact that, firstly, it will not be unique, and secondly, the images will not be of very high quality.
- If you have a color monogram , then create another one in black and white , since not all decorative elements on which you plan to use it will look beautiful.
- If you plan to use your wedding monogram on anything other than printed materials, we recommend avoiding super-fine lines . They may be too fragile or inconspicuous.
For example, this is what the invitations to the royal wedding of Prince William and Kate Middleton looked like (2011). Notice the monogram, quite modest, right?
And this is what the invitations to the wedding of Prince Harry and Meghan Markle looked like in 2022.
Wedding program
| Yes, yes, just like in the theater. Or at football. The program is issued before the start of the wedding and it contains the schedule of the holiday: time for gathering guests, buffet table, beginning and end of the ceremony, time for a photo shoot, start of the banquet, start of the entertainment program, and so on. Useful information may be a list of musical compositions that were played during the ceremony, and a diagram of the wedding area if it is large: indicate where the photo zone, chill-out, smoking area, and toilet are located. Often newlyweds write a short story of their love in the program, memorable dates for the couple, and print a crossword puzzle with questions about themselves on the pages so that guests do not get bored while waiting for the ceremony. | You can also mention key guests (bridesmaids, groomsmen, parents), as well as those who organize your wedding and perform at the celebration (names of the host, manager, photographer, name of the cover band, so that guests can politely address them). |
Such a program is an excellent memory of the wedding and an exhibit for the family archive. After many years, your children and grandchildren will be interested not only in looking at wedding photographs, but also in touching the “artifacts.”
6
Use of the coat of arms after the wedding
The monogram accompanies the married couple not only during the event, but also in later life. Therefore, it is worth taking care of preserving memory in advance. For example, you can order a family album with a coat of arms from a printing house. Not only photos from the wedding, but also from future family life will be placed there.
The monogram can be located in the hallway of the house, above the fireplace. Some spouses create key holders with the image of a coat of arms. This symbol can be used in the future during family holidays or children's birthdays.
This decorative element is considered a unique detail that each couple creates independently. The process of selecting a symbol must be treated responsibly. You should take into account all the stylistic features of the wedding event. The finished coat of arms should not contradict the created decor.
If young people have doubts, they can turn to a designer for help. He will offer the newlyweds design options, which include fonts, shapes and colors. With the correct selection of a wedding symbol, it will become a real coat of arms of the family and will accompany it throughout its life.
How to use templates in Word
Word samples are rarely used in everyday life, so they are difficult to find on the Internet.
Most of them are on the official website, where you can find stamps for any special occasion for free.
To make your own invitation template, you need:
- Word from 2007 (earlier versions do not support the dotx extension);
- invitation text;
- 2–3 hours of free time to find the required workpiece;
- 30–60 minutes to enter text.
- After the required blank is found, it is downloaded and opened using the program. It contains all the necessary formatting and pictures, so there is no need to look for anything else.
- If the file was downloaded from the official website, then the window that opens contains all the necessary explanations, so you only need to transfer the invitation text.
- Once the text entry is completed, the entire postcard is reviewed for errors or places where anything needs to be changed.
- When everything is ready, you need to remove the explanations.
- Save file.
It is important to monitor the format in which the text is inserted when copying. A simple drag and drop will change the font and alignment
Therefore, it is necessary to use the Paste Special function, in which you select unformatted text - in this case, template formatting will be used. Conventionally, we can call a template an image that contains all the design and main text.
When this format is preferred, it can be inserted as a background image and a font can be selected in which the individual data will be printed.
- addressing the guest by name;
- the date of the;
- time spending;
- place of registration;
- address of the restaurant where the banquet will be held;
- wedding style;
- names of newlyweds;
- signature of the bride and groom.
In this case, there are two options for entering text.
The usual way is to try to fit the text to the fields using spaces. This will take a lot of time and may not be effective if the line spacing in the image differs from the file spacing.
Through the “inscription” function - a more difficult to implement, but reliable method. Individual text is placed in a special area, which is moved with the mouse to the desired location.
To insert an inscription, you need to enter the “insert” menu and select the required sub-item. You can also open the drawing panel, where there is a shortcut button for this function.
An additional advantage of the "letter" menu over manual text substitution is that after all the insertions are completed, you can combine them with the background image. To do this, you need to select all graphic objects, right-click on one of them and select the required item from the list.
After this, all elements will be fixed in relation to each other and will change simultaneously when stretching or changing the margins.
How to make a monogram for a wedding?
Most often, newlyweds order a family symbol from professionals. He sketches the monogram in a specialized program. If you need little things in the form of wood, fresh flowers or textiles, then the master makes the appropriate adjustments.
There is also an alternative option. It involves using your own imagination. But how to make a coat of arms without the help of designers? There are several programs and services that will help solve the problem.
Office Word
This program is familiar to everyone and is found on almost any computer. It is enough to use the tools to draw a coat of arms, select the desired font and insert decorative elements.
This option is considered the easiest, simplest and most affordable. But this will not help in creating original ideas. If newlyweds are looking for an easy way to create a monogram for a photo shoot and create 3D letters, this is a great workaround.
Adobe Illustrator, CorelDRAW, Adobe Photoshop
You can make a sketch in other programs. Fonts, colors and sizes for letters will help diversify the symbolism. The use of various effects and original patterns is allowed.
The advantage of this method is that a young couple will be able to get an effective result without putting in a lot of effort. But there is one drawback - basic knowledge of such programs is required. If you don’t have time to study the material, then you should abandon this idea.
Paint
Another simple assistant in creating wedding symbols. This program allows you to use different colors, fonts and shapes. Adding decorative elements is allowed. But it won’t be possible to create spectacular symbolism. The letters will have no volume.
Insert photos into wedding invitations online
Combine photos from the days you spent together into wedding invitations, creating a funny or romantic collage. Just upload them to your storage and then drag them into the curly frame. Want to improve your photos before making them into wedding invitations? The designer will help you adjust brightness, contrast and saturation in two clicks!
If your photos are not enough, take a look at our gallery, where the best pictures, illustrations, drawings and other details can be used to best achieve your goals. All of them are of excellent quality, so you don't have to worry about the results.
Choose a style
Each invitation design will fall into some style, or perhaps borrow something from a couple of styles. A specific style, especially if the couple is having a themed wedding or has a penchant for a specific period or genre, is a good way to add a strong punch to your invitation design.
Here are a few design styles that would work great for wedding invitations, and the features each style brings to the design...
Traditional and Elegant: This is a classic, timeless and suitable for both formal and informal weddings. You won't risk offending any of the older wedding guests with this beautiful, tasteful invitation. Handwritten font, floral frames and subtle colors complete the look.
Art Deco: Another old-fashioned style, but it has a stronger vintage feel, which gives you a sense of style and is on trend. Art Deco invitations add a sweet, symmetrical quality to your design, like the invitations below, and add a distinctly glamorous edge with rich geometric designs and luxurious colors like gold, silver and jet black. If you want to achieve an Art Deco style, gold embossing may come in handy.
Art Deco wedding invitation
Mid-Century Retro: This style is a throwback to the 1950s, but with a trendy twist that makes it look very meaningful and modern. Pastel colors, Americana font style, and vintage-inspired graphics like ribbons and badges add a fun, informal touch to this invitation.
Retro style wedding invitation
Choosing a style is a great start for your project. A 1920s-inspired font blending several major genres will give your invitation an instantly recognizable and distinctive character.
Export your invitation
You've completed your design (yay!) and it's ready to go to print.
Remember that we have set up three different finishing effects: the cut line, the embossing patterns and the frame that will be foiled.
When you have so many post-press effects, it's wise to export them individually and check with your printer which ones do what.
First let's take care of exporting the cut line...
Step 1
Go back to the Layers tab and turn off the visibility of the FOIL BLOCK inside, FOIL BLOCK bleed and EMBOSSED DECORATION layers.
Go to File > Export and select Adobe PDF (Print) as the Format. Give this file an appropriate name. for example, “Wedding Invite_DIE LINE Artwork”. Click Save to open the PDF Settings window.
From the Adobe PDF Presets list, select [PDF/X-1a:2001].
Click on the Marks and Bleeds tab in the menu on the left side of the window. Make sure the Use Document Bleed Settings box is checked and click Export.
Step 2
Great, now we are ready to export the foil layer.
In this case, I think gold metallic foiling on the front of the invitation and perhaps a dark blue glossy border (or metallic - imagine!) on the back of the invitation would look beautiful. To do this, we need to export each invitation page as a separate file.
Go back to the Layers tab and turn off the visibility of all layers except FOIL BLOCK bleed and FOIL BLOCK inside.
Repeat the steps above: Export the InDesign file as a PDF file [PDF/X-1a:2001], but first select only the Page 1 page to export. Name the file Wedding Invite_FOIL FRONT_GOLD_Artwork. Also add a trim line before exporting.
Repeat for Page 2 (back side), naming the PDF file “Wedding Invite_FOIL FRONT_BLUE_Artwork”.
Amazing!
Step 3
We're almost done... Honestly! All that remains is to export the embossed patterns as a separate PDF file. The steps are the same, we created embossed patterns in black and placed the content on a separate layer (how organized!).
Go back to the Layers tab and turn off the visibility of all layers except the EMBOSSED DECORATION layer.
Repeat the Adobe PDF export process and name the file Wedding Invite_EMBOSS FRONT_Artwork. We only have embossing on the front of the invitation, so for export you only need to select Page 1.
Let's Create a Form for Your Invitation in French Style
Step 1
Minimize your document in InDesign and open Adobe Illustrator.
You can choose to either create your own invitation border design using Illustrator's drawing tools, or choose a decorative frame from pre-made ones, like this assortment of elegant frames from Envato Market.
Either way, you'll need to make sure the shape is 175mm in Width and 106.5mm in Height to match the document's proportions in InDesign.
The border should be as simple as possible - any intersecting borders or corners will create difficulties when cutting. Something as simple as the border below would be ideal. Once your shape is created as a vector in Illustrator, set the Stroke Color to / and the Fill Color to a solid color, such as Black.
Select the vector shape and go to Edit > Copy.
Step 2
Return to your InDesign document, Page 1.
Go to the Layers tab and put a lock on all layers except the bottom Background Color layer. Click on a layer to activate it.
Then go to Edit > Paste. This will place the vector frame on the page.
Align the frame perfectly centered on the page, and then go to the Controls tab at the top of the work surface and set the Fill Color of the frame to (none).
Download a high-resolution image of a blank piece of paper or card, like this one from Envato Market, to add some texture to your invitation background. This will add even more tactile texture to the plain cardstock, making your invitation look vintage.
Go to File > Place, select the paper image and click Open. Place the image in the frame, go to Object > Effects > Transparency and lower the Opacity a little, to about 70%.
Step 3
Expand or open the Swatches tab (Window > Color > Swatches) and create a CMYK color swatch. Name it Pale Oatmeal and set the values to: C=11 M=13 Y=16 K=0.
Duplicate the swatch and create a tint by double-clicking on the copy and moving the Tint slider at the bottom of the Swatch Options window to 10%. Click OK.
From the Swatches tab menu, select New Gradient Swatch.
Name the new swatch Ivory Gradient and in the Type field select Radial. Click on the left cursor on the gradient, select Swatches in the Stop Color box and select a lighter swatch on the gradient for that one.
Click on the right cursor and select the Pale Oatmeal 10% Tint swatch from the list of swatches. Click OK.
Select the vector shape with the paper background and go to Edit > Copy, Edit > Paste in Place. Double-click inside the frame to select the paper image and delete it.
Set the Color Fill field of the frame you inserted to Ivory Gradient.
Then go to Object > Effects > Transparency. In the Mode field, select Hard Light and set the Opacity to 60% to bring out the texture of the paper underneath. Click OK.
Check your invitation
Finally, I'll reveal some helpful tips and tricks to get you started creating your own wedding invitations. To start designing your own invitations, you can:
- Choose a style: Choose a well-known design style such as Art Deco or Classic to help you manage your ideas and give your design cohesion
- Look to Timeless Font Styles: Classic fonts that have stood the test of time will always look great on invitations and your invitation designs will never go out of style.
- Consider practical issues: Consider important issues such as sizing, orientation, and printing before diving into the design. You won't regret it later!
- Give your floral design a modern twist: Floral designs are a romantic, traditional choice for wedding invitations, but they don't have to look boring. Try abstract illustrations, and play with the contrast of dramatic background tones to make the overall design feel completely modern.
- Consider using photos: If you're looking for a unique design that looks fresh and modern, introducing a photo as an invitation backdrop or frame can be a great way to achieve this.
- Center your text: Of course, you can move the text further left or right if you want, but 99% of the time, centered text will look best.
- Embrace the Ampersand: Replace the awkward “and” with a decorative ampersand (&) for elegance and added interest.
- Use color to transform your design: Avoid reinventing the wheel every time by changing the colors of your layout instead of changing the core design elements.
- When in doubt, turn to Classic: Individual preferences may vary, design fashions come and go, but classic designs will always be appropriate for wedding invitations. Add a modern twist to a traditional design to add a little personality.
- Most importantly... Always make them personal: Find out the tastes of the newlyweds and their vision of their own wedding. Can you combine these two factors into a single design? Involve the newlyweds in the design process, but without compromising your creativity, by letting them choose the color scheme for the invitation from the selection you made for them.
Invitation with flowers on chalk board
If you use these ten techniques as a starting point for your invitation designs, you'll be well on your way to creating an invitation that's super special.
If you're still feeling lost (happens to everyone!), take another look at the beautiful templates used in the article above and choose the ones that suit you best. You can also browse through a wider selection of wedding invitation templates to find the perfect style for your event.
What you should pay attention to when creating a monogram
The first step when creating a wedding monogram or monogram is to figure out:
- Do you want to use only letters or other patterns as well?
- Do you prefer handwritten fonts or something more modern?
- do you have a color scheme that you want to incorporate into the design?
When creating a monogram, you can use any fonts. The main goal is to choose one that will look aesthetically pleasing with all the decorative elements. Use symbols such as "&", "+" or the word "and" to link letters together. For example, a monogram for Anna and Maxim will look like this:
In the classic version, the monogram also includes the first letter of the now common surname.