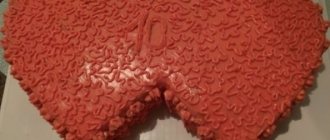
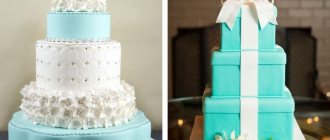
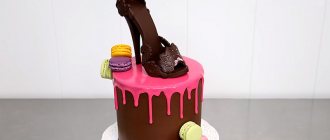
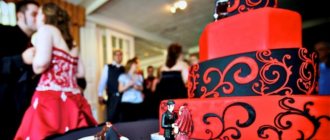
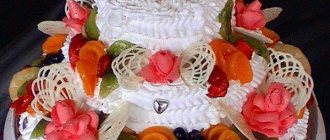
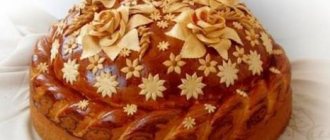
The central decoration of the holiday will be a wedding cake-heart, which by its shape already symbolizes the atmosphere of love, kindness and warm wishes to the newlyweds.
This contour of the cakes allows you to fit into the overall theme any other types of decorations, inscriptions and a color palette of a large number of shades or just 2-3 colors. At home, confectionery art allows you to use simple design options with cream, chocolate or fruit - the main idea will be preserved in the outline of the heart, which will remain in memory and in photographs.
Cream cake “Heart”
According to our master class, a wedding cake made from cream “Two Hearts” looks no less festive than one decorated with fondant, but it is easier to prepare. For it you will need the following ingredients that our master class requires:
- 2 biscuit bases of the same shape;
- butter or cream custard;
- food colors pink, red, green;
- a small piece of mastic for creating newlyweds’ rings and inscriptions with their names;
- as well as a pastry bag, a rotating cake stand, a spatula, and a knife.
The cream wedding cake “Two Hearts” according to our master class is prepared quite quickly:
- First you need to bake 2 heart-shaped biscuits, as in our MK, then layer with cream, spread on top, and let sit in the refrigerator for several hours.
- Now we need to connect our “Two Hearts” blanks. To do this, place them side by side, using the mold in which the cake was baked, cut out part of the first heart and insert the second cake there.
- Coat the cakes with cream inside and out and refrigerate.
- Place a large volume of white cream into a bag with a nozzle, squeeze a little cream onto the surface, and smooth it out using a spatula, as in MK. To draw the border of the hearts, attach the shape and press down lightly.
- Using a bag with a star tip, decorate the sides with vertical stripes, make a border at the base and around the perimeter and border of the hearts at the top of the cream miracle.
- Form chrysanthemums from cream on a special carnation, place 2 flowers on one heart, 3 on the second heart according to our master class.
- Now the wedding cake needs to be decorated with roses. We also form them on a nail and then transfer them to the surface.
- Use green cream to form narrow leaves.
The wedding cake is ready. It remains to decorate it in accordance with our MK with two rings, which can be made from yellow mastic, as well as a small strip with the names of the newlyweds. In addition, you can place beads, icing balls and other decor on the surface as you wish.
Basics
I am often asked about which mastic is best to sculpt figures from. For some time I worked with both store-bought mastic, made according to various recipes, and with sugar paste, but I always returned to my recipe because I know how to adjust it to my needs.
Remember that all this is not the ultimate truth, but just my own experiences, and you may have a different view on how to make figures from mastic for a cake. So there are no hard and fast rules here other than maybe the placement of parts, so adapt these tips to your needs and preferences.
Required materials and tools
In my work, I try to avoid unnecessary expensive tools and often use what I already have at home. I'll stick with that idea throughout this tutorial and try to keep the amount of what you need to make your sugar gummies to a minimum.
To make a simple figurine from mastic, you will need:
- Mastic of different colors for making the following parts: pants, boots, sweaters, leather, hair;
- A few toothpicks. Note: Do not give fondant products containing toothpicks to young children and be sure to warn everyone else that they contain toothpicks. You can substitute solid pasta if you wish, but let everyone know anyway;
- Salt shaker with powder or corn syrup, whichever you prefer. If you don't have a salt shaker, you can use a spoon instead;
- Cutting board (as smooth as possible);
- A sharp, non-corrugated knife;
- Small or medium ball shaped mastic tool;
- Small pastry brush;
- Water in a small container;
- Black food gel coloring;
- A surface on which you will place the figures, such as a cake or, if you are making them in advance, a piece of foam;
- Printed sketch of a person (see below).
Sketch of a man. To save, right-click on the image and save the image to your computer.
Through trial and error, I realized that as I made figures from mastic, each subsequent piece turned out to be larger than the previous one, and as a result, I ended up with disproportionate mastic crafts. It was also difficult for me to make several figures of the same size if I did it by eye. For this reason, I began to use sketches similar to the one shown above and the figures for the mastic cake began to turn out to be the right size. Just upload this sketch to any graphic editor (I use Irfanview), set the desired height of the future figure and print the sketch. This approach can also be used when decorating a cake to figure out how to arrange the figures and what size they should be.
The height of the figure described in this article is 6.3 cm. Mastic is usually sticky, so to roll it out properly and avoid sticking to the board and fingers, sprinkle the work surface and hands with powdered sugar. Don't worry about getting powdered sugar all over the figure; you can easily clean it afterwards.
To glue pieces of mastic, apply a thin layer of water to one of them using a brush and press them together. You may need to move them around a little to get them to stick, but usually just water is enough to do this. Some people like to use different types of edible glue, either store-bought or homemade, but I usually don't bother with that. Water glues perfectly in almost all cases.
If you are working in a dry area, you may need to soften your mastic to prevent cracking on the surface. To do this, just mix a small amount of water into the dough and warm it in your hands. Try to do everything quickly so that the mastic does not have time to dry out and begin to crack. In high humidity conditions, you may need to stir in additional powdered sugar into the fondant and increase the time between steps to prevent the pieces from mixing.
Next, I will talk about how to sculpt with mastic and get excellent results.
Recipe for “Two Hearts Beat as One” Cake:
Berry mousse Defrost the berries, puree them in a blender, rub through a sieve, you get berry puree 200 ml plus or minus, add sugar, mix
Soak the gelatin in water, dissolve in a micro and cool slightly. Pour the gelatin into the puree and beat with a mixer at high speed for 15-20 minutes. The mass will increase several times. Place in a mold smaller in circumference than the main one for the cake and put in the refrigerator for an hour .If the mold is not intended for mousse, line it with film so that the mousse can be easily removed.
Base Break the cookies into small pieces
Put butter in the milk and put on fire until the butter is completely dissolved. Break the chocolate into small pieces. Pour the milk into the chocolate and cover with a lid for 3 minutes.
Stir chocolate until smooth
Add cookies and stir
Place the chocolate mixture in a 23 mm springform pan (if not silicone, then line the bottom and sides with film)
And press into an even layer through the film. Place in the refrigerator.
Creamy mousse with white chocolate, coconut and almonds Place milk and 100 ml of cream on fire, add rosemary, bring to a boil, remove from heat and let cool slightly, remove rosemary
Break the chocolate into small pieces
Beat the yolks with sugar until white and pour the rosemary infusion into a thin stream through a sieve.
Mix well and put on the fire, stirring continuously until thickened, BUT DO NOT boil!!! Pour the hot mixture into the chocolate, cover for 5 minutes, stir well. Soak the gelatin in water, dissolve in micro, pour some into the chocolate, stir, pour in the rest gelatin and mix well
Whip the cream (400 ml) - it is best to put the attachments in the freezer before whipping for about 15 minutes and the cream should be very cool.
Gently fold the cream into the chocolate mixture, drawing a figure 8
We take both forms out of the refrigerator.
Invert the mold with berry mousse onto the base.
Carefully pour the rosemary mousse on top, tap gently to fill the mold evenly and place in the freezer for an hour.
Creamy dark chocolate mousse Break the chocolate into small pieces
Bring the milk to a boil and pour into the chocolate, cover for 5 minutes.
Stir until smooth.
Soak the gelatin in water, dissolve in a micro - do not bring to a boil!!! Pour hot into chocolate and stir. Cool slightly
Whip the cream, without ceasing to beat, add chocolate in parts under the mixer blades. Take out the mold and place the mousse on top, level it, tap the mold on the table and put it in the refrigerator overnight
Glaze Boil water with sugar, pour in cream and bring to a boil. Add cocoa and stir with a whisk until completely dissolved, without lumps.
Boil for 20-26 minutes over low heat, stirring occasionally. Dissolve the gelatin.
Remove the glaze from the heat, cool a little and add gelatin, mix well and cool at room temperature. Pour onto the cooled cake and put in the refrigerator for an hour. The photo clearly shows that the glaze was not mirror-like, but seemed to have streaks - I ran out of gelatin, I had to use a bag of ready-made jelly in powder, the result was not an ordinary mirror-like and very beautiful glaze, but something like this)
Decorate as desired.
Homemade frosting recipes
Another wonderful and most importantly simple way to decorate a homemade cake is icing. You can make the glaze with just three ingredients on hand:
- powdered sugar – 3 tablespoons;
- milk – 1 tablespoon;
- butter – 50 g.
Melt the butter over low heat in a crust and let it cool slightly. Then add the sugar ingredient to the butter and stir well. Then add milk and mix everything again. The finished mixture is white milk icing for decorating a homemade cake. It can be spread on the surface of the biscuit and allowed to harden.
You can also make chocolate glaze. Only the proportions of the products should be slightly different:
- powdered sugar – 3 tablespoons;
- milk – 2 tablespoons;
- butter – 30 g;
- cocoa – 1 tablespoon.
Mix cocoa powder with powdered sugar. Pour milk into the resulting mixture, mix well again and put on fire. When the mixture boils, remove the crust from the heat and stir in the butter. The chocolate glaze is ready to be applied to the cake.
You can also make a real confectionery glaze - ganache. This is a denser version of this “finishing” material. And to prepare it you need to take:
- chocolate - bar (180-200 g);
- butter – 50-70 g.
To get ganache, just melt the chocolate and mix it with melted butter.
Wedding anniversary cake design
Usually, for such a celebration, a cake is made that symbolizes a specific date of marriage. For example, 35 years of marriage is a coral wedding, for which it would be appropriate to make a cake in a marine style using coral color.
The cake is also decorated with numbers indicating the number of years of marriage and auxiliary elements, for example:
- Mastic made in the form of gold or calico fabric;
- fruits;
- wedding figurines;
- hearts, bows, flowers made of marzipan mass or mastic.
- macarons;
- gingerbread,
- sweet photos, etc.
An unusual option would be to make exactly the same cake that you had on your wedding day or to repeat one of the periods of family life on the cake.
1 year wedding anniversary cake
1 year of marriage is called a chintz wedding, where it is appropriate to make a cake in the shape of the spouses’ bed, covered with chintz bed linen, on which the newlyweds lie or sit.
Cake with fondant
A heart-shaped cake can be made from anything. Sweet dishes made from mastic are gaining great popularity. The material allows you to create amazing culinary masterpieces. Why not make dessert in your own kitchen and give the treat as a gift.
Ingredients:
For mastic:
- marshmallow – 120 g;
- butter – 20 g;
- lemon juice – 5 ml;
- powdered sugar – 350 g;
- food coloring – 3 pcs.
For the test:
- vanilla sugar – 10 g;
- sour cream – 180 g;
- sugar – 180 g;
- cocoa – 50 g;
- baking powder – 10 g;
- eggs – 2 pcs.;
- flour – 250 g.
For the meringue:
- sugar – 180 g;
- egg whites – 2 pcs.;
- salt - a pinch.
For cream:
- powdered sugar – 100 g;
- boiled condensed milk – 300 g;
- butter – 250 g;
- cream – 450 ml;
- peanuts – 150 g.
Preparation:
Let's start preparing the mastic. It’s not difficult to make it yourself. The only thing to keep in mind is that you need to sculpt the decorations a few days before preparing the dessert. Place marshmallows in a bowl, add lemon juice and oil. Place the dishes in the microwave for 30 seconds. This time is enough for the mass to increase in size. Pour powdered sugar into the resulting mixture and mix everything.
- We form the remaining roses in the same way. We make leaves by cutting them out of mastic using a die cutter. Place the decorations on a tray with powdered sugar and put them in a dry place. The photo shows flowers in finished form.
- Let's start preparing the meringue. In a bowl, combine egg whites, salt, sugar. Beat the mixture with a mixer.
The treat is ready. It will take a lot of free time to prepare it, but the result is worth it. Why not please your loved one and give him such a surprise.
Advice!
If there is any mastic left after cooking a dish, there is no need to throw it away. It can be stored in the refrigerator for a week.
Romantic treat - cooking methods
Professional confectioners have different forms for cakes, including heart-shaped ones of different sizes, so making such a dessert is no more difficult for a master than any other. If the future newlyweds decide to do this themselves, then there are two different manufacturing options.
First
Using the same form as the professionals. It is detachable, with high sides, so you can make several voluminous cakes with filling between them. The dough is baked, then cut into several pieces, which are coated with cream or other filling. When everything is ready, the mold opens, and the finished cake can only be decorated as you wish.
Second
It involves baking round cakes, from which a neat heart is then cut out using a stencil. Assembly can be done without a mold.
These cakes vary in taste depending on the wishes of the couple. The cakes are usually made with vanilla or chocolate, but you can experiment, for example, with citrus additives or food coloring.
The filling is chosen depending on the size of the heart-shaped wedding cake - for a single-tier cake, any filling is suitable, and for multi-tier cakes, thick cream is usually used for the bottom cakes and, if desired, soufflé or mousse for the top cakes.
The “Heart” wedding cake, as in the photo, will create a real sensation at the celebration. All that remains is to choose the right filling for the main treat.
Often a heart-shaped dessert is decorated with berries and fruits, especially the top part. Strawberries are considered the most popular in this regard - they match the shade, and they are often filled with jelly to create an even brighter picture. Berry and fruit decoration goes well with the yogurt filling for the cakes. This is a fairly dense cream with a delicate taste.
In addition, sour cream, curd and cream fillings are used for the heart-shaped cake. It can be cream, soufflé or mousse with the addition of fruits and berries, candied fruits, nuts, waffle crumbs, cookies, etc. In a multi-tiered dessert, you can use different types of fillings for each element separately - this will please most guests.
The “Two Hearts” wedding cake is suitable for different celebration styles. At a classic celebration, it is decorated in the traditional way - cream roses, curls, two gold rings and other decorations. For stylized weddings, mastic is most often used, since it can be used to create any patterns or figures. For example, for a celebration in the steampunk style they make gears and springs, for boho - a dream catcher, for Love is - a wedding cake with figures and a heart.
Why is it needed?
The main dessert is ceremoniously served at the end of the wedding banquet. The heart-shaped wedding cake is carefully cut into portioned pieces and placed on plates for guests. Sometimes the dessert takes part in a kind of auction - the toastmaster invites friends and relatives of the newlyweds to auction for the first cut piece. The money received is sent to the wedding treasury along with other gifts.
The tradition of treating guests to cake has existed for four centuries, and, like many other wedding customs, originates in Europe. It is believed that the sweeter the main dessert of the evening, the more prosperous the newlyweds' life together will be. Eating a piece at a time, friends and relatives wish the couple happiness, good luck and peace in the family. In most cases, wedding desserts are decorated in accordance with the theme of the celebration.
The decorations on the cake highlight the overall style or color scheme of the event. The attention of the guests is once again focused on the theme, and the photographer takes more vivid photographs, which will then be distributed among family albums. The “Two Hearts” wedding cake, as in the photo, will definitely please those present at the special event.
Wedding anniversary cake design
Usually, for such a celebration, a cake is made that symbolizes a specific date of marriage. For example, 35 years of marriage is a coral wedding, for which it would be appropriate to make a cake in a marine style using coral color.
The cake is also decorated with numbers indicating the number of years of marriage and auxiliary elements, for example:
- Mastic made in the form of gold or calico fabric;
- fruits;
- wedding figurines;
- hearts, bows, flowers made of marzipan mass or mastic.
- macarons;
- gingerbread,
- sweet photos, etc.
An unusual option would be to make exactly the same cake that you had on your wedding day or to repeat one of the periods of family life on the cake.
1 year wedding anniversary cake
1 year of marriage is called a chintz wedding, where it is appropriate to make a cake in the shape of the spouses’ bed, covered with chintz bed linen, on which the newlyweds lie or sit.
How to decorate a heart cake at home
Cover the cake with a thin layer of cooled cream. Refrigerate. Then apply the second and third layers in the same way. Level the surface. Now you can use decorative elements.
How to decorate a heart-shaped cake: flowers from mastic or fruit pastille
Fruit pastille perfectly replaces difficult-to-handle confectionery mastic. From it you can easily form flowers with leaves, letters and ornamental elements to decorate a heart-shaped cake.
How to Decorate a Heart-Shaped Cake: Marshmallow Braids
To add a warm and cozy look to your heart cake, make it a knitted scarf like this.
To do this, warm up the marshmallows a little, pull them into long ropes and braid them. Place the braids on the base - a thin layer of marshmallows. Cut out a heart shape to the size of your cake, and place on top of the cream layer.
How to decorate a heart-shaped cake: decorative powder
A cute and unpretentious way to decorate a heart cake at home when you have neither time nor materials for creativity. The colorful confectionery powder will do everything for you.
Read also: How to make strawberry meringue hearts: a recipe for Valentine's Day
Read also: Chocolate brownie cake: a recipe for those who don’t have time to cook
Read also: Sweet heart: cupcake recipe for Valentine's Day
Peculiarities
There are many options for both the base and impregnation of the cake. Biscuit, shortcrust pastry, honey cake - choose what you like best. As for the filling, it is better to use light options - soufflé, yogurt, cream, since there may simply be no room left for a rich buttercream at the end of the banquet.
Idea! Simple and tasty - soak the cakes in syrup or cover with melted chocolate.
For cakes, choose a base that is easy to cut - sponge cake, cake, well-soaked shortbread dough. The wafer layer or meringue inevitably becomes deformed and crumbles during the portioning process.
How to decorate a heart cake, ideas
If you really want to make a “heart” cake, but there is no suitable shape and you don’t want to try too hard to create perfect curves, then you can make a cake of a standard shape, but with a characteristic decor. To do this, it will be useful to learn how to decorate a cake with hearts.
You can create a heart on the cake from multi-colored dragees or sweets:
Even a pancake cake can be coated with cream and decorated with hearts:
Hearts can also be made from cocoa or grated chocolate:
Gingerbread hearts can also decorate the cake:
A heart-shaped cake will not go unnoticed. He is direct proof of tender feelings. Only at first glance does it seem that its appearance is predetermined. In fact, such a dessert can be varied (both in appearance and in taste). This will allow you to choose the recipe that your other half will definitely like.
Execution options
An unusually shaped wedding dessert can be made even more original. For example, they often bake not one, but two identical hearts, creating different compositions from them. They can be joined on one side and placed on each cake with a swan figurine. They will stretch their beaks towards each other, forming another small heart with their necks. The remaining surface of the dessert is decorated with cream lilies and water lilies.
Another option is to create the illusion of one heart overlapping another. To do this, one of the elements is cut along the outer contour of the second, then they are fastened with cream or mastic. You can decorate such a dessert with a small lace pattern, confectionery beads or ready-made wedding figurines. A heart-shaped wedding cake, as in the photo, is ideal for a classic wedding.
Two heart-shaped cakes standing next to each other, one of which is slightly smaller than the other, look original. They can be decorated in the form of the clothes of the bride and groom, with the “men’s” cake made with coffee filling, and the “women’s” cake with vanilla or fruit filling. Another option for combining two hearts into one dessert is in the likeness of Yin and Yang, but then the lines of the cakes should be slightly curved so that they fit perfectly together.
Not only the cake itself, but also decorations for it can be heart-shaped. For example, glaze contours placed on the top of a dessert look harmonious. For decoration, some people use many small hearts made of fondant or chocolate, which cover the entire surface of the cake. The dessert looks original without voluminous decorations, on which small hearts are imprinted.
Interesting!
Photos of the most beautiful heart-shaped wedding cakes
Heart shaped cake is one of the most popular confectionery that can be prepared for Valentine's Day, wedding, as a gift to your loved one and also for birthday. The main thing in this cake is its shape; you can decorate it with mastic or cream, depending on which confectionery material is easier for you to work with. This product can be considered one of the easiest to prepare; it is quite simple to make, especially if you use our detailed master class.
To create a wedding cake you only need a few ingredients. The complete list is as follows:
- sponge cake - it is quite acceptable to leave the cake white, add cocoa powder, use any non-liquid cream;
- mastic;
- decorgel;
- powdered sugar;
- pearl sugar balls;
- liquid dyes pink, brown, white.
In addition, you will need the following tools:
- substrate;
- multiple stacks;
- stands for forming roses;
- brush.
Traditionally, a heart-shaped wedding cake should be made in pastel colors, so we will use a soft pink dye; to create roses, do not select a separate dye, just pour a little more of it into the mastic to give intensity to the colors. The original decoration for this cake in our master class is a box, which can also be made from mastic. This lidded box can hold a wedding ring or other small item.
Preparing the base
The “Heart” cake has a characteristic shape, as indicated by our master class. Making a cake of this shape is quite simple:
- bake a round sponge cake of large diameter, from which a heart is subsequently cut out using a paper stencil or using an iron die;
- bake a sponge cake in a springform pan;
- if the base for the cake is not a sponge cake, but, for example, honey cakes, then they can also be immediately cut out using a stencil in the shape of a heart.
After the cakes have cooled, they must be greased with butter, butter or other fairly thick cream, and allowed to soak in the refrigerator for about 2-4 hours, depending on the hardness of the cakes. After this, the base can be covered with mastic, as in our MK. For these purposes, use light pink mastic, you can use gelatin, condensed milk, store-bought
It must be painted very carefully so that the color is not intense, pastel
To cover it, roll out a large layer of pink mastic and carefully, being careful not to tear it, transfer it to the surface. Now, using your hands and a special iron, release all the air, smooth the mastic on top and sides to the base. Carefully trim off excess mastic with a knife or special device. Do not throw away the remaining mastic, roll it into a ball and wrap it in plastic.
Wedding cake decoration
This wedding cake requires appropriate decoration. There are many tutorials on how to decorate desserts for a special occasion. For a wedding or other occasion, you can make a cake in the shape of one heart, or you can make two hearts in one, but this is usually a cream version.
Let's start decorating:
- Add a little more dye to the pink mastic to make the color richer. Now roll out the layer, make several circles with a die cutter, and form multi-layer roses on a special stand. These roses can be used to decorate the entire cake around the perimeter, or to make several flowers in one part.
- You need to place a heart-shaped box in the center; our master class will also tell you how to make it. To create a box, you need to make identical pieces in the shape of a heart, make the edge jagged using a special device. Make a side about 2 centimeters high inside the bottom. At the base of the side, place pearlescent sugar beads on the gel, decorate the edge of the lid with the same beads, and you can make a design on it using icing. In our wedding MK, on the lid of this box there are 3 small roses made of burgundy mastic.
- Glue the box to the surface using gel or syrup; inside the box you can use white mastic to lay out an imitation of fabric on which the ring is placed.
- Now plant the pre-made roses on the surface.
- Make a long ribbon from dark red mastic, which you attach at the base with water, so you can hide the cut of the covering.
Before decorating and attaching flowers and boxes using MK, do not forget to coat the surface with decorgel, as in our MK, to give a beautiful shine.
Additional Tips
Any pastry shop can offer different versions of heart-shaped cakes, but future newlyweds can prepare such a dessert themselves for their own wedding. In any case, it is necessary to first think over the design and design option that will ideally suit the concept of the entire celebration.
The bride and groom need to consider the following nuances.
- Decorating cakes with mirror glaze is considered fashionable. The surface of the dessert is glossy, and you can choose any shade, since food coloring is used. This cake looks unusual even without a lot of decorations, so it’s suitable for almost any wedding.
- For a heart-shaped dessert, you can make different designs on the two halves. The dessert will turn out to be whole, but each guest will be able to choose a piece from the part they liked best.
- If the bride and groom want to make a multi-tiered cake, it is not necessary to make absolutely all the cakes in the shape of a heart. This way you can decorate only the upper tier, and make the lower ones classic round.
- For multi-tiered cakes, you can use a special stand instead of stacking the cakes on top of each other. This way it will be not only more reliable, but also more solemn.
- Before ordering the main dessert, you need to taste the cakes and filling. Future newlyweds can even order a mini cake to test its appearance and taste.
Heart-shaped wedding cakes are often seen at holidays: the newlyweds then place a photo of the dessert in a family album. Future spouses will not have any difficulty finding a suitable option; they just need to decide in advance what the ideal cake should be. Whatever it is - large, small, multi-tiered or flat - it should be tasty in any case, this is what you should focus on first.
admin 115
Previous article
Dreamy and romantic wedding in Tiffany style: hall decoration in the photo
Next article
How to make buttercream for cake decoration at home
Creams prepared for decorating cakes at home can be very different. The only thing they have in common is impeccable taste. But from my own experience I can say that butter cream is the incredibly delicate and lightest cream. It looks like white foam, with a rich, milky, neutral taste, which can be combined with various glaze and cream recipes. I guarantee that if you do everything correctly according to the specified recipe, the foam will be very stable and hold its shape for a long time, which is very beautiful when decorating cakes.
Vegetable cream is an emulsion of vegetable oil and fats, as well as stabilizers. The taste of this product is very similar to the natural one. The plant analogue is denser, thicker, with a stable consistency. According to the recipe given below, from one liter of such cream you can prepare three liters of whipped foam for decorating the cake. This cream is produced in containers with attachments that are convenient for decoration. You can often find them in markets - whipped cream in a can.
Natural cream is a very high-calorie, fatty product with a rich milk taste. They come in white or with a slightly yellow tint. Only those with a fat content exceeding 30% are suitable for decoration. Less fatty ones will either not be able to be whipped, or they will fall very quickly. They are less airy, unlike plant ones, and more capricious.
If the technology for preparing the sweet mass is not followed correctly, they will easily settle or spread. However, two weighty arguments can be put forward in their favor - taste and healthfulness, in contrast to the low-calorie nature of their plant counterpart.
Don't get too carried away with vegetable creams. They contain many preservatives and stabilizers. This is, rather, an emergency aid for the housewife when she simply doesn’t have enough time to tinker with a natural product. This cream does not use sugar, so it has a neutral milky taste. Thanks to this, vegetable cream can be combined with any type of baked goods. You can add powdered sugar to the cream, thereby sweetening the confectionery product.
It is perhaps beyond the power of other described masses to compete with natural whipped cream as a decoration for home-baked goods. As soon as you think about baking and decorating a cake with whipped cream at home for the first time, I advise you to choose an industrial product. The packaging will indicate the fat content percentage and shelf life of the cream.
The ideal option should not contain anything else other than the cream itself. The minimum percentage of fat content of industrial cream is 10, and the maximum is 42. In the market from grandmothers you can buy a product with a fat content of 50% or more, but you cannot get a high-quality cream from it. Based on the recipe, when whipping you will get natural butter, but not whipped cream. The optimal percentage of fat content of cream, which after whipping is suitable for decorating baked goods, is 30-40.
To create the creamy mass you will need:
- 200 g cream;
- 2 tbsp. l. sugar or powder;
- 2 tsp. vanilla extract.
Step-by-step recipe with photos
- Cool the cream thoroughly and pour into a clean, dry bowl.
- Add sugar and vanilla extract (you can use any other flavoring if you wish).
- I whip the cream with a whisk. It may be more tedious and longer, but the sugar has time to completely dissolve. Plus, when whipping with a mixer, you can overdo it and get butter. Gradually the cream thickens and increases in volume.
- Continue the process until the product is so fluffy and thick that it will hold its shape.
- Or it’s good to stay on the rim and not fall.
Video recipe for cake decorating cream
I want to share with you one recipe that I found on the Internet. There is a difference here from the classic whipped cream, and because of this it is more expensive, since cream cheese is also used. But the result exceeds all expectations. Having prepared such a sweet mass, all you need is your imagination on how to beautifully decorate the cake. Take a look and you won't regret it.
Size and weight
Before you start cooking, you should calculate how many servings you will need. This depends on the number of guests, as well as on their taste preferences, because someone eats a spoonful of dessert “for the sake of decency,” while others ask for more. One serving is approximately 150 g.
It is also better to calculate the weight before starting cooking, because the shape of your product depends on it:
- If the cake is heavier than 3 kg, then it is better to make it multi-tiered. This way the structure will be stable and will definitely not fall apart during transportation;
- If the weight of the wedding cake exceeds 5 kg, then a third tier is required;
- The maximum number of tiers that can be prepared at home is five. If you try to make the cake taller, it will turn out unstable;
- Each subsequent tier should be made lighter than the previous one by 2-3 kg;
- The bottom base should be the largest and heaviest. Other intricate options are possible, but their implementation requires extensive pastry experience.
