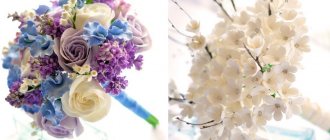
During the period of preparation for the wedding, it is not necessary to purchase all the necessary wedding attributes in specialized stores or from private craftsmen; some accessories can be made with your own hands. Such details also include the groom's boutonniere - a flower that matches the bride's composition, which is attached to the pocket or lapel of the jacket. Recently, wedding flowers made from satin ribbons have become fashionable; any girl, even if she has not previously resorted to needlework, can make such an attribute with her own hands, spending a minimum of time.
Photo for inspiration
Where did the tradition come from?
The word “boutonniere” came into Russian from French; literally translated, it means “flower in the buttonhole.” The attribute itself has been known since pagan times. Men attached a small bud to their wedding vestments before the ceremony, it was believed that this would scare away evil spirits.
Different cultures believed that if this was not done, evil spirits could lead the groom astray from his chosen path, and the wedding would not take place. According to other beliefs, the absence of a boutonniere could provoke misfortune with the bride, so men strictly adhered to this tradition.
In the Middle Ages, the attribute began to be used by knights - by pinning a flower to their clothes on the side of the heart, they said that they were in love and faithful to their lady. At that time, only noble people wore boutonnieres; the miniature bouquet was made by servants. To keep it fresh longer, it was placed in a small flask with water and attached to clothing.
According to the established tradition, after the bride price, the groom gives his beloved a bouquet, and she, in turn, attaches a boutonniere to his suit. You can place it in the main flower arrangement in advance. Then, after the groom gives the bride a bouquet, she will take a flower from it and attach it to her future husband on the side of her heart as a sign of eternal love, as happened in Rome.
In the modern wedding tradition, a boutonniere is more of a tribute to tradition; no sacred meaning is attached to it. This attribute can be ordered from a florist or made by yourself. For this you can use both natural and artificial plants. Usually the bride is responsible for making a mini-bouquet, so the girl can use her imagination and create a unique composition.
Important! The groom should fasten the boutonniere on the left side of the pocket or lapel of his jacket. If the attribute is also made for guests, single men attach it to the left, married men to the right.
How to make kanzashi wedding boutonnieres step by step
Prepare the accessories necessary for making wedding accessories. Delicate squares of peach, cream and soft pink will be used to create three buds of wonderful roses. Green pieces in two formats are necessary for the leaves of the composition. The gold lace adds a sparkling touch.
To make leaves from strips of green satin, follow simple hardware processing steps. Dome both the wide and narrow sections, then singe the edges. But in wide details, stretch the cut edge to get a slight wave, then the leaves will look more believable. And bend the wider green leaves at the base to create oval details.
Next, prepare another type of oval kanzashi petals. Take all the prepared parts in pastel shades. Round off with sharp nail scissors, then singe the sections. But this step is needed only to eliminate protruding threads, and there is no need to stretch the satin. Make folds at the base of each petal to make it more voluminous and teardrop-like.
For one boutonniere you need to make 3 roses of different shades, absolutely identical. Prepare 17 petals of each color.
Glue the first row of 6 wavy green leaves onto the felt circle.
Lay out the petals to simulate flowers. Each rose will consist of 5 rows and three double-sided stamens (or six single ones).
Cover 3 double-sided stamens with three petals, directing them inward, forming a bud. Then add 4 petals inside too.
The third and fourth row will consist of 5 petals.
Model a flower. Apply glue to the front side of the petals of the two outer layers so that the bud is open.
Model the last fifth row from narrow green petals, gluing them in a circle.
Make beautiful delicate roses in cream, peach and pink colors.
Add a second row of green petals of the same size to the felt base. And also glue loops of gold laces. You will have a total of three pairs of loops since we are using different sized laces. To the same golden loops add two double-sided stamens.
Start gluing the roses on top.
All flowers are glued to a felt base with green leaves at an angle.
Make an elegant wedding accessory. And in order to attach it to a dress or jacket as a boutonniere in the future, add a pin at the back.
The diameter of the finished product is 9-9.5 cm - a very elegant miniature that is sure to attract the attention of others. And of course, the method of application proposed here is far from the only one, because such a bouquet of roses will also look beautiful as a girl’s hairpins or as decoration for a handbag, purse, or cosmetic bag
| Comments to the news “Wedding boutonnieres Kanzashi. Master class with photos step by step" already 0:
Interesting on the web:
E-book “The best handicraft master classes.”
After that, click the “Get book” button.
"Masterclasses" 2011-2017
. All articles on the site are copyrighted, copying is strictly prohibited. In case of partial citation, a direct indexed link to the “Masterclasses” website is required.
Attention! It is forbidden to use expressions in the form of obscene and insulting. HTML tags and URLs are not allowed
Types of accessories
During the period of preparation for the wedding, it is not necessary to purchase all the necessary wedding attributes in specialized stores or from private craftsmen; some accessories can be made with your own hands. Such details also include the groom's boutonniere - a flower that matches the bride's composition, which is attached to the pocket or lapel of the jacket. Recently, wedding flowers made from satin ribbons have become fashionable; any girl, even if she has not previously resorted to needlework, can make such an attribute with her own hands, spending a minimum of time.
As such, there is no division of boutonnieres into varieties; they can be roughly divided into living and artificial. A mini-wedding composition can also be classified according to style - if the celebration is thematic, then all the attributes must correspond to the general idea.
If earlier a separate large flower was used as a boutonniere, now there is another option - creating a real miniature bouquet from one main plant and several additional ones. A boutonniere for the groom made from fresh flowers can carry a deeper meaning, according to the language of flowers.
The following plants are commonly used:
- Rose. The most common flower for weddings. A white bud means innocence, a red boutonniere for the groom means passion, pink means the beginning of love, yellow means happiness and joy, and orange means intoxicating feelings.
- Peony. A boutonniere for the groom made of peonies, regardless of the shade, symbolizes love, beauty and protection. This is one of the noblest flowers in China; only noble people could grow it.
- Lily. A large bud symbolizes purity, wealth and prosperity in the family.
- Lilac. If the wedding takes place in the spring, lilac is one of the best options, since it is identified with the first and only love.
- Calla. Symbolizes love blessed by higher powers.
- Jasmine. In some countries, modesty and purity of love are attributed to this flower, in others it is believed that it symbolizes passion and ardor of feelings.
- Mistletoe. It has long been considered a symbol of lovers.
- Daisy. Symbolizes eternal pure love.
- Aster. Identified with grace, sincerity and love.
Depending on the style of the wedding, the boutonniere can be supplemented with other natural elements at your discretion. For example, cereal ears, bird feathers, wildflowers, twigs with berries, leaves or blades of grass of bizarre shapes are suitable.
A boutonniere made from artificial materials also has its advantages - it will not lose its original appearance during the celebration and will remain with the newlyweds for many years as a symbol of strong love. To make an attribute, satin ribbons, beads, pieces of fabric and other materials can be useful.
Attention! It is not necessary to follow the language of flowers; you can use any plants you like if they suit the image of the groom and the style of the wedding as a whole. However, if it is important to you what flowers symbolize, we examined this in more detail using the example of a wedding bouquet.
Final assembly of the boutonniere
When the main satin ribbon flower is ready, you can move on to creating your own boutonniere for the groom. To do this, you need to thread a wire through the finished bud and bend it into a stem. To make the structure stronger, you can thread two identical pieces of wire perpendicular to each other, and then also bend them downwards. The wire must be wrapped with green decorative tape.
You can add various decorations to the main flower, for example, you can make decorative greenery with your own hands using the principle of making stamens or add leaves cut out and flame-burnt from green satin ribbon. Having collected all the elements together, you need to form a single stem of the boutonniere from wire and decorative ribbon.
If desired, the assembled boutonniere can be decorated with a light “skirt” made of organza or tulle. You can also glue rhinestones or beads onto the main bud if they are in harmony with the groom’s outfit and the bride’s bouquet. The finished accessory is attached to the jacket using a small safety pin.
Comments (0)
Manufacturing technique
The most traditional flowers used as a boutonniere are roses, but you can choose others: peonies, dahlias, poppies, daisies and even the most unusual fantasy flowers. All of them are made using the kanzashi technique. This is the Japanese art of folding fabric into flowers, similar to origami. Any ribbons can be used: organza, nylon, rep, but satin ones are more affordable and look more impressive.
To make flowers using the kanzashi technique you will need:
- satin ribbon 5 cm and 2.5 cm wide;
- a piece of felt or cardboard for the base;
- threads with a needle;
- candle or lighter;
- scissors;
- beads or buttons for the middle;
- metal tweezers;
- glue gun
If you are using satin fabric rather than ribbons, it is convenient to cut it into strips with the sharp end of a heated soldering iron - then the edges will not fray.
First, individual petals are made; based on the method of folding the tape, they are distinguished:
- sharp petal - can be double or triple;
- narrow sharp;
- round volumetric;
- round flat;
- elongated flat;
- trapezoidal;
- complex petal.
Using basic types of petals it is possible to create a wide variety of flowers.
For a boutonniere with daisies, a voluminous round petal is used. You need to cut the white tape into squares. Fold each square in half, base up. Bend the corners towards the center and glue them. Trim the bottom part, grab it with tweezers and burn it on a candle or lighter. Straighten the top into a rounded shape. You will need from 7 to 14 such petals. Cut out a base from felt or cardboard and glue the petals in a circle, end to end. Glue a button wrapped in yellow ribbon into the middle.
For a lush peony, it is better to take a ribbon of several shades of the same color. It is necessary to cut 5-6 small round flat petals and 25 large ones. This can be done using a cardboard template or randomly. Burn the edges of each petal in a candle flame, and the heating will cause the petal to bend slightly, which will add liveliness and naturalness to the flower. Make a center out of a square of ribbon by wrapping it around a piece of cotton wool and pulling it into a ball with thread. Around the middle, stick first small petals, then large ones in a checkerboard pattern.
It is better to glue the last two rows with the curve outward so that the flower looks open.
This flower is made from sharp narrow petals. To do this, cut the tape of the required width into long pieces (at least 7 cm). Fold each one in half. Cut one end at a 45 degree angle and flame seal. Bend the remaining free ends to the other side and glue them. For a dahlia, it is better to make 20 large and 15 small petals.
The flower is assembled in a circle onto a felt base. First, the bottom row is glued, and then each subsequent row moves towards the center. The smallest petals or a bead are glued into the middle.
There are many ways to make this flower; you can use a whole ribbon, laying each tier and securing it with glue, or you can make separate petals. Both round flat and trapezoidal ones are used.
In the first case, a sufficient number of round-shaped blanks are cut from the tape, the edges of which are scorched over a fire, stretching a little so that the petal has a curved “living” appearance. Roll a ball from a piece of cotton wool and paste it with two overlapping petals to form the center of the flower. Each subsequent row is glued, slightly moving downwards. The rose turns out voluminous and lush.
For the second method, the square is folded in half, the corners are folded towards the center and the lower part of the resulting diamond is cut off, singeing and sealing the edge. The assembly of the rose is done on a felt base, gluing the petals in a checkerboard pattern. The flower will turn out quite flat, which is convenient to use when creating jewelry for a belt or bracelet.
The base on which the flowers will be attached should be quite rigid, but light. It is made from cardboard covered with fabric or thick felt of a suitable color. Flowers are attached using hot glue; if desired, leaves from green satin ribbon, beads, artificial ears, bows, and lace are added. For a wedding boutonniere, a thin fishing line with beads strung will be suitable.
Special latches for brooches are used as fastening, and pins are used as improvised means. It is convenient to make a small loop of elastic on the back - then the boutonniere can be threaded into a hairband, belt, or tie clip, making it a universal decoration for any occasion.
Do it yourself
Let's consider the most sophisticated options.
Mini composition
How to make a boutonniere for the groom? The easiest option to create a mini-composition is to use one large bud and several branches with small inflorescences or berries. Many people prefer to choose a rose, lily or kala for this, which are suitable for almost any image , and the shade can be selected depending on the color of the groom’s suit.
To make a boutonniere, you will need the following materials:
- 1 large fresh flower (you can take several, with a reserve);
- sprigs of gypsophila or hypericum;
- green tape;
- floral wire;
- safety pin for fastening;
- scissors.
Before creating a boutonniere, you need to cut the stem of the plant at an acute angle and place it in water for at least 4 hours, this will allow the bud to stay fresh longer. It is advisable to decide in advance on the desired length; usually 1 cm of stem is enough to create a durable composition. It is recommended to dip a cut of a flower in liquid paraffin or wax so that there are no wet spots left on the groom’s suit.
Then you need to cut two pieces of wire approximately 7 cm long, pierce the stem crosswise with them as close to the bud as possible and bend them parallel to the stem. Additional plant branches also need to be strung on floral wire, bent on one side with a hook. Having collected all the elements together, you need to intertwine the wires together and wrap them tightly with tape. The finished boutonniere is secured with a safety pin.
Gypsophila and hypericum are more suitable for roses or peonies, and for lilies and callas it is better to choose greens without inflorescences, but with larger leaves.
In the form of a mini bouquet with lavender
If the wedding will be held in the style of Provence, rustic, vintage, or the newlyweds simply decided to hold the celebration in the fresh air, it is best to make a flower arrangement of wildflowers. In this case, lavender is often chosen as the base, which symbolizes admiration.
You can use lavender as a single composition, wrapping it in a kind of linen wrapper. In addition, you can add additional elements - spikelets of cereals, thin green blades of grass or small wildflowers in pastel shades. This boutonniere should not be weighed down with bright accents or large buds. You should not use wire; it is better to secure the mini-bouquet with twine or other material that suits the style.
Boutonniere made of ribbons and twine
An original boutonniere can be made from ribbon, twine and gypsophila. This accessory is perfect for a nautical themed wedding!
- ribbon;
- twine;
- scissors;
- sprig of gypsophila.
Time: 20 minutes.
Cut two 10 cm long ribbons. Cut the ends into a “V” shape.
Cut the twine 20 cm long. Fold the ribbons in half and tie them with twine.
Wrap the twine three times around the ribbons and hide the end.
Insert a sprig of gypsophila under the twine. The boutonniere is ready!
Chamomile
For a boutonniere with daisies, a voluminous round petal is used. You need to cut the white tape into squares. Fold each square in half, base up. Bend the corners towards the center and glue them. Trim the bottom part, grab it with tweezers and burn it on a candle or lighter. Straighten the top into a rounded shape. You will need from 7 to 14 such petals. Cut out a base from felt or cardboard and glue the petals in a circle, end to end. Glue a button wrapped in yellow ribbon into the middle.
Rose using kanzashi technique
The kanzashi technique has become widespread among modern needlewomen; it allows you to create real works of art from satin ribbons. This skill is difficult to master only at first glance, but in fact, any girl can make such a flower for her groom’s boutonniere with her own hands, only by showing diligence and patience.
To create a rose you will need satin linen 5 cm wide, glue, tweezers, scissors and a candle. You can take two satin ribbons of adjacent shades to create the volume of the finished bud. You need to cut a lot of squares with a side of 5 cm; it is better to prepare them for future use in case of unforeseen situations. Each square is folded in half diagonally and the other two are folded towards the resulting vertex to form an equilateral rhombus. Its lower side must be cut in a straight line and scorched over a candle flame; the same must be done with the sides so that the ribbon does not unravel.
To assemble a rose for a boutonniere, you first need to take one of the light-colored petals and apply glue to it parallel to the base at a distance of about 1 cm, then twist the piece into a tube. When the glue dries, you need to apply it to the second petal in the same way and wrap it around the first. Similarly, you need to glue the following blanks to the base, trying to give the bud the appearance of an opening rose. When the flower reaches half the intended size, you need to start gluing the darker petals.
Simple satin rose
The rose is considered a classic flower for wedding decoration and, in particular, the image of the bride and groom. If the option of a living queen of flowers is out of the question due to allergies in the young man or wedding guests, you can easily make a bud for a boutonniere with your own hands, and it will be almost indistinguishable from the real thing. In addition, this option will look more original and will show that the bride is ready to try for the sake of her future husband.
To make an open bud, you will only need a medium-thick satin ribbon, pins and a needle and thread. The shade of the material should be chosen based on the color of the groom’s suit and the overall decoration of the wedding. You can use gradient coloring, which is characterized by smooth transitions from light to dark shades.
It is necessary to bend a small section of the tape on one side to form a right angle; for convenience, you can secure the workpiece with a pin. After this, you need to fold the corner and bend the ribbon to it, forming the petals of the desired splendor. When the rose reaches the desired size, you need to cut off the remaining tape and secure the structure by stitching it from the bottom with threads.
Pros and cons of boutonnieres made from various materials
A bouquet of fresh flowers looks lively and stylish, but is very susceptible to breakage and premature fading. Advantages of the accessory: a huge variety of fresh flowers, there is a wide choice to suit any style of clothing of the bride and groom. The composition can be made in the same style as the wedding theme. The ribbon accessory is very easy to wear and attach, it will not break. The downside is that it is very difficult to make for a non-professional. By contacting a specialist, you will receive an accessory that will look modern and strong. Artificial flower boutonnieres are very versatile, but many people have a very biased attitude towards artificial flowers.
A wedding is a bright event in the life of the bride and groom. A hand-made boutonniere, whether made from ribbons, fresh or artificial flowers, will add completeness to the suit and evoke a flow of tender emotions in the groom. Looking through wedding photos and seeing a lovingly made boutonniere on the groom, you will return to the memories of a wonderful event in your life... to your bright and ideal wedding in every way.
What if you make mini bouquets yourself?
When the bride and her bridesmaids love to craft, they can make many different types of boutonnieres on their own. Several types of flowers (some can be purchased at the market, others - in florist shops, others - picked in a field or garden), branches of bushes, other accessories and fabrics, for example, tulle, organza (you can buy inexpensive leftovers at a fabric store) and a little patience . Well, the technique for making such boutonnieres is extremely simple, the main thing is to secure the cotton pad with a nutrient solution with tape, after first piercing the stem with floral wire. And then arrange the boutonniere according to the style of clothing of the witnesses or the type of similar decorations of the newlyweds.
Master class on creating a boutonniere from ribbons for witnesses
The accessory for the second most important people at a wedding should be different from the one used for the bride and groom. The bouquet simply must be inconspicuous, but at the same time complement the image of the newlyweds’ friend.
It is recommended to purchase such jewelry in one place. If you want to do them yourself, then you need to do them for everyone, not just the witnesses.
A simple satin rose will be a great decoration for the groom's friend. It can be supplemented with artificial branches. This decor will be especially relevant if the bride’s bouquet consists of similar flowers.
Peony is an equally popular flower for boutonnieres. It goes perfectly with absolutely any witness outfit. Moreover, a peony can have a wide variety of colors.
In order to make such a flower, you just need to prepare the necessary material and then follow the instructions. You can buy such jewelry ready-made if you can’t do it or don’t want to make it yourself.
Necessary materials
To get started, you need to prepare:
- thread and needle;
- ribbons of the required colors, 2.5 centimeters wide;
- scissors;
- candle or lighter;
- pin or clip;
- a button to match the color of the composition;
- ruler.
Stages of creation
- It is necessary to cut the tape into different pieces - 5 pieces. 6 cm each, 7 pcs. 11 cm each, 6 pcs. 8.5 cm each, we hold the cut edges under fire so that they do not fray.
- The longest segment (11 cm) should be bent in the middle to form a right angle. The side that is directed to the right bends back and is compared with the base.
- We string the base of the petal on a long thread, so it is necessary to create the first circle of petals. The same manipulations must be done with ribbons of 6 cm and 8.5 cm.
- After all the parts are ready, you can connect them using a thread and a needle, threading it from the largest part to the smallest. Next, a button is sewn on, secured on the wrong side of the composition, the clip can be glued with a hot gun, and the pin must be sewn to the flower using a piece of felt.
To make a boutonniere for the groom from ribbons, you don’t need to know much, you just need to strictly follow the recommendations, and then the flower will turn out perfect. If you don’t want to spend your precious time creating a bouquet, you can purchase it in specialized stores or on the Internet.
Peony from individual petals
Peony is considered a noble flower, since in ancient times in the countries of the East only noble people grew this plant in their gardens. Today, peony is found in almost all countries, and its popularity does not fade. From satin ribbons you can make a high-quality imitation with your own hands, very similar to the original. To do this you will need:
- satin ribbon of a suitable shade 5-6 cm wide;
- thin threads to match the color of the ribbon;
- needle;
- scissors;
- glue gun;
- wire;
- yellow glitter or microbeads;
- pattern paper;
- candle and matches.
To make a peony from satin ribbons with your own hands, you must first make a pattern of the petals. To do this, on paper you need to draw a blank 5 cm high or a little less in the form of a wide heart with the tip cut off in a straight line, the base should be approximately 25 mm. Using this pattern, you need to cut 6 identical petals, then reduce the workpiece by 5 mm and cut out the next 6 elements, then repeat the procedure again. As a result, you should have 18 petals in 3 groups of different sizes.
Light the candle and burn each petal in turn on all sides over its flame. To do this, carefully take the workpiece with both hands and bring one edge to the fire, and when it is scorched, immediately stretch it in different directions. This is done so that the petal becomes wavy, life-like. When all the edges are singed and stretched, briefly place the workpiece over the flame, holding it with tweezers until it takes the desired shape.
In order not to spoil the cut out petals, first practice on the remaining unnecessary piece of satin.
Then you need to make stamens, for this you need to cut several pieces of wire approximately 5-6 cm long. You need to apply a drop of glue to one end of each piece using a gun, then dip the future stamen in glitter or microbeads and form an even drop. When the stamen is dry, you can additionally paint it with clear nail polish to create a glossy surface.
The last step is to assemble the peony from satin ribbons together; to do this, you need to sew 6 large petals together at the base using a needle-forward seam, leaving a hole in the middle for the stamens. When the base is ready, you need to place the prepared stamens inside the hole and secure the structure by stitching it again from the wrong side. After this, all that remains is to sew on all the remaining petals, starting with the medium ones and ending with the small ones.
DIY ribbon boutonnieres for guests
This decoration on the guests indicates that the bride and groom consider them the people closest to their hearts.
Thus, clearly highlighting those who are truly dear. In some cases, the bracelet is worn only by young boys, unmarried girls and children. Moreover, each decoration should be different in size and design. The bride and groom simply have to have a large bouquet, the witnesses have a medium bouquet, and the rest have the smallest ones. Very often, such an accessory for invited people is made from ribbons.
This is interesting: Together we choose wedding hairstyles for guests
After all, this material is durable and allows you to preserve a long memory. Such decorations can be combined with various laces, artificial branches, etc.
Handmade boutonnieres are especially appreciated. Most often, such creations are created by the bride herself or her bridesmaids.
Why are witnesses needed?
How the celebration will go depends largely on whether there are witnesses at the wedding. The groom's friend and the bride's friend are the main assistants of the newlyweds during the pre-holiday events (bachelor party, bachelorette party) and the wedding itself.
They do everything to make sure one of the most important days in their friends' lives goes perfectly. The newlywed's friend watches her dress and appearance in general. The best man controls the atmosphere at the wedding, smooths out conflicts between guests, makes toasts and congratulations.
Together with the toastmaster, they conduct competitions and quizzes, helping him with props and making sure that everyone present at the celebration is happy and cheerful.
Florist advice
In your choice, you should not ignore the recommendations of professionals. Even in salons where flowers and bouquets are sold, real specialists can help you with advice.
- As mentioned earlier, the color of the bouquet depends on the color of the wedding dress. But this does not mean that the flower arrangement should be the same tone as the dress. The ideal wedding bouquet is a bouquet that is one or two shades darker than the wedding dress.
- If after the wedding ceremony you are planning a long trip around the city, taking photographs, or simply the circumstances are such that you need to carry the bouquet with you for a long time throughout the whole day, then using a special capsule or porta bouquet holder with floral foam will help preserve the freshness of the bouquet.
- In order for flowers to fit perfectly into the wedding ceremony, they must be combined not only with the image of the bride, but also with the groom’s boutonniere. Thanks to such a seemingly trifle, an absolutely complete and amazing image of the newlyweds will be created.
- A short bride in a dress with an A-shaped silhouette should choose a round bouquet. In this combination, the bride and the bouquet will look very harmonious.
Slender and tall girls should pay attention to the cascading form of the flower arrangement, in which some of the flowers seem to fall out of the bride’s hands and resemble a waterfall descending from her hands. For short brides in a dress with a straight cut, a vertical mono-bouquet, the so-called wand of flowers on long stems, is suitable. This look looks elegant and laconic at the same time.
- A frame-shaped bouquet is for those who like to experiment. From the frame you can make any shape of a bouquet: a butterfly, a heart hat. And attach cut buds and petals to the frame. Ideal for lovers of everything unusual, those who like to surprise others.
- Truly extravagant girls, whose dress style allows them to use a bright bouquet, can complement it with dried fruits, succulents and wild flowers. Bunches of rowan berries, sprigs of berries, cornflowers, and bells can add special beauty to a flower arrangement.
If the bride is afraid of the discomfort that wearing a bouquet can bring her, then you should turn your attention to a bouquet-bracelet, which is attached to the hand using special ribbons and does not cause inconvenience. In a delicate bouquet on long stems using greenery and wild flowers, it would be very appropriate to use a rope rather than a satin ribbon. Such a bouquet will greatly refresh the bride’s image and create a wonderful atmosphere for those around her.
To learn how to put together the perfect bouquet for the bride, watch the following video.
Real or artificial flowers, is decor needed?
All signs agree on one thing - only fresh flowers are suitable for a bouquet, hair decoration and bride’s dress. Artificial ones, no matter how well they are made, immediately “cheapen” the image. In addition, they are inevitably associated with a cemetery, grief, sadness. Their other meaning is falsehood, insincerity of feelings, short-term relationships.
A wedding bouquet of artificial flowers, no matter how beautiful it may be, is a categorical taboo for any reason
It is very difficult to accidentally leave or lose a wedding bouquet “bracelet”, thereby depriving yourself of family happiness
But at the same time, there is also a tradition of throwing a bouquet. So that the wolves are well-fed and the sheep are safe, they order a “double” bouquet. This composition looks like the main bridal bouquet, but is still a little simpler and, accordingly, cheaper. It can be created from fabric or paper flowers and even soft toys and sweets. The weight of the composition is minimal, completely eliminating the risk of injury to those wishing to catch it.
The “understudy” of a wedding bouquet may well be simpler than the original
Such bouquets look very original, do not have an “expiration date”, and do not carry any negative meaning. Therefore, more and more often they began to be ordered not only as a “understudy”, but also as a souvenir, for example, for bridesmaids, mothers-in-law and other close female relatives (sisters, cousins).
A “double” bouquet of artificial flowers is a very unusual souvenir from a wedding
Video: do-it-yourself duplicate bouquet
The youngest wedding guests can be given these bouquets as a souvenir.
The decor of wedding bouquets can be very diverse. Most often used for decoration:
- Rhinestones, beads. There should not be too many of them - decorations should emphasize the individuality of the bouquet, and not hide the beauty of fresh flowers. It makes sense to show the florist your decorations in advance so as not to overdo it.
- Berries. The bouquet turns out to be exclusive, bright and “seasonal”. They decorate it, for example, with rowan berries, viburnum, rose hips, and even “Chinese” apples.
- Cones and twigs. Willow will fit well into a spring bouquet, and cones of thuja and decorative spruce will fit into a winter bouquet. Succulents look very original.
- Ribbons. Both simple and stylish. If they are chosen to match the dress, the shade should match it exactly. For a tight-fitting dress or an A-line silhouette, you can use long ribbons.
- Lace. Used only if the bride's dress already has lace inserts. The material should be the same or at least similar to that used in the outfit.
- Embroidery. Embroider ribbons or a piece of fabric that is wrapped around the bouquet. A universal option - monograms of the newlyweds, wedding date, wishes. For weddings in folk style, appropriate ornaments are suitable.
- Bundles or twine. An ideal addition to a bouquet at a beach or sea-themed wedding.
- "Corset". For the “leg” of the bouquet, a whole “sleeve” of fabric is sewn, fastened with buttons or hooks. It is decorated with rhinestones, embroidery, and pearls.
- Wire. The stem of a bouquet of several catchy flowers is wrapped in silver or colored wire with beads strung on it.
- Brooch or pendant. One of the latest trends. The decoration is pinned to the ribbon or sewn to it, put on a chain and wrapped around the leg. Of course, it should match the bride's jewelry.
- Mascot. Semi-precious stones in a simple frame can provide newlyweds with protection from the evil eye (agate, jasper, moonstone, cat's eye) or strength of feelings (pearl, amethyst, carnelian, rose quartz).
- Beads. The bouquet looks very aesthetically pleasing and “antique”. Suitable for a wedding in the style of “retro”, “jazz”, “Hollywood of the 20s”.
- Themed accessories. They can be very different, most often attached to a tape. The main thing is to comply with the general theme of the celebration (notebook, feather, vinyl disc, angel, fairy-tale character).
A wedding is that event when you want everything to be perfect.
You will have to pay attention to many different little things, including the bride’s bouquet. There are many signs and traditions associated with this accessory; the harmony of the image is also important.
Therefore, it is better to entrust its preparation to a professional florist.