Since ancient times, bouquets of artificial flowers have been used to decorate the interior. Now they are made both to create doubles for the bride, and as an original gift.
Over time, manufacturing techniques and the materials themselves began to change. At first, such compositions were made only from paper, fabric, foamiran, ceramics and clay. Then heavy ceramics and clay, which harden after firing, were replaced with polymer compounds and lightweight plastic. Well, no one has canceled the use of ready-made artificial flowers, which can be bought in many stores. This article describes in more detail what materials are used to create bouquets with your own hands, what their advantages are and how to make them.
Materials and tools
To create floral arrangements, you need to prepare the following materials.
- Floral sponge. It serves as the basis for compositions. It is placed at the bottom of any container - a basket, a hat box, a vase, to fix flowers and other elements. Flowers stuck into it stay fresh longer and can be watered.
- Thin flexible wire. It will be useful not only for strengthening the composition, but also for the manufacture of its individual elements.
- Floral tape is necessary for covering cuts on the stem, wire, packaging and decoration. Its properties are reminiscent of elegant electrical tape made from synthetic non-woven material. It is easily stretched, follows the shape of the element, is tightly and securely fixed thanks to the adhesive layer, and prolongs the life of the cut plant.
- Vases, bouquet holders, satin ribbons of different colors, beautiful wrapping paper, baskets, hat boxes, plugs and other accessories for decoration. We’ll give you a little advice right away: follow fashion trends in floristry. On social networks, subscribe to famous florists or professional communities to keep abreast of all the new products.
- Transparent cellophane film can be used as technical wrapping, for example for transportation or protection against damage.
As for tools, first of all you will need:
- pruner,
- scissors,
- floral knife.
It is advisable to have these tools in pairs: one for household purposes (cutting ribbons, paper, etc.), the other strictly for cutting and processing flowers. Keep your tools sharp at all times. Dull blades damage plants and this negatively affects the overall quality of the arrangement.
- Hot glue gun (the simplest model with a power of 100 to 150 W is enough). It is needed to connect elements.
- Stapler - for the same purpose.
- Wire cutters, thin-nose pliers and pliers for working with wire.
- The color wheel is a very convenient cheat sheet, thanks to which you can accurately choose colors for bouquets and other compositions. For beginners, this is a must-have tool.
Floristry tools must be of good quality so that they are convenient and easy to work with. Cheap models tend to break down very quickly.
Tips and tricks
The rules for caring for artificial compositions depend on the material from which the flowers are made:
- plastic, porcelain or polymer clay are wiped with damp wipes that do not contain alcohol;
- soft material is cleaned with a feather duster;
- latex products are washed with a damp sponge or napkin;
- fabric products can be sent to dry cleaning;
- soft flowers are cleaned using a steam cleaner.
For home decor, it is recommended to purchase flowers made of latex or polyurethane. These materials provide maximum realism, but are expensive. To save money, you can buy artificial plants made of fabric.
Principles of composing floral compositions
Floristry, like any other art, has its own rules and principles that must be strictly followed in order to create a beautiful composition that pleases the eye. Even very experienced florists don’t make bouquets at random.
Ideally, a floral arrangement should meet the following requirements:
- harmony, that is, all elements form a single whole;
- the design matches the chosen style;
- variety of textures and structures of plants;
- a well-chosen color scheme, this is where the color wheel will help you;
- dynamism, the presence of one or more focal points;
- compliance with the golden ratio rule;
- balance of all parts of the composition.
Let's look at each quality in more detail so that you can freely navigate the theory of floristry.
Floristry styles
- The vegetative style suggests that the composition should be as close as possible to the natural image. This style is characterized by a muted color palette; twigs, berries, moss and other natural materials are often used in the design. It is important to ensure that the plants belong to the same season. This is a very difficult style for beginners.
- Decorative style. Any combination of plants is allowed here, the main thing is that they look organic and none of them lose their flavor. In decorative compositions, you can safely use the most unusual finishing materials; the more textured they are, the better. Often used for room decoration and composition using a floral sponge.
- Linear style. The composition is built according to the principle: clear lines, minimum materials, maximum naturalness. Most often, such compositions use plants with curved or long stems, and the elements are arranged asymmetrically.
- Massive style. The composition has a clear form. All elements are tightly connected to each other or to the frame. There are no strictly defined focal points; the colors, size of the buds and lines smoothly transition into each other.
The decorative style is used mainly for making bouquets. The rest are most often found in interior design.
Basket of flowers
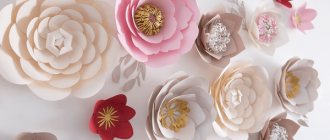
It has been very fashionable lately to give a basket, where the main place is occupied by large paper flowers.
Note!
Ideas for LD (a girl’s personal diary): step-by-step instructions for making it yourself, photo reviews of the best options
Educational soft books made of felt: materials for making, detailed instructions + reviews of plots for books (100 photos)
- Original do-it-yourself valentines - design options, necessary materials, master class for DIY work
A quick and easy way to cut out all the petals is to make a stencil of one petal and then use it as a template. The edges of the petals are curled using a pen or pencil. You need to make a small cut at the base of the petal. The effect of a curved petal is obtained when the cut is glued on top of each other. Using a glue gun, apply a line of glue to the very bottom and glue the petals to the pre-made center in a circle.
The center of the flower may differ in color from the petals. The rest of the flowers are done almost the same way. They change the number, size and shape of the petal. It can be more elongated or, on the contrary, rounded with notched edges. One basket can contain flowers of different materials and, of course, different colors. Glue the flowers on top of the basket filler and the gift is ready.
Dynamics and focal points
If you arrange the elements correctly, the composition will turn out dynamic. Looking at it, a person will move his gaze from one plant to another, and this will not only bring aesthetic pleasure, but will also relax and relieve stress.
The focal point is the most important element that attracts attention in the first place; the entire composition is built from it. Multiple focal points are allowed. This could be a large flower, unusually shaped leaves, varying degrees of bud opening, or different flower positions in height.
How to combine textures in a composition?
Each flower has its own surface of leaves and petals. This is called plant texture. It is very important to take this into account when composing a bouquet. Facts are divided into several groups.
- With a metallic sheen. This includes plants with shiny smooth leaves and inflorescences, for example, anthurium, begonia, as well as with matte foliage, for example, sedum.
- The glass texture is formed by smooth, translucent petals and leaves, such as those of bells and irises.
- The porcelain texture is obtained from the dense surface of the flowers, shiny-smooth or, conversely, slightly rough and matte. These are, first of all, orchids and hyacinths.
- Velvety texture - the petals feel like velvet or soft suede to the touch. This group includes violet, Saintpaulia, and some varieties of roses.
- The brocade texture also implies a soft surface, only more silky, with rich shades. These are marigolds, primrose, gaillardia.
- The silky texture is elegant large petals, smooth and tender, reminiscent of natural silk. The most striking representatives are poppies and anemones.
- The wool texture is characterized by flowers that are similar in appearance and softness to alpaca wool or cashmere. These include astilbe, ageratum, cotton grass, and some flowering herbs.
- Flowers with a somewhat rough rustic texture: helianthus, rudbeckia and others, make bouquets in a rustic style - cute and unpretentious.
When composing a composition, it is customary to combine flowers either as close in texture as possible, or strictly opposite. For example, shiny flowers look great against the background of matte velvety leaves.
Rules of care
In order for artificial flowers to remain attractive for a long time, it is necessary to perform the following work:
- Use a feather duster or a damp cloth to periodically remove dust.
- Spray with water diluted with vinegar once a month for disinfection.
- Do not place flowers in bright sun near a windowsill or balcony, as the petals may burn out.
- It is necessary to touch the artificial stem with tenderness and thrift, otherwise the flower may crumble.
Important advice! To ensure that flower compositions have a lively and pleasant smell, aromatic products are often used. For example, you can sprinkle some lavender oil on lavender leaves. Each flower can have its own unique scent.
Not only a vase and a flowerpot can decorate a home interior. By adding a little imagination, you can create an unusual flower collage. For example, it is enough to purchase a small tabletop fountain and try to decorate it with an artificial composition.
The art invented by the ancient people is still shrouded in great mystery. After all, roses, hyacinths, camellias, like many centuries ago, are copied today in Europe. Perhaps not so luxuriously made of porcelain and gold, but natural and beautiful.
Golden ratio rule
The golden ratio is the basis that every florist must know and strictly observe. It means that the harmony of the composition is achieved by observing certain proportions when assembling it. Thanks to this, the composition looks like a single whole.
In floristry, ratios of 2:3 and 3:5:8 are used. Let's take a closer look at how they are used in practice.
- Height proportion. If you are making a composition in a vase, then you need to take its height into account. It is better to use a ratio of 2:3. The height of the large vessel will be 3 parts, and the flowers, respectively, two parts. It can also be the other way around: the flowers make up 3 parts, and the vase – two. In a bouquet, proportions are calculated starting from the middle of the bunch. The optimal ratio is 3:5. Three parts - bottom, five parts - top.
- The length proportion is calculated depending on the base or diameter of the vessel according to the same principles.
- The proportion of height and length is calculated for horizontal compositions, taking into account the height of the vessel. Here you should adhere to the ratio of 3:5:8.
- For asymmetric compositions, calculate the proportion of the mass of the material. The main mass of colors is 8 parts, the distant one is 5 parts, the near one is 3 parts.
It is useful for novice florists to copy compositions compiled by experienced florists and carefully monitor compliance with the ratios. So, a professional sense of proportionality will come naturally
Symmetry or asymmetry?
Mentally draw the geometric axis exactly in the middle of the composition. If the material is at an equal distance from it, then this indicates symmetry. If all the parts look different, then this is asymmetry.
With symmetry, the main elements are placed in the center of the composition. The remaining elements are less significant; they complement the main ones, emphasizing their color and shape. Symmetrical compositions are usually used on special occasions, as well as when decorating official events and office spaces.
With asymmetry, the main elements are not placed strictly along the axis, but in deviation from it, but it is important to maintain the 3:5:8 ratio, which we wrote about above.
- The main part is usually placed on the left side of the axis, and the remaining elements on the right. The smaller they are, the further away they should be.
- Light flowers enhance asymmetry, dark ones smooth out.
- As a result, the plants look natural, as if we found them in nature.
Asymmetrical compositions are usually used to decorate festive events and spaces intended for relaxation and leisure.
Tips for choosing material
Modern factories offer the following materials for making flowers:
- Textile;
- Latex coated fabric;
- Foamed polyurethane;
- Latex.
Fabric products are the most common, their price is quite reasonable and accessible to everyone. Outwardly, they may be highly similar to their living counterparts, but are still significantly inferior in this indicator to non-woven polymer competitors. To make textiles more realistic, they are sometimes coated with latex, which naturally increases the price.
Products made of latex and polyurethane can boast a high class of realism; they are called “real touch” colors, visually and tactilely imitating natural qualities. They are not afraid of humidity, they can be washed in water, and therefore they are the only ones suitable for decorating the kitchen and bathroom. The only negative is the relatively high cost.
What else is important to know?
Firstly, it would be a good idea to study the language of flowers. Even though this tradition is a little outdated, many people find it very beautiful and romantic. Special reference books will help you learn basic “phrases” and “words”.
Secondly, be sure to take into account the reason for which you are making the bouquet. Some flowers traditionally accompany funerals, others - weddings, dates, birthdays, and others - are appropriate only in business compositions. The palettes and design are completely different in all cases.
Thirdly, many plants are sworn enemies, and some, on the contrary, are friends with each other and even heal each other. Be sure to check the color combinations in the gardener's reference book.
As you can see, putting together a bouquet of living plants is painstaking work that requires the florist to be thoughtful and knowledgeable about the basic geometry and biological characteristics of each flower.
In conclusion
Decorating with artificial flowers can be done independently, the main thing is not to rush, but to think through every action, be guided by your own taste, but listen carefully to the advice of professionals.
In general, a unique decor thought out in every detail will create a special atmosphere. Phytocompositions in the interior will give a finished look to the original artistic idea. With the help of bouquets you can create a unique design, or simply add a “zest” to the overall look. The decor can be remade many times without any problems, creating new combinations of shapes, thus updating the usual home decoration.
Flowers chosen wisely and tastefully will attract glances, and their realistic options will never let your guests doubt their naturalness.
Floristic techniques
Let's look at a few basic techniques for creating a beautiful, harmonious floral composition.
- A boutonniere is a traditional mini composition that complements a man’s suit at a wedding, anniversary, prom and other celebration. It can also be attached to a women's bracelet. One large flower is placed in the center of the composition, green branches and other decorative elements are placed on the sides. On one side, the boutonniere must be flat so that it can be easily secured. Details on how to make a boutonniere are shown here
- The parallel technique is usually used to create tabletop arrangements and vertical bouquets, which are usually given to men. Flowers with large buds are suitable for a bouquet. The essence of the technique: the plants are laid in a ladder, so that the heads of one row are located lower than the previous one. The stems are secured to each other with tape. If you want to create a tabletop composition, you will need a floral sponge and flowers with stems of different heights. It is composed in the same way as a bouquet: one row is lower than the other. How to correctly assemble a bouquet using the parallel technique is shown here
- The spiral technique is used to create most bouquets. To do this, you need to take flowers with even, dense, long stems. The essence of the technique is that when assembling, one flower is placed at a slight angle in relation to the previous one. If you assemble a round spiral bouquet correctly, it will stand on the table without a stand. You can see how to do everything right here
- The asymmetrical technique is very complex; it requires imagination and knowledge of the laws of floristry to create a truly beautiful elegant composition. The bouquet uses flowers, twigs of different shapes and heights. It is desirable that only one element stands out, and the entire composition will be built around it. See more about this here
How to compose a composition, watch in this video
You can even make a bouquet from one flower, the main thing is to decorate it beautifully and unusually, following the rules of floristry, as shown in this video
Flower assembly
The most time-consuming and painstaking work is connecting the parts. First, the petals are assembled near the inner part of the flower. The petals are grabbed one by one with tweezers, the tips of the blanks are dipped in the adhesive composition and connected to the core of the flower, around which they should be located. In this way, a base is obtained, under which the remaining petals are glued in a natural order and correct alternation. In this case, the lower end of the stem is held in the left hand, and the core of the plant is turned downwards. This technique is convenient when assembling large inflorescences, but when fixing the petals of a small flower (forget-me-not, lilac, etc.), the stem can be held with the flower head up. Also, those flowers are held with their heads up, the bottom of the petals of which will later be fixed with cloth or paper - tulips, irises, etc.
The next stage is the connection of the flower with buds on the branch and other elements on the main stem. Having attached the cup to the flower, the leaves and buds are wrapped with silk or paper tape.
DIY artificial flowers step by step
First, let's see how to make artificial flowers with your own hands using the example of a fairly simple plant - forget-me-nots.
.
Fabrics such as satin, cambric, satin or velvet with a small pile are suitable for making this flower. The fabric is folded 8 times and round petals are cut out; If there is no shape, you will have to cut it out manually with scissors. The work requires accuracy and scrupulousness - the appearance of the flower will depend on the quality of cutting. To color forget-me-nots, take bright blue paint, which is applied with a small brush to the edges of the petals - as a rule, the middle of a living forget-me-not looks paler than the tips. Very small petals can be painted with a pinkish-blue tint. After the painted blanks have dried, they are placed on a rubber pad and first the tips of the petals are squeezed out with a small boule from the inside, then the blank is turned over to the front side with tweezers and the center of the petal is squeezed out with a slightly larger boule. The finished petals are placed on a twisted green tube: the upper edge of the tube is slightly greased with adhesive, sprinkled with dry yellow paint and threaded into the petal so that its edges are flush with the tube. After a sufficient number of blanks have been made, take a thin wire and attach 5-7 buds, 2-3 small flowers, 3-4 medium-sized flowers and 2-3 large ones to its upper end. Then, with the help of paper, leaves are grafted - one opposite the other, after which you can add one small flower and a few more leaves. To make leaves, according to the pattern proposed below, blanks are cut out, along the front side of which veins are drawn with tweezers: longitudinal and several lateral. It is advisable to use two tones of fabric color for leaves: light green for large leaves, dark green for small ones. Large leaves are glued from the inside out with a thin stem (liton) made of wire, laid along the entire length of the leaf and retaining a 1 cm tip for fixation to the stem; small and medium leaves are attached to the lower edge. One or two more are attached to this branch, a little shorter and with fewer inflorescences. It is very desirable that the flowers are not monochromatic, but vary in shades. Such branches look very beautiful in a small porcelain vase. If forget-me-nots are made to decorate a dress or hat, then flowers made from velvet look most impressive. Pattern of forget-me-not details:
How to make chamomile
Satin, satin or velvet are suitable for making this flower. For the core of the flower, woolen threads are secured in the center of the wire loop and twisted tightly, securing them with tissue paper. Then the core is straightened, cut in a circle, cutting out a small depression in the center with scissors, like a real chamomile. The edges of the part are smeared with glue and sprinkled with dry yellow paint.
The petals cut out according to the pattern are corrugated with tweezers: first, one longitudinal groove is drawn along the underside of the petal along its entire length, then two lateral furrows are made on the front side, so that the longitudinal groove becomes convex.
The flower is glued with two green stars, the edges of which have a barely noticeable brown color; when gluing stars, the petal of one of them should fall on the free space of the other.
Leaves of different sizes are cut out of green matte fabric, a vein is drawn along them from the inside, then side veins are made from the front side. Each leaf is glued with a very thin lithon (stem) and grafted onto the stem in this order: first small ones, then larger ones, placing them at some distance opposite each other.
Pattern of chamomile parts:
How to make a tulip from fabric
Tulip petals are cut out according to the pattern below from satin or silk of the desired color. Using tweezers, small veins are made on the petals, and then the workpiece is given the desired shape: with a hot boule with a large head, the center of the petal is squeezed out, and a tool with a small head is passed along the edges.
Using tweezers, very carefully pinch a narrow fold in the center of the petal, trying not to damage the spherical shape of the workpiece. From the wrong side, each petal is glued to the middle with white lithon (a very thin stem).
The core of the tulip consists of three small yellow balls connected to each other, surrounded by five brown anthers. Six finished petals are grafted onto this core with silk or paper. The wire stem is threaded into a green tube made of fabric, to the bottom of which leaves are attached.
When making leaves, long longitudinal strips must be made with tweezers or a knife; A tulip bud is made from three corrugated petals, tightly glued together at the edges.
How to make a daffodil
The petals of this flower are made of starched cambric, satin or silk; The bottom of the blanks is tinted yellow. To work, you will need 6 petals, which are folded two together, after which they are drawn along them with tweezers, forming a central groove. Using tweezers, bend the edges of each petal slightly.
The core of the flower consists of five yellow stamens, threaded into a small cambric circle with corrugated edges and tinted with yellow or poor green paint; Also, a red elegant rim is often drawn along the edges of the circle.
Three smaller petals are glued around the core, and the remaining three larger petals are glued into the spaces between them. The flower is inserted into a tube of green cambric, then they take tinted wax or a very thick adhesive composition, which was described at the beginning of this issue, and with moistened fingers make a triangle out of it, which is connected to the tube. The stem is wrapped in green paper. An additional petal is cut from the gauze fabric and used as a cup surrounding the flower stem. This petal is attached to the stem so that it touches the green wax piece.
A flexible stalk about 20 cm long is threaded into a green fabric or rubber tube.
3-5 narrow leaves are attached to the bottom of the stem. Having cut out two sheets according to the diagram, one of them is smeared with an adhesive composition, a thin liton is glued along the sheet, then a second sheet is placed on top and pressed firmly. Using tweezers, the necessary veins are formed on the sheet.
Making a peony from fabric
This flower is made from starched cambric or silk. To work, you will need 48 internal petals of the first size and 10 of the second size. The edges of these petals are slightly crushed with tweezers, after which the blanks are wound onto the finger, pulling quite tightly. After these manipulations, the petals are twisted onto the finger again, but in the opposite direction. The petals prepared in this way are tightly glued to the core so that it is completely hidden from view under the inner petals. These petals are followed by internal blanks of the second size: they are pleated and squeezed out at the edges with a ball, after which five pieces are glued in a row. After these petals there are two outer rows, the middle of which is squeezed out with a large loaf, and the edges are slightly bent back with tweezers. The peony cup consists of five petals: two long and three short. As a rule, these blanks are cut from dark green fabric and slightly painted in a reddish color. Indentations are also made on these petals, and the tips of the blanks are compressed with tweezers. The core of the flower is a tight small ball of pale green color, to which the petals are glued in the indicated order. The branch will require several dark green leaves; the stem will be wrapped in paper of the same dark green color. The half-open buds consist of eight outer petals and five inner ones, which are also crushed with tweezers and squeezed out with a ball. After the petals of the bud are glued to the core, they are squeezed again with tweezers and lightly glued along the edges to give the bud a blooming appearance. Completely closed buds consist of a green ball covered with calyx petals.
How to make an iris flower
This elegant, noble flower is made from starched cambric, silk or thin satin in lilac, lilac, white, yellowish or blue. On six petals, longitudinal grooves are drawn with a brush, the color of which should be darker than the color of the petal itself. On three petals of the third size, either no veins are drawn at all, or a dark spot is placed, which is smoothly shaded so that the upper edges of the blanks are lighter than the main color, and the bottom is yellowish or pale green. The first three petals (first size) are folded in half and pleated obliquely with tweezers, small folds are made on the next three (second size), and a longitudinal convex vein is drawn in the middle (from the wrong side) and the edges of the petal are slightly rounded inward. The last three petals (third size) are scratched on the front side with tweezers; A longitudinal groove is also made on the wrong side, and the edges of the workpieces are slightly pulled out with your fingers. The middle petals are glued halfway through with wire wrapped in paper to match the color of the petals, and small yellow fringe is glued to the last three petals. To do this, cambric or yellow silk is cut into strips 4-5 cm long and 1 cm wide; these strips are plucked out on both long sides so that literally not a few threads remain of the material. This fringe is folded in half, coated with adhesive on the inside and glued to the middle of the petals (from the middle to their bottom). For a more spectacular look of the flower, the last three petals can be made of velvet. The core of the iris consists of yellow stamens attached to a wire: first three small ones, followed by medium ones in the intervals, and the last ones, which bend slightly downwards. Instead of a calyx, the bottom of the flower is wrapped in green film or paper. Long leaves are attached at the very base of the stem.
How to make a rose from fabric
To make a half-opened rose, for its core you will need five petals of three sizes, crimped with tweezers. To do this, three petals of the first, second and third sizes are superimposed on one another and connected at the very base with an adhesive composition. The smallest petal is located closer to the core of the rose, followed by the medium and large ones. These three blanks are folded in half and pinched with tweezers several times along their entire length. Then the petals are slightly straightened and glued slightly obliquely to the center of the flower, consisting of fluffy yellow threads. The outer part of a fabric rose is made like this: first, ten fourth-size petals are glued on, scratched with tweezers, having several noticeable folds at the very top and pressed out with a ball in the center. This is followed by nine petals of the fifth size, which are also extruded in the center, but do not have folds in the upper part - these petals need to be slightly rounded along the upper edges. 10-15 outer petals of the sixth size are prepared in the same way: the center is squeezed out with a loaf, the upper edges are rounded. When fixing all the petals, you must ensure that they fit as closely as possible to each other. This is especially important for the very first petals - in order to get a realistic half-opened rose, these petals must almost completely hide the core. As a gluing to the bottom of the color there is a “star” made of dark green dense fabric; This piece is followed by a cup made of green wax or cotton wool. To make it from cotton wool, just wrap a small amount of it under a star, cover it with green-tinted adhesive, lightly sprinkle with starch and immediately blow it off so that velvety dust remains.
How to make a bouquet of artificial flowers
Having studied the basics of the ancient craft of making artificial flowers, you can try your hand at making various compositions: bouquets, garlands, wreaths, boutonnieres, etc. Sometimes the length of the stem of the flower made may not be enough to make a bouquet - in this case, it is recommended to graft a thin wooden wire onto the product skewer or twig of the required length.
Having roughly connected the stem of the flower and the twig that extends it, wrap the place of fixation with cotton wool and mask the whole thing with a strip of green paper or fabric about 1 cm wide. When connecting branches in a tree or bush, it is advisable to use strips of paper in a bark shade: dark or light brown for older branches or light green - for young shoots. Also worth remembering. that the leaves located at the top of the branch are usually lighter than the middle ones, and the middle ones are lighter than the lower ones. The basis for a garland of artificial flowers is a wire frame wrapped in cotton wool and paper. Separate elements are attached to this frame with a piece of paper or a strip of paper: flowers, buds, twigs. If a flower arrangement is created in a basket or large vase, then fixing flowers and branches in these vessels will be much more convenient if you fill them with moistened sand. When all the elements of the composition take their places, the sand is masked with moss. If you don’t have enough sand on hand, you can secure the flowers in a basket in a simpler way: the bottom of the stem of each artificial flower is wrapped with napkins or crumpled newspaper so that it looks like a soft onion. Such branches are placed in a basket, after which the “bulbs” are masked with moss. Do not neglect living fern branches - they fit very elegantly into any flower arrangement. Tags: Fine crafts
What is important to know about bouquets of artificial flowers?
The main advantage of artificial flowers over real ones is that they are durable and can be placed in places where real plants cannot survive. If you decide to create a composition of artificial flowers, choose high-quality products. They are very beautiful and look natural, and also last longer with their rich color and ideal shape.
Bouquets of artificial flowers are assembled according to the same principles as those made of real flowers. But here it is important to consider the placement of the composition. We'll give you some interesting ideas.
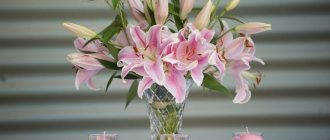
- For spacious rooms, such as a living room, bouquets of roses, peonies, and lilies are ideal. Here you can also use floor vases with tall flowers.
- Place a small bouquet of bright multi-colored flowers on the jardiniere in the hallway - chrysanthemums, asters, gerberas, tulips.
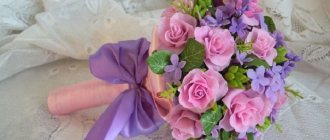
- Delicate compositions of small roses, violets, and peonies will look beautiful on a dressing table or bedside table in the bedroom.
- Artificial flowers in pots will be an excellent decoration for the walls in the bathroom. They can also be placed in the office.
- Small pots of flowers and herbs look amazingly beautiful on kitchen shelves and add coziness to the room.
Also, with artificial plants you can create interesting wall panels, collages and other compositions that will become the main decoration of the interior.
Advantages and disadvantages of artificial compositions
The advantages of artificial flowers include the following factors:
- They do not need to be fertilized, watered and do not require replanting.
- You can leave safely and not worry about who will water your plants.
- They do not get sick and are not attacked by pests.
- They are considered an ideal option for those who suffer from allergies (the most common is to pollen).
- Don’t be afraid that your pets will dig in the flowerpots or accidentally knock them over.
- An ideal option for interior decoration in a hand-made style. You can find quite a lot of photos of artificial flowers made by yourself.
- You can choose the most incredible shades and colors that will perfectly suit your interior.
Despite the large number of advantages, artificial flowers also have disadvantages:
- They don't smell. This may frustrate lovers of floral scents. As an option, you can use floral scents in essential oils.
- Allergic reaction to low-quality materials. That is why you should carefully consider the choice of artificial flower manufacturer. An allergy to dust may be added (this factor can be easily eliminated by thorough daily cleaning).
- They can fade in direct sunlight.
- Cleaning. Periodically, they should still be wiped off from dust and dirt that settles during the day.
- Static composition – it cannot change on its own. She will not be able to grow new shoots or appear buds and flowers.
How to make a bouquet of sweets?
Knowledge of floristry will come in handy if you want to congratulate a loved one in an original way with a sweet gift. For this you will need:
- candies;
- corrugated paper: green for sepals, yellow (or any other color) for petals;
- tape with a green adhesive layer;
- scotch;
- long wooden skewers;
- wrapping;
- small scissors;
- floral sprigs and ribbon for decoration.
Execution order:
- According to the number of candies, cut out blank strips from paper: wide ones for the petals, narrow ones for the sepals. They should be such a length that they can be loosely wrapped around the candy and secured.
- Fold the strip like an accordion, cut out the contours of a petal or sepal with scissors. Repeat the same with the remaining strips.
- Wrap the candy in petals and secure with a piece of tape.
- Wrap the candy in a sepal and secure with a piece of tape.
- Repeat steps 3 and 4 until you run out of candy.
- Attach the resulting buds to wooden skewers with tape, wrap the stem a few centimeters down.
- Collect a bouquet, fasten the stems together with tape or tape. If you wish, you can supplement it with floral branches.
- Wrap in beautiful wrapping paper and tie with matching ribbon.
Done!
Potted crops
Indoor flowers require a scrupulous attitude, but unfortunately, not everyone has the necessary knowledge and skills that help maintain their decorative quality. Plus, potted plants are very picky about many indicators, such as temperature, light, humidity, and require regular replanting, and in some cases special growth restrictions. Sometimes you really want to decorate an empty corner with a green bush in a beautiful flowerpot, but it is likely that due to lack of light it will quickly lose its attractive appearance or even die.
There is a way out of this situation; there are artificial flowers that replace popular indoor plants: anthurium, ficus, azalea, dracaena, dieffenbachia and others. You can not be afraid to leave such decor for a long time unattended; the only care they require is periodic dusting or washing in the shower.Master class: making a flower arrangement in a box
You will need:
- roses with large buds;
- succulents - aeonium, stone rose, pachyphytum, preferably the same size;
- beautiful decorative box and drawer;
- film;
- floral sponge;
- floral knife;
- stapler;
- ribbon for decoration.
Procedure:
- Cut the sponge to the size of the box or drawer.
- Place the film down and secure the edges along the walls with a stapler.
- Place a floral sponge on the film.
- Trim roses so that they are slightly taller than succulents.
- Fill the sponge with plants as follows: a row of succulents, a row of roses, in any direction.
- Try not to let the sponge show between the flowers. You can fill the gaps with any decor, for example, straws made of paper or other material.
- Wrap the box with ribbon and tie it in a pretty bow.
- Wrap in beautiful wrapping paper and tie with matching ribbon.
Select the palette according to the color wheel. Draw a diagram of the arrangement of flowers in advance so as not to accidentally damage the plants when laying them out.
That's all!
How to make it yourself?
By creating artificial flowers with your own hands, you can create a composition that not only matches the interior of the room, but also meets your personal preferences.
What will you need?
You can make artificial flowers with your own hands from fabric or paper. For the first option you will need:
- organza;
- beads;
- needle and thread;
- scissors;
- candle and matches;
- glue;
- paper.
For the second option, in addition to paper, you will need PVA glue and polymer clay.
Procedure
To create artificial flowers from fabric, you will need to follow these steps:
- Draw blanks of petals of different sizes on paper.
- Place the blanks on the fabric and cut out the petals with scissors.
- Burn the edges of the fabric over a candle, thereby removing any protruding threads.
- Form a bud. To do this, you need to connect the petals together (small in the center, large at the edges) using thread and a needle.
- Decorate the composition with beads, securing the beads with glue.
White paper makes good artificial calla lilies. To make such a flower, you will need to cut out several hearts of the required size. Then you should roll out the polymer clay in the form of a small rope and let the material dry for 30 minutes. Next, the resulting “stamen” should be placed in the center of the heart, fold the paper and glue the edges.
Useful tips for beginners
- Before making a bouquet or composition, soak the flowers with water for several hours. You can add Crisal powder to the water. This will help the flowers stay fresh longer.
- Remove all leaves and shoots that will be under water or inside the package.
- Cut the stem at an angle and only in water, using pruning shears or a florist knife.
- For women, it is customary to make round bouquets, and for men, tall, elongated bouquets.
- The optimal number of flowers in a bouquet is no more than three types.
- Use flowers with half-closed and newly opened buds; such a bouquet will last longer.
- Lighter flowers of calm shades should be located along the edges, and darker and brighter ones should be placed closer to the middle.
- You cannot combine exotic and wildflowers in one composition. It's vulgar.
You will find some more useful tips in this video