We all want to please our family and friends by giving them a wonderful holiday gift . These could be balloons, decorations, or something that our loved one has dreamed of for so long. However, sometimes we don’t have enough time to buy a gift or we simply don’t know what to give. In such cases, we present the birthday person with money.
The classic option for packing money is an envelope. It can be made with your own hands or bought in a store. This option is simple and well-known to everyone; they are unlikely to surprise the recipient. How can I replace the envelope and present money in the original packaging ?
A surprise box is a modern interpretation of an envelope for money. To create a box with a surprise you will not need much time and effort, and the result will certainly surprise and delight the recipient of the gift. Even a novice master can handle such a money box.
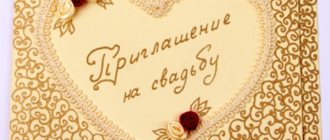
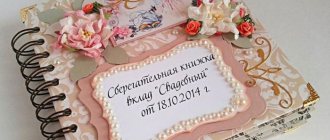
A clamshell box that fans out pages with banknotes or photographs can be made, for example, for your mother’s birthday. Or it could be a beautiful wedding box for money. Anyone who appreciates handmade items will be delighted with the original design of the money storage box. How to make a cute money box with your own hands - see our MK.
Materials needed to create a surprise box
The scrapbooking technique continues to conquer the hearts of craftswomen around the world. To make a scrapbooking surprise box with your own hands, you will need:
- thick cardboard;
- paper with patterns (scrap paper);
- scissors;
- glue stick;
- ruler;
- a simple pencil;
- curly scissors;
- figured hole punches;
- acrylic paint;
- foam sponge;
- decorative elements (rhinestones, sparkles, beads, ribbons, etc.).
How to make a box for a women's gift on March 8?
Template #1
Template No. 2
Template No. 3
It just so happened, but for some reason most women associate March 8 with delicate branches of mimosa and scarlet tulips. That is why when making a box for this holiday, you must remember that there must be flowers on its outside. Whether they are drawn or made using appliqué is up to you to decide. The main thing is that your packaging shows with all its appearance that spring is coming very soon.
If you don't want to spend extra time decorating the box, then invest in scrapbooking paper. If you are ready to work a little, then you can download some interesting template on the Internet, make flowers using it and cover the finished box with floral applique. Also, if you wish, you can simply paint it beautifully.
Gallery: box with a surprise for money (25 photos)
How to make a box for a men's gift on February 23?
Template No. 1
Template No. 2
Template No. 3
If there are real men in your family, then you simply must make February 23 a special day. The right gift wrapping will help you create a festive atmosphere. In principle, it can be done quite simply. You can make a box according to any template or master class that we introduced you to, only taking into account the fact that you are preparing a gift for a representative of the stronger sex.
That is, in this case it is best to forget about flowers, curls and all sorts of feminine things. It will be better if you make a gift box from paper with a camouflage print, or simply paint the finished product in different shades of green and brown. If you want to pack a present for an older man in this way, you can try decorating the box with a red star or any other attributes of the Soviet era.
You can also draw it, or print out the template and use the resulting blanks to make the desired applique. Well, if you are a lover of everything new, then try making a box in the shape of a men’s shirt. You can see how to do it in the picture, which is located a little higher.
Tips for creating a surprise box
- If you don't have patterned paper at home, you can use old wallpaper or any pieces of kraft paper for scrapbooking. You can also use photocopier colored paper or old postcards. The main condition is the compatibility of materials. Master classes on color combinations can be found on the Internet.
- Choose a color scheme and use colors that go together. If you decide to make a box in pastel colors, use only muted and delicate shades. In this case, it is better to avoid bright colors.
- Don't forget to trim the edges of the paper with curly scissors to make the craft as personalized as possible . Your imagination can work wonders, so don’t be afraid to experiment!
- Use shape punches to create holes in tags or create patterns along the edges of cardstock.
- Do not apply acrylic paint with a brush - too thick a layer can ruin the paper or cardboard. It is better to use a foam sponge, which will not leave dirty prints and distribute the paint evenly over the surface. You can take advantage of a step-by-step master class on using watercolors in scrapbooking.
- Before you begin, cover the surface with old newspaper to avoid staining your work area.
- Don't forget to be in a good mood! The recipient will be much more pleased to receive a gift made from the bottom of his heart.
How to make a scrapbooking box for a gift?
Template No. 1 Box of squares
If you want to really surprise your loved one, then make a scrapbooking box for him. To make it, you will need both regular cardboard and special paper for scrapbooking. You will make a durable frame from cardboard, and use paper to give it a festive look. The best part is that in this case you will have a huge field for imagination. Since this box is supposed to be untied, you can decorate it both inside and outside.
Moreover, if you wish, you can even provide places for small gifts in those parts of the craft that will recline. For example, you can make places there for notes in which you write the nicest words. But keep in mind that in order for the congratulatory notes to fit well into the overall style of the gift box, they must be in the same color scheme as it.
Box with a surprise, master class
By following the step-by-step master class, you can make an extraordinary box with your own hands using the scrapbooking technique, which is sure to attract attention. The master class contains 13 steps, after completing which you will receive a beautiful box.
- Cut a square (30x30 cm) from cardboard. This base square must be divided into equal parts. To do this, you need to divide the sheet into 9 equal squares (10x10 cm).
- Using scissors, separate the four side squares from the cardboard sheet. You won't need them anymore.
- Using paste without ink or a knitting needle, press through the fold lines. There should be four of them in total. The side squares need to be folded towards themselves.
- Cut out squares (9x9 cm) from craft paper or photocopy paper of a suitable color and trim their edges with curly scissors or a hole punch. Use a glue stick to glue the finished cards to the base walls.
- the empty space with acrylic paint . To do this, apply a little paint to a foam sponge and walk along the edges of the side walls.
- Decorate the bottom of the card-box for money with craft paper. It can also be covered with lace braid.
- Print or write half your wishes on square sheets (6x6 cm), trim the edges with curly scissors and glue to the walls of the money box. The walls and bottom can be decorated as desired.
- Now you need to make a lid for the box. To do this, you need to take a sheet of cardboard and cut a square out of it (12.2x12.2 cm). Please note that you need to add two centimeters on each side for the fold.
- Press down the pencil markings and make 2 cm cuts on one edge of each side.
- Fold the indents inwards.
- Decorate the lid with craft paper, scrapbooking paper , ribbons and other decorative elements.
- Seal the edges.
- Place money and other small gifts into the box, connect the walls and close the box with a lid. Tie the gift wrapping with a satin bow.
Shapes and style of money box
A round box for a wedding as a family money bank should be tall so that all the envelopes fit. An important element is the cutout in the top cover. Think about how to place the envelopes : will your box have a cutout or just remove the lid, then locks or tapes are required. The rule - you gave it, you can’t take it back, must be observed. If there is a cut, it should be wide and spacious so that envelopes with voluminous decor can get inside without deforming the decorations. If you prefer front loading, then you should think about how to place stylish locks or magnets.
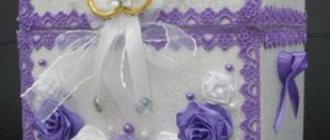
Wedding box for money envelopes
The wedding box for money envelopes in the form of a casket is also unusual.
You rarely see a ready-made cardboard form on sale, so you’ll have to make the header yourself
If you use your ingenuity, it is not difficult to make at home a wonderful fairy-tale chest for storing the treasury with rounded shapes, roomy, with handles and a reliable latch for locking and unlocking.
You can paint a money box in the form of an ATM with the “Bride's Bank” logo and a banknote acceptor. Or imitate an old chest in Russian national traditions.
Another option is a pirate treasure chest. The main thing is that the gift box is securely made and does not fall apart during the celebration. With this attribute you can play out a number of money-raising scenes. A treasury decorated with your own hands will become an elegant and cool prop for any wedding.
Treasury for a wedding in the form of a pirate chest
Designs for creating a surprise box
- Butterflies and flowers.
Using the quilling or parchment technique, you can create an entire flower meadow with butterflies fluttering above it. This composition will certainly decorate gift wrapping. Money can be hidden in the wings of a butterfly, twisting them into a thin tube.
2. Hearts.
You can present a beautiful to your loved one , containing wishes, declarations of love and small gifts. To do this, just cut thin strips from a plastic bottle, attach hearts cut out of red colored paper to them, and place the heart bouquet on the bottom of the box. On four walls you can place shiny red postcard letters: L, O, V, E. By removing the cover, the recipient will discover a pleasant surprise that you hid inside the gift wrapping.
3. Pigeons.
A box with doves is perfect for a wedding. It can be presented to newlyweds by hiding money in the package. You can write wishes in the box, add decorations made of polymer clay (master classes on making objects from this material can be found on the Internet) or glue a three-dimensional postcard. The design is limited only by the imagination of the master.
Such a surprise box , made with your own hands, can be presented not only to the birthday boy, but also to a loved one on New Year, Valentine's Day, Easter and other holidays. A beautifully decorated box, made using a step-by-step master class, will not only surprise the recipient, but will also lift his spirits. Don’t be afraid to fantasize and experiment, and you will succeed!
How to make a small mini gift box from paper: template, pattern
Scheme for work
Gift box
Finished box Template No. 1
Template No. 2
If you are planning to give a loved one a small gift, then you can make a small box for such a gift. It is best to make a similar craft, like the previous one, from thick paper. If you make it out of thin material, then there is a possibility that it will not hold the desired shape, or it will simply tear due to the mechanical impact that the gift will have on its walls.
Yes, and in this case it is extremely important to take the most responsible approach to fastening all the side parts. Since these crafts do not have secret locks, it will be better if you fix everything with glue or double-sided tape. If the first box seems too simple to you, then below we have placed two more quite interesting templates, by printing which you can easily make some pretty cute crafts.
What to make it from?
To create a container for storing and collecting funds, various improvised means are used:
- jars (glass, tin);
- plastic bottles;
- shoe boxes;
- unnecessary toys;
- matchboxes.
For original piggy banks, multi-colored paper sheets, paper for wrapping flowers, photo frames, outdated toys, etc. will also be useful. Acrylic paints, clippings from old magazines and newspapers, ribbons, lace, and coins are suitable for decoration.
Color and shape - what to pay attention to:
To make a piggy bank for collecting money at a wedding, common celebratory colors are most often used: white or light pastel colors . If the bride has a snow-white dress, choose a casket to match her outfit. If the celebration takes place in a certain color scheme, you can decorate the box in the appropriate colors. The casket can have any shape: square, rectangle .
Pay attention to the shape of the heart - it will be very symbolic
How to make a gift box for sweets?
Recommendations for making a box
A simple box for sweets A simple box for sweets
In principle, a box for sweets can be anything. You can, for example, make a cake from boxes that imitate pieces of dessert (we described how to do this in the previous paragraph of our article) or make something simpler, for example, a round or rectangular box. Therefore, choose which shape you like and start making your holiday craft. If you don’t like such products, then try making boxes using the templates located a little higher.
But I would like to say right away that no matter what you choose, you need to pay special attention to the material from which you will make your craft. In this case, it is strictly forbidden to use thin standard paper as it is unlikely to be able to withstand the weight of the sweets. Therefore, it will be better if you spend money and find the most dense cardboard in a specialized store that will not require additional reinforcement.
How to design and decorate a gift box with your own hands?
Paper roses
Lush flower Flowers made of corrugated paper
Fabric flowers
Recommendations for making bows
Paper bow
Ribbon craft
Idea for an applique
Application for decorating a gift box
If you were attentive, you probably realized that you can decorate a gift box with any decor. Therefore, you can even use simple colored paper as a decorative material. So, draw a flower of the desired shape on it in different sizes. After this is done, all you have to do is carefully cut out the blanks and then layer them on top of each other in 3-4 layers.
At the same time, you must ensure that the petals of your flowers are not located opposite each other. It will be better if the petals of each new ball move a little. This way you can achieve the effect of fluffiness and visual realism of the flower. You can also paste over the finished box with hearts, stars, openwork snowflakes, small notes with wishes and various kinds of signs.
In addition, you can make bows of different shapes from paper and also place them on the craft. And, of course, don’t forget that paper can be easily decorated with crafts made from ribbons and fabric. You can see how they can be made in the master classes posted a little higher.
How to make a gift box for lovers on February 14?
Box for February 14
Template No. 1
Template No. 2 Template No. 3
Many people think that making a heart-shaped box is very difficult. In fact, such a product is made according to the same principle as all other packaging. All that will be required of you in this case is simply to find the correct template and use it to glue the box together. We decided to make the task easier for you and therefore offer you a choice of several interesting ideas for gift boxes for February 14th.
If you decide to make the largest and most voluminous one, remember that in this case you will also have to make a product consisting of two parts. One part will act as the gift box itself, and the other will be the lid. Therefore, when cutting out the frame of a future craft, be sure to double-check whether one of the parts is slightly larger in size.
As in the case of a rectangular product, this is necessary so that in the end you can easily put the upper part on the lower part. As for the color of the box, it doesn't have to be red, if you want you can make the heart pink, raspberry or even purple and white.
How to make a gift box for a child?
Template No. 1 Template No. 2
Template No. 3
Template No. 4
If you are planning to make a box for a children's gift with your own hands, then remember that in this case brightness will come first. Therefore, it will be better if you use paper in rich and rich colors to create such a craft.
Scrapbooking paper is also suitable for creating such a masterpiece, just try to find a material on which a child's drawing will be applied. These could be castles, princesses, cute animals, racing cars or even Legos. But even if you don’t manage to buy something like that, then just use your imagination and decorate the product with appliqué.
How to make a birthday gift box?
Template for making a cake
Template #1
Template No. 2
Template No. 3
Birthdays are one of those holidays that everyone looks forward to. It makes no difference how old the hero of the occasion is; on this day he still wants to feel most loved and dear. And what else can take us back to childhood and give us wonderful memories if not a gift packed in a box simulating a birthday cake. It’s easy to make such a craft, the main thing is to show a little patience.
Above you can see a template that you can use to make one piece of cake. If you see that in the end the gift wrap will be smaller in size than you need, then increase the scale to the desired size, just making sure that all proportions are respected in the process. Then make the required number of pieces, fold them into a circle and measure the diameter of the resulting figure.
But based on the data obtained, cut out a round stand on which you will place all the workpieces. If you wish, you can cover its edge with openwork snowflakes or lace. When the stand is ready, fill all the boxes with presents, form them into a cake and secure everything with a satin ribbon.
How to make a box for a cash gift?
Money box
Template No. 1 Flowers for decoration
Nowadays you won’t surprise anyone with a gift envelope for money, so most people try to present them in a more original way. The best option for such a case would be a cash gift box. You can make it using a fairly simple template. True, when making such a craft, you must remember that in this case you will be making a box, the inside of which will slide out.
Therefore, if you see that the sides of the product do not hold their shape well, then be sure to strengthen them. If you do this using cardboard, then one strip will be enough. If you use less dense paper, then first glue several pieces together, and only after that fix this element on your craft. And, of course, remember that until all the parts of the product are fastened together, it is not advisable to move the internal part.
If we talk about the finishing of such products, then everything depends solely on your imagination. You can decorate a cash gift box with whatever you have on hand, or try making flowers from scrapbooking paper. You can see how they can be made a little higher.


