How to decorate the cover of a wedding wish book with your own hands?
How to make cover decorations? Very simple! Ribbons and fabric decorations, decorative items, artificial flowers or the same appliqués are often used as decoration for a book. An excellent decoration would be lace, beads or beads. It is worth noting that the style and color scheme of the entire wedding can give an idea for decorating a wish book. Therefore, if the newlyweds decide to have a wedding in a vintage, nautical, summer or other style, then it is worth decorating the wish book accordingly. The template for one of the most popular applications, which is often used to decorate books, is located below.
Tree of wishes made from branches
Necessary materials:
- dry branches 50-100 cm long. Hazel (hazel) branches look very good
- plastic flower pot of suitable size
- spray paint for painting branches and pots
- alabaster (building gypsum)
- construction ties
- pieces of padding polyester
- artificial flowers for decoration
- decorative elements: pebbles, beads, moss, hay (sesal)
How to make a wishing tree from branches:
Selected branches need to be painted using spray paint. The color can be any. Classic wedding ambience - white accessories
- In a pot, dilute a mixture of alabaster (construction plaster) and water in a 1:1 ratio. Stir well. After 4 minutes, as soon as the mixture begins to set, lower the tree trunk into the mixture. Leave until the alabaster has completely set
- Form the crown of the tree from the remaining branches. The branches are attached to the trunk using construction ties
- When the crown is formed, you can start decorating. Artificial flowers that need to be glued to the branches of the crown are perfect as decoration. Beads are used to decorate thin branches
- The plaster is covered with pieces of padding polyester. You can sprinkle beads or decorative stones on top. The composition will also be decorated with decorative moss or decorative hay (sesal)
- All that remains is to set the composition in place, prepare the cards and wait for the guests
You can make vintage leaves as cards for wishes. And for a children's tree of wishes from branches, these funny cards are suitable
Words of wishes on the tree for the hero of the day
You can write a short poem or words in prose, for example:
- Happy Birthday, dear, Happy anniversary! Always be so cool, achieve your goals!
- Anniversary is the best holiday Let age not be a hindrance Let there be no problems in life No barriers to success
- We wish you to be on top, not to know what adversity and sorrow are, but only to feel joy every day
Or you can simply wish the hero of the day in one or a few words such important words as:
- Health
- Love
- Beauty
- Cheerfulness
- Have a good mood
- True friends
- Family well-being
This list can be endless, so you can write whatever you want. After all, you know the birthday person better and can guess exactly what he needs.
How to make a wedding wish book with your own hands?
There are a huge number of options for making a wedding wish book; you can always choose interesting decorations to suit your taste. The cover must be hard. The easiest way to create a book of wishes is to purchase a hardcover notebook with blank sheets, decorating it with ribbons, lace, and original appliqués. The pages of the book also need to be beautifully decorated with interesting patterns and drawings along the edges.
However, you can use the most ordinary stationery folder as the basis for a book of wishes. It is advisable to choose a plain, dim cover so that later the design on the folder does not show through. Next, an A5 sheet is inserted into the folder, and the folder itself is cut to fit the paper size. The resulting small book is wrapped in thick paper of any color, the remaining part of the sheet is trimmed. To decorate the inner cover, the master class recommends using a regular white sheet of cardboard. However, before gluing the cover, you should work with narrow ribbons, decorating the top of the book with them and gluing long pieces in the middle. These ribbons will act as ties.
Having completed all the above manipulations on the stationery folder, you can begin to decorate it. It all depends on your imagination: you can decorate a book of wishes with ribbons, special decorative elements, and interesting appliqué made of colored paper or cardboard. Book design may include decorating the cover with beads and artificial flowers.
Inside the resulting book you need to place a certain number of sheets of A5 paper, pre-decorated with romantic patterns. The first page of the book usually contains the explanatory inscription “book of wishes” or the name of the bride and groom. The remaining sheets remain blank; guests at the wedding will leave congratulations on them. Usually the book is placed on the newlyweds' table or in a specially designated place. The video below will tell you in detail about creating a wedding wish book with your own hands.
A fabric booklet may seem like an equally interesting idea. The manufacturing process is almost no different from the cardboard version, however, instead of paper and cardboard, the main element here will be fabric. After the folder has been cut to the desired size, it is necessary to cover the outer cover with padding polyester, which is attached with double-sided tape. The selected fabric is glued on top of the padding polyester layer.
Making crafts
There is another simple way to create a wish tree with your own hands. The base consists of twigs without leaves or beautiful driftwood, which can then be placed in a vase. The most interesting are the branches of apple, ash, elm and other trees with corners and kinks. So, preparing the branches: • Clean the branches • Dry them • Treat them with paint to ensure strength, durability and aesthetic appearance.
The branches are placed in some container: a large stable or classic vase, pot, box, tin bucket. Of course, they must be decorated. The container is filled with something heavy, then it will be stable. Sand, stones, floral sponge, etc. are suitable for this purpose. Additionally, you can decorate your masterpiece with ribbons, flower buds, beads and other decorative elements.
Tree of living branches
An original and special souvenir created using living branches will complement the wedding ceremony and surprise the guests. The fashion for such a tree came to us relatively recently. More and more newlyweds prefer to decorate their wedding with this craft, which is made from natural materials. To create it, you will need available materials, which you can purchase at any stationery store. Let's take a closer look at what you need to buy for your wish tree.
Necessary materials
The main element you will need is a few living branches. Their length should be approximately 1 m. Clean them from hard bark growths, if any. To paint the branches, buy a regular spray with gold or silver paint. You will also need a vase, decorative stones, sheets of thick colored paper, ribbons, and a hole punch.
Stages of creation
Let's look at how to make a wish tree from branches with your own hands for a wedding. Follow the detailed step-by-step instructions:
- Spray the cleaned branches and leave them to dry.
- Fill the vase with decorative stones. Insert dried branches into it. Make sure they are stable in the vase.
- Cut out paper hearts or cards for guests to write wishes for the newlyweds.
- Use a hole punch to make holes in the leaves. Thread the pieces of ribbon through them and tie them.
- Hang leaves for wishes.
It is advisable to make a corresponding sign next to the wish tree. Don't forget to place pens or markers next to the vase so that guests can leave wishes.
Quilling
A wish-fulfillment tree can be made from paper. The quilling technique is suitable for making such crafts. To create the tree you will need thinly cut sheets of double-sided paper. You can make them yourself or purchase them at the store.
Take green strips of two or three shades and roll them into leaves. How to do it? Roll the strip into a spiral, then relax the workpiece a little and now the part needs to be flattened at both ends.
The barrel should be made using a different technology. Take a dense base, such as a sheet of foam. Stick three nails in there so that they form a triangle. Now start winding the brown strip. Remove the workpiece and tape the tip so that the part does not unwind. The barrel will consist of two such parts. Collect all the blanks and glue them to the base.
How to prepare a wish tree for a wedding
So, you will need:
- A3 sheet of paper,
- stamps (variations are possible here),
- several gel pens,
- frame with glass, A3 format,
- wet wipes and a container where you can throw them away.
You draw a wedding tree of wishes in advance on whatman paper or print it out (type wedding tree template or wedding tree vector in Google and download the option that you like best). You can write your wedding date and your names under the tree.
To leave prints, you will need paint. There are several options here. You can buy special stamp pads - choose 3-4 similar shades.
You can prepare the stamp pads for your wedding wish tree yourself. To do this, dip regular dishwashing sponges into the paint. Light and transparent watercolor paints are ideal.
The easiest option is to mix a palette of colors in a plate or tray. The good thing about the palette is that you get smooth color transitions.
Make sure that there are wet wipes next to the wishing tree - who wants to get their holiday dress dirty! Newlyweds, by the way, put their fingerprints first precisely for this reason.
Lastly, you'll need some gel pens so guests can write their names and wishes. This is also an important detail: if there is only one pen, someone will definitely fish out a felt-tip pen of an unexpected color from their pocket.
Let's draw
To draw a tree of wishes, you will need: • a template • a sheet of paper (size of your choice, from A1 to A4) • paints, pencils or colored pens • a frame The idea is simple. A trunk is drawn on the sheet. It can be with or without leaves. If with leaves, then the guests simply sign their kind words and parting words on them. If not, then they also draw leaves.
An interesting way is when fingerprints are left on the crown. To do this, take stamp pads filled with paints (plain or colored). Complete the picture with other suitable inscriptions: the names of the newlyweds, the wedding date, relevant aphorisms, etc.
Tip: Place a pack of wet wipes next to the design so guests can immediately remove the paint from their fingers.
What it is?
Usually, a tree of wishes for the newlyweds is an imitation of a real plant (made from wire or real branches), on which guests can place postcards or cards with congratulations for the newlyweds. This is an original way to replace the classic book of wishes.
A wedding wish tree with fingerprints is a drawing of a tree on canvas or thick paper, on which instead of leaves there will be colorful fingerprints of your friends and loved ones.
The advantage is that the painting is much more compact and easier to transport and store. The fingerprints can be signed (so that the bride and groom know who exactly left the mark), and your wishes or congratulations on your wedding day can be left next to them.
Fabric applique
A photo of the wish tree is presented above. You can create a similar craft for yourself or for your friends or parents. The main thing in the creation process is to think about the good. The wish tree should become for its owners not just a picture or a panel, but a kind of icon, which, of course, you don’t need to pray to, but it’s worth handling with care. How to make an applique from fabric? Choose the right material. You can use either plain fabric or printed material. The main thing is that the drawing is not too pronounced. You can depict the trunk as a hand, and the leaves as hearts. Such a composition will definitely not look trivial. The basis for such a panel should be thick cardboard.
Wedding wish tree template
First of all, you need to draw a blank. You can do this yourself, but if you have no artistic abilities, then use templates
It is not necessary to draw the bark or root, but pay special attention to the branches
Having placed everything necessary, the bride or groom must show how to record pleasant words on such an unusual object. A finger is dipped in paint and an imprint is made.
The cherished words are already written on it using a gel pen. As for the color of the prints, the choice depends only on your desire. Having chosen a summer style, make the branches green or other bright colors, autumn - only yellow or neutral shades, but in spring the riot of colors is not limited.
After all the guests have left their fingerprints on the branches of the wedding wish tree, use the remaining paint for additional decoration by painting a couple of dozen bright leaves.
Living tree
Living twigs are especially interesting to iron. They can be either small or tall.
Guests and family members can write kind words on pre-prepared sheets. To make it convenient to hang them, you need to make loops from a beautiful cord. The leaves can be ordinary or with images or even photographs of the newlyweds. If you want to immediately write down the names of the guests, it is recommended to place them in advance on the tables where the invitees will sit.
To create a compact model you will need branches, a vase, stones to secure the base, paints and paper with ribbons. Let's decide on the view. The color must match the overall style. You can spray paint the branches or even sprinkle them with salt for a look that resembles a coral branch.
After the branches are ready, place them in a container and place stones around them to secure them. Cut out leaves or any other shapes from paper. To make your work easier, use ready-made templates by printing them.
We insert a string into the eye of the cut out leaf, then lay out the finished leaves around the vase with branches. Don't forget to leave markers and pens with which guests will write words of wishes to the newlyweds.
Tree with balls
Another idea is wedding wish trees in the form of branches with balls. The trunk of the plant should be tall, and the top itself should be large. The cherished words are written on the balls with a marker and tied to the branches. Choose a place for the tree, place it, prepare a set of markers. You can immediately tie the balls to the branches, especially if gel balls are used.
Painted tree
If you are not satisfied with the option of drawing with your fingers, you can prepare leaves of the desired color in advance, and also add glue to the pens and markers. Guests will write nice words and stick them on the canvas. The picture will turn out not only beautiful, but also voluminous.
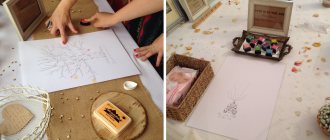
Master class on making a guest book with soft cover
To create an album with a soft cover you need:
- One-color paper folder.
- Sintepon.
- Textile
- White cardboard or designer paper (2 pcs.).
- Sheets for filling out the album.
- We select the same stationery as for decorating a guest book using the scrapbooking technique.
- Decorative elements: small satin ribbons, decorative ribbons, decorations.
The first step in making a guest book is preparing the folder. You need to decide on the size of the product. Using a utility knife, trim the folder to the desired size.
In order for the materials to be better fixed, the top paper covering must be removed from the inside of the folder, except for the area near the metal clips.
We glue padding polyester to the outer sides of the folder and secure it with two strips of double-sided tape, as shown in the photo below.
Cut the fabric to the desired size, leaving 2-3 centimeters for the hem.
To make it easier to glue the edges of the textile, you can cut out corners on each side.
We fix the material with glue. How to properly fix the edges and corners of the fabric is shown in the photo.
On the inside of the guest book (in the places where the paper covering was removed) you need to stick narrow small satin ribbons to hide the joining seams at the top and bottom of the folder.
The cover is ready, you can start decorating the front of the album. Glue the ends of the decorating ribbons to the opposite side of the book. We fix the remaining design elements (hearts, bows, figures or flowers) on the surface.
We decorate the back of the album with white cardboard or designer paper.
We fill the finished folder with sheets. The guest book is ready!
You can also watch a master class on making a wedding wish book on video.
You can see how a wish tree is created in the following video.
Forest of wishes in a baguette
If there are unnecessary paintings or old frames in the house, do not rush to throw them away. Use frames to create a wishing tree! To do this, you need to attach the branches to the back side of the baguette using a furniture stapler. The result will be an unusual forest. Branch trees can be painted white, and then decorate the stylish piece of furniture with wish tags and satin ribbons.
If you like the idea, but you don’t have an old molding at home, and a new one is expensive, go to a hardware store. In such giants as OBI, Castorama, Leroy Merlin, you will find carved slats with stucco. They will make a wonderful frame for a wishing forest.
Birthday Wishing Tree: Template
This option is perfect for the birthday of a child or any family member. In order for the wish tree to have a presentable appearance in the future, we advise you to also buy a frame and, after framing, store the craft under glass.
If you think that the A4 format is too small, and you don’t have a printer for A3, it doesn’t matter. With the help of these instructions you will make a wonderful tree with minimal cost. To do this, stock up on:
- Sheet in A3 format, the best option is the sheets from the drawing set, as they are quite dense and of high quality
- Carbon paper
- Black marker or felt-tip pen
You can find a tree template online or draw one yourself. Let's look at the first option and find a template on the Internet. After choosing a template, enlarge it so that the entire tree fits in A4 format. On another sheet of paper, type in curly letters the name and date of the birthday person or simply the words “Happy Birthday!”
Guests will be happy to write words to the birthday boy
Next, trace the tree from A4 to A3 format and stick it on top or also trace congratulatory letters. Use not only a simple pencil for drawing, but also a felt-tip pen. Otherwise, when guests come into contact with the tree, the borders of a simple pencil may become blurred; a felt-tip pen is much more reliable in this regard.
Wishing tree is a great idea for a birthday.
Now it all depends on your imagination - you can draw leaves or figures where guests will leave wishes for the birthday boy, or buy paints and then instead of leaves, the fingerprints of all the guests will appear on the tree.
Wire Wishing Tree
For this craft you will need wire of different diameters. You can buy it in craft stores. There is a more unconventional way. Do you have old wires? Peel them using a knife. You will be especially lucky if you find wires with a copper-colored core. This wire is quite thick and easily takes the desired shape.
A wire tree is created by twisting. First, thin branches are made. They twist with thicker ones. The most massive branches are woven into the trunk. When twisting, it is important to leave long tails with which the parts are connected. Multi-colored stones, beads, and artificial flowers are suitable for decoration.
Anniversary wish tree: template
Initially, the wish tree was used exclusively at weddings, but this idea has spread so much that now you can often see a similar element at birthday parties. And why not, because it is no less pleasant for the birthday boy to read wishes than for the newlyweds.
Now you will learn how to prepare a wish tree for the hero of the day. You, of course, can buy it, but a surprise made with your own hands will be much more pleasant for the birthday boy.
For the wish tree you will need the same set of tools that we talked about earlier. At the moment of celebration, you will take the easel with the tree into the hall and put pens and paints on the table nearby. Don't forget about napkins.
Now the guests will wish the hero of the day plenty of wishes and even leave their fingers as a souvenir. The following templates can be used:
At first the tree looks like this
And when the guests write their wishes
The tree will look like this
Paper wish tree
The simplest option is considered to be a tree made of paper. It is very simple to make, so you will certainly cope with the task. The main thing here is creativity and a creative approach.
Before you start creating, think about what emotions you want to see on the faces of the newlyweds when they receive your gift. Introduced? Fill yourself with inspiration and get started!
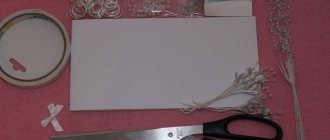
Necessary materials
In order to create a paper wish tree, you will need:
- Large sheet of high quality thick cardboard.
- Wooden frame.
- Various drawing tools (your choice).
- Decorative material (sequins, beads, ribbons, etc.).
- Ink pads, napkins and a beautiful pen (for writing wishes).
Step-by-step instruction
When you have prepared all the necessary materials, you can proceed directly to creating a masterpiece. Follow our instructions and you will succeed.
- On a sheet of cardboard you need to draw the trunk of the future tree and its branches, which will further symbolize the young family. It is best to do the drawing with a black pencil or felt-tip pen.
- Next, you need to insert the template into the frame and start decorating. Here you can give free rein to your imagination and use any materials you like. You can “tie” ribbons on the branches, gluing them in the form of bows, and you can make a scattering of sparkles or sequins along the frame. It is at this stage that you will need inspiration.
- Now your tree is almost ready. You can present it to young people, and each guest will come up and write their wish on a piece of wood. Ink pads will come in handy here - to leave your imprint as a souvenir, and napkins - so that guests can wipe off any remaining ink from their hands.
Paper tree templates
For those who are good at drawing, various stores have ready-made paper tree templates. All you have to do is insert the template into a frame and decorate it if desired. This option is also suitable for those who want to give an original gift, but do not have any free time. After all, if you make a tree using a template, the whole job will take no more than an hour.
Application on the wall
The wish tree can be different. It is not necessary to do something voluminous. You can paint a similar tree on your wall. Of course, you don’t need to display your totem, but you shouldn’t hide it in the closet either.
You can draw a similar tree in your bedroom. On a painted wall, or you can make a pencil sketch directly on the white wallpaper. First outline all the main branches and the trunk with roots, and then do the detailing. You need to draw such an image using a silhouette. Choose the color that suits you. It is advisable to give preference to dark colors, black or brown. When the tree is ready, it can be decorated. Stick butterflies or flowers in the form of wishes. To make it easier for you to figure out how many wishes you have and how quickly they come true, you can glue butterflies of different colors every month. So in August you will know for sure whether everything you wished for in January has come true.
Looking for easy ways
The current basis for completing a wedding wish book is a folder with a binder. In this case, you won’t need to glue the sheets, worrying that the edges will be even. You can buy such a folder at any office supply store. To decorate it, use any decorations that are in the box. These can be bright rhinestones, beautiful decorated flowers, thin ribbons, small pearls.
To create an interesting book in which guests can leave their wishes, you can familiarize yourself with a detailed master class.
When choosing a folder, it is important that it can freely accommodate sheets of A5 paper. Holes are made in the sheet, place it in the required place
Lines are measured on the folder with a pencil, and any excess is cut off with a knife. Using the same knife, the glossy layer is removed from the folder. The clamping area is marked with a pencil, i.e. album binder. Carefully clean the surface without touching the side and outer surfaces. For the cover of your future idea, you can use decorated paper or interesting material. A copy of the same size + 2 cm is cut out to tuck it inside. The cover must be pasted over as evenly as possible, without unnecessary bumps or gaps (except if the accordion is not part of the idea). The material or sheet is glued with glue, the edges are wrapped. You will need 4 satin ribbons. 2 x 9 cm, 2 slightly longer. Short strips are glued to the edges of the book, long strips to the edges of the folder, they will serve as ties. White sheets are cut out along the inner surface of the cover and glued to the binding. This way, unsightly paper folds will be hidden. Decorative elements are used to decorate the book. Next, you need to start preparing sheets on which wishes will be written. These can be small drawings in the corners, a painted sheet using paints in a different color palette. A good option for decorating pages would be beautiful sayings about love. Inside, along the edge, glued lace or gathered strips of satin ribbon would look good.
The photo shows an interesting design of a writing pen intended for pleasant wishes to newlyweds.