Books of wishes have become increasingly common at weddings outside of Europe and America, so in stores you can find such an accessory made in any theme. To make it more original and personal, the bride and groom can do it themselves, generating creative ideas and adding their own details to the design. There are several options for making a wedding wish book with your own hands, so anyone can choose the right option for themselves.
Why do you need a memorial album?
A book of wishes in a standard format is an album with sheets on which guests write congratulations and instructions to the newlyweds. This accessory is needed so that the bride and groom can remember the warm words of friends and relatives , since verbal wishes will sooner or later be forgotten. Having decorated the book of wishes with their own hands, the future newlyweds will be able to make it exactly the way they wanted, and the handmade work will be appreciated by the guests.
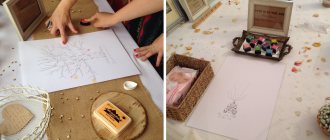
The creative process begins with creating a sketch. To do this, the bride and groom can look at ready-made solutions, understand the basic idea of the design and create their own design. After drawing up a preliminary version, you can begin to purchase the necessary materials according to the sketch plan, but you need to take it with a small reserve in case of accidental damage during work.
You can create a design using the following techniques:
- scrapbooking;
- quilling;
- applique;
- origami.
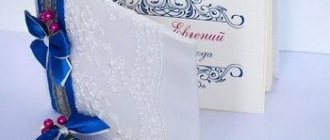
The most original books of wishes using the scrapbooking technique are obtained. The cover is decorated with many decorative elements that combine with each other, and the pages can contain retractable elements, pockets for cards with congratulations, and cascades of photographs.
Scrapbooking technique
Scrapbooking is a new but already popular craft technique. These are special products that are made using paper, paints, fabric, original inserts, badges and brooches.
If the most ordinary congratulatory speeches are placed in an album made in a similar style, then it will be pleasant not only to re-read them, but also to look at them. The scrapbooking technique uses expensive materials that do not deteriorate over time.
Thanks to modern technologies, the paper does not turn yellow, and other decorative elements do not lose their beauty and originality.
The only downside of this type of technology is its high cost. The price is high, but it is justified by high-quality material, long years of service and originality. This is truly handmade, which you will not find in any of your friends.
Reader
If you decide to design a book of wishes with your own hands, printed photos will perfectly decorate the page. Maria
Unusual versions of this accessory are listed below.
- A typewriter standing on a separate table at a wedding. Each guest can print a message on it and seal it in an envelope. This option is suitable for retro style.
- Messages can be written on the bride or groom's guitar.
- Playing cards can be used as wish cards for a mafia theme.
- Vase with smooth stones. Guests write their wishes on them with markers; this option is suitable for a seaside wedding. The resulting vase can later be used as an interior detail.
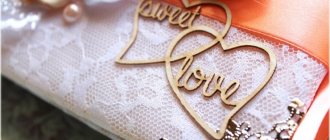
- Wooden dies in the shape of hearts are suitable for an eco-wedding.
- Congratulations written with a white marker on vinyl records will look harmonious at a holiday in the style of a dude.
Attention! The most popular are books in the Provence style and those created using the scrapbooking technique.
Secret wishes
If the newlyweds want to truly find out what their guests really want, then they need to hide the contents of their notes from the prying eyes of the other guests. A master class on creating a book of wishes for guests with separate envelopes for notes will be presented below.
For such an album you need to have simple A4 sheets for the printer. It can be white paper, or you can use a set of colored ones. It is double-sided, but you need to take one that is not very dense so that the album does not become swollen.
For notes and wishes, you can purchase separately thick rectangles for business cards. They will fit well into envelopes. All that remains is to make a lot of small pockets in which guests will insert wishes.
To do this, you need to take a strip of paper and round off its corners on one side with scissors, cutting off the edges. Next, the strip needs to be bent into three parts: two identical, and one small with rounded ends, which will serve as a pocket lid. The back wall of the envelope is glued to the page in the album.
At a wedding, this album is placed on a separate table, pens and white rectangular leaves are placed. Each guest can come up and write their wishes to the newlyweds, putting the message in an envelope.
Useful video: master class
How to make a wedding wish book with your own hands? Anyone can cope with this technique, even if many years have passed since the last creative activity. It is enough to be inspired by ready-made ideas and bring them to life in your own interpretation. With the help of this master class, you can make a wish book on rings in silver-white color.
A book of wishes can be made from a ready-made folder with a paper holder, then you don’t have to waste time creating the base. The video tutorial shows a DIY wedding wish book for beginners. This accessory can be decorated with satin ribbons in a minimalist style.
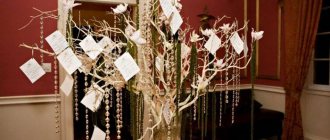
Wedding books or wishing tree
With your own hands you can make a very beautiful object for collecting pleasant words from guests at a wedding - this is a wish tree. You can design such a product either by investing a lot of money or without spending any money at all. It depends on the choice of materials. To design a tree like the one in the photo below, you need to use laser cutting. First you need to think about what material the trunk, leaves and names of the newlyweds will be made from.
The master will quickly cut both plywood and plastic. It is, of course, more convenient to write on a wooden plate. Then you need to prepare the panel. Glue letters to the bottom, making up the names of the newlyweds. You can write the wedding date. Then - the most important and largest part of the picture - the tree trunk. Finally, you need to leave the leaves. They can be made in the shape of hearts or simple elongated leaves.
The panel can be installed on a stand or simply placed on a table. Guests come up one by one and write wishes on each piece of paper. You can store such a picture for quite a long time.
Additional Tips
Materials for a wish book can be found in craft stores. Even if the bride and groom have not done needlework before, it is advisable to purchase professional tools, fabrics, paper or cardboard so that the finished accessory looks presentable.
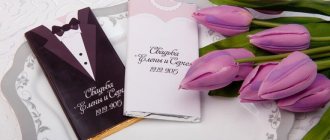
Important! Making a wedding wish book with your own hands can be combined with making invitations for guests, place cards and bonbonnieres.
If the bride and groom do not have enough time to create a wish book from scratch, they can buy a ready-made one and replace the cover design with their own. This option is even simpler, since you don’t have to select suitable sheets and attach them to the base, and the result is no worse than completely self-made ones.
Book for recommendations
The newlyweds at a wedding have so many emotions and impressions that many moments pass quickly and elusively. If you want to capture every moment, then it is better to do it in the form of a wedding photo album and a book of wishes. WITH
The essence of such a product is that each guest comes to the table on which there is a special book. Everyone can write congratulations, poems of their own composition, and even excerpts from songs.
The book of wishes lies on the table all evening. Her main idea is for guests to feel as relaxed as possible and be able to congratulate the bride and groom without fear of public attention. Many people write congratulatory speeches only towards the middle or end of the celebration, forming their thoughts.
After the event, the young people are given a book containing the kindest and most sincere words. After the wedding, newlyweds read everything that their guests wished for them. This book remains in the family for many years. After many years, you can take it out, review it and remember everything that guests once desired.
Collection of wishes on a stand
In the photo you can see another interesting way of collecting the wishes of guests at the wedding party. It’s quite simple to make such an object, but it’s unlikely to be possible on your own. The stand consists of a persistent wooden plate in the form of a circle or square. A wooden stick is inserted into the base, on which guests will actually put cards with wishes. They can be in the shape of a heart or a flower; simple circles will also do.
In the photo, the hearts are cut out of thin plywood using a laser. But you can easily replace them with thick cardboard. Office supply stores sell glossy paper. On one side there is a drawing on it, and on the other there is a blank white sheet. You can use such products. And you can cut out any shape from them under a stencil using simple scissors.
How to do it?
How to make an original and beautiful book of wishes with your own hands? We offer two interesting manufacturing options.
Option one
To make a book using this method you will need:
- a folder for papers with rings, having a plain and preferably light-colored cover (colored, bright or dark can be seen through the material used for covering);
- fabric, wrapping paper or wallpaper for cover design;
- scissors;
- pencil;
- sheets of A4 paper;
- printer (preferably color);
- hole puncher;
- universal glue or refilled glue gun;
- ribbon;
- decorative elements.
Instructions:
- First prepare the base. To do this, remove a layer of thin smooth paper from the inside of the folder, leaving a small area near the rings. This is necessary for reliable fixation of the material used for decoration (it is unlikely to stick to a smooth surface).
- Cut out a piece of wallpaper or paper that is the same shape and size as an open folder. Add two centimeters on each side for the hems. Cover the folder with the material and let the glue dry.
- Place a blank sheet of paper on the inside of each side of the cover.
- Make ties. To do this, glue a piece of ribbon to each side of the cover from the inside. Place the ties approximately in the middle of the book to make them easy to use.
- Then, using a ready-made template and a printer found on the Internet, draw up all the sheets, preferably on both sides, so that there is more space for writing wishes. Now use a hole punch to make holes in them from the edge, corresponding to the location of the rings in the folder.
- Next, move on to the decor. Glue flowers, beads, beads, stones or something else made from paper or napkins onto the cover with glue or a gun.
- A homemade but very interesting book of wishes is ready!
Option two
Such a beautiful book can be made practically from scrap materials. Here's what you'll need:
- thick cardboard;
- padding polyester or other soft material;
- beautiful fabric for decorating the cover, for example, satin or velvet;
- lace;
- felt, contrasting in color with the main fabric;
- glue gun;
- identical beads or rhinestones;
- pencil;
- scissors;
- Printer;
- fabric chalk;
- blank A4 sheets;
- awl;
- thick thread or thin rope;
- romantic stickers with themed images;
- ribbon.
Process description:
- The first stage is making the cover. Cut out three parts: two sides and the base connecting them. On the reverse side, connect them using a piece of blank sheet and glue.
- Decorate the sheets using ready-made thematic stickers.
- Next, immediately add sheets to the cover. To do this, use an awl to make two holes in them, thread a thread or rope through them and pull it through the cover (you will also need to make holes in it). Connect the ends of the thread from the inside, tie it well and secure it with glue.
- Cut the soft material and fabric according to the dimensions of the cover (when cutting the fabric, leave allowance for the folds).
- Now cover the entire cover with soft material on the outside.
- Then cover the cover with fabric. Cover the inside with sheets or cloth. Glue ribbon ties to the cover.
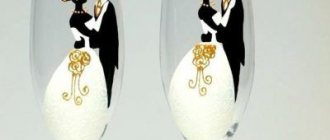
- Next, move on to the decor. Cut out figures of the bride and groom from felt, having previously found images on the Internet and transferred them to the material. Glue them to the cover. Place and secure a strip of lace in another place. Place rhinestones or beads along it or over the entire surface.