Every year decorative candles are becoming more and more popular. They are used as decor at photo shoots and special events, and in winter they give a cozy and warm atmosphere to the house. But the cost of beautiful candles with decor is much higher than simple ones. That is why we have prepared several master classes, thanks to which you can transform simple candles and make them a stylish accent in the interior.
Garnish with spices and grains
The amazing aroma and original appearance of cinnamon sticks make them a popular material for decorating many things. Items with such decor are perfect for giving a sophisticated look to your holiday table. Or a good option is to take a relaxing bath in the evening in the atmosphere of a flickering light and the delicate scent of cinnamon. Don't know how to decorate a candle with your own hands? The easiest way is to place the sticks around the product and secure them with twine, lace ribbon or braid.
Candles placed in wide, low glass flowerpots will become a stylish decoration. The space is filled with different cereals. Corn grains and a mixture of multi-colored rice are suitable for this eco-style design.
Eco-style decor
Preparing the wick
Whatever the candle is - wax, gel or paraffin, it cannot burn without a wick. A thick cotton thread is well suited for its creation. For this purpose, you can take floss. The thickness of the thread usually depends on the size of the future product and the substance.
A loosely woven cord is inserted into wax candles, while a tight and rigid cord is inserted into gel and paraffin candles. The thickness should be moderate. An excessively thin cord will melt the substance very quickly, and a very thin wick will not be able to burn well and for a long time.
The core of the candle can be crocheted, woven like a pigtail, or twisted with a rope. It is better to impregnate the resulting wick with the substance from which the product will be cast. To make your work easier, just remove the wick from ordinary household candles.
Candle with coffee
The original decor in the form of coffee beans will give the candle an elegant look. Noble coffee can be used in different ways:
- The grains are glued directly to the surface of the product. It is recommended to use decoupage glue. The grains are placed in dense rows approximately 2/3 of the height of the product.
- Thin twine is wound around the candle (about halfway). Decoupage glue is used to secure the ends of the rope. Then, in a chaotic manner, the coffee beans are fixed to the twine. The finishing touch is to attach an elegant bow made from chocolate-colored ribbon.
True coffee lovers will love not only seeing the beans, but also smelling them. To further diffuse the coffee aroma, several beans can be pressed into the candle around the wick.
Appetizing coffee-chocolate decoration
Necessary materials
Before you begin work on creating a unique decorative item, you need to prepare a place for creativity, the necessary components and several necessary tools:
- vessel for melting a substance;
- container for creating a water bath;
- molds for future products;
- thin wooden sticks for stirring and attaching the wick;
- inexpensive household candles or old cinders;
- a set of soft wax pencils;
- thick cotton thread;
- decorative details for decoration.
If the product is intended to be used in aromatherapy sessions, various flavoring agents can be added to the necessary materials.
Decor with ribbons
The easiest way to give a candle a Christmas or gift look is to tie it with ribbons. Using products of different quality, you can add a romantic or cheerful mood to your craft.
The wedding celebration will be decorated with candles decorated with lace or satin ribbons. The original option is a combination of plain and lace stripes. An openwork fabric is attached to the product, over which a shiny satin bow is tied.
Candles decorated with twine and handmade cream lace ribbons look romantic and rustic.
Delicate set of candles
Pouring process
You will need to pour the molten substance into the prepared glass with the wick attached. Typically a simple tin can is used, bent on one side to form a spout for pouring.
To make it easy to remove the candle later, the walls of the mold should be coated with vegetable oil. Sometimes dishwashing detergent is used for these purposes. Next you need to follow the instructions on how to make candles at home:
- Place cinders or household candles chopped into small fragments into a tin vessel for melting.
- Pour water into a large container and bring it to a boil.
- Place a jar of wax in boiling water and wait for the substance to melt.
- Filling should be done gradually: first fill the bottom and let it cool, then the next layer in the same way, then fill the entire form in this way. The substance should cool naturally, without placing it in the refrigerator. This way the composition of the candle will be homogeneous.
- After the product has cooled, you need to unravel the knot of the cord and remove the resulting candle from the mold by the other end. Excess wick can be removed, leaving 1 cm.
To make the item neat and shiny, you need to choose smooth shapes without seams.
Stylish salt decoration
A somewhat unexpected decor in the form of salt will give the product an original delicate look, especially if the paraffin/wax surface is pre-decorated. Step by step process:
- Separate parts of the candle are sealed with tape.
- PVA glue is mixed with paints and spread on open areas.
- Pour a layer of salt onto a plate and roll a candle over it. Then the tape is removed.
If you show your imagination by gluing adhesive tape in different versions, then things will turn out to be non-standard and stylish.
Secrets of aromatherapy
When making a new candle, use essential oils. Add a little of your favorite aromatic oil to the liquid (melted) wax before pouring it into the mold.
The composition of aromas of bergamot and lavender has a relaxing effect, while rosemary and lemon have a healing effect. A mixture of one part rose and geranium oil and two parts lavender has a calming effect. For mood, use an aromatic composition of cloves and orange, and to relieve stress - cedar and lemon.
Dried flower decor
Crafts decorated with dried flowers look especially tender and cozy. Flowers are selected in bright, saturated colors or plant compositions are made in pastel colors. The process of creating amazing beauty is simple:
- Dry leaves and flowers are applied to the surface. It is recommended to pick up the elements with tweezers.
- The decor is poured with melted wax (from a spoon) to fix it.
An interesting effect is obtained when a candle is lowered into paraffin - the outlines of individual leaves/flowers seem to dissolve, and the picture takes on a fascinating three-dimensional appearance.
How to attach dried flowers
DIY candles at home: recipe for scented and colored candles
Having mastered the manufacturing principle, you can create more complex variations of candles. To make colored candles, place wax crayons along with paraffin in a melting dish. Fantasize, experiment with combinations and as a result you will get a stunning composition of bright rainbow candles.
From burlap
Textiles are one of the most “democratic” materials, since they look great in the company of lace/ribbons and as a basis for fruit and toy arrangements. The easiest way to decorate a candle is to fasten a wide strip of burlap on it and then decorate it with whatever you have on hand or with specially prepared elements.
Delicate handmade lace will soften the “harsh” look of the material. Such items look organically in a rustic style interior.
It’s easy to make original souvenirs for New Year’s guests: ribbons are tied on burlap, to which small Christmas tree balls and pine branches are attached.
What to use for flavoring
To improve the aroma, aromatic substances are added to the candle base. In general, there are special fragrances for candles. It is easier to work with them if you are confident in the quality. Just add the recommended amount.
Set of scents for candles: Lemongrass, Jasmine, Flower bouquet. The recommended consumption of fragrance is 6-12% of the total mass of wax. For aromatization, special fragrances or aromatic oils with a high ignition temperature are used.
Many people prefer to create their own scents. In this case, you can use aromatic oils. These should be oils, not water or alcohol extracts. Another condition is that they must have a combustion temperature higher than 65°C. These are not all aromatic oils. Suitable oil extracts are geranium, peppermint, lemon mint, anise, amyris, myrrh, lemon myrtle, sandalwood, clove, rosewood, lemongrass, juniper, patchouli, ylang-ylang, lavandin (instead of lavender), patchouli, cinnamon, grape seed, bergamot .
Aroma oils are added to the already melted and colored composition when it has already begun to cool, before pouring. The quantity is counted in drops, the oils are added with vigorous stirring. It is impossible to indicate a specific number of drops. Some compositions have a more intense aroma and 3-5 drops per 100 grams of mass are enough, others are barely perceptible even with 20 drops.
Not all aromatic oils from all manufacturers have sufficient aroma, try finding another company.
Not all oil extracts in candles provide a sufficient level of aroma when burning. If you want a stronger scent, buy fragrances for candles or soap making. They generally smell stronger.
Some solid oils also have a pleasant smell. They can be used both as a base and as a flavoring. For example, coconut, shea, cocoa oils. When using them, standard candle bases account for about 20-30% in recipes.
Inscription on the candle
To create an exclusive gift - a candle with an inscription - you will need an iron and thin paper with a wish and name. For work, it is recommended to choose square-shaped products. Cut out a rectangle/square from paper with the required sides. The sheet is applied to the candle and pressed tightly using a hot iron. It is recommended to keep the heated paper pressed tightly (you can use cardboard or a cloth) until it cools down.
How to make an original inscription
How to make a gel candle
Frame: JK Arts/YouTube
What you will need
- Gel for candles;
- wick on a stand (preferably reinforced);
- decorative sand of different colors;
- artificial branches;
- toy fish;
- shells, beads and any other decor as desired;
- toothpicks or thin sticks;
- blue dye;
- glue gun or glue;
- container for melting the gel;
- glass glass.
How to do
Prepare and arrange all the components so that they are convenient to use. The glass for the candle must be perfectly clean and dry.
Frame: JK Arts/YouTube
Tear the gel into pieces, place in a heat-resistant container and place in a water bath or the lowest heat to melt, do not forget to stir.
Frame: JK Arts/YouTube
While the gel is melting, secure the stand with the wick at the bottom of the glass with glue.
Frame: JK Arts/YouTube
Glue twigs to the bottom or walls of the glass. Use a toothpick to place the decor as intended.
Frame: JK Arts/YouTube
Add red sand and tilt the glass so that it only covers part of the bottom.
Frame: JK Arts/YouTube
Pour yellow sand onto the other part of the bottom.
Frame: JK Arts/YouTube
Add layers of sand of other colors if desired. Be careful not to shake the glass so the colors don't mix.
Frame: JK Arts/YouTube
Arrange the shells and beads.
Frame: JK Arts/YouTube
Add a drop of gel dye to the melted gel and stir thoroughly with a wooden stick. The number of bubbles in the finished candle depends on how intensely you mix the gel. In this case, they will decorate the underwater landscape, so you can safely interfere.
Frame: JK Arts/YouTube
In a thin stream, being careful not to dislodge the decorations, pour about a third of a glass of liquid gel.
Frame: JK Arts/YouTube
Add the fish. If they do not hold well in the desired position, wait a couple of minutes until the gel cools a little and thickens a little.
Frame: JK Arts/YouTube
Add the rest of the gel.
Frame: JK Arts/YouTube
Align the wick and secure it between two toothpicks until the candle cools.
Frame: JK Arts/YouTube
If anything remains unclear, watch this video:
Decoupage technique
The original version of decoupage is to use hot air or an iron instead of glue. The napkins are first divided into layers, carefully separating the leaf with the design you like. A rectangle is cut out of a napkin (according to the parameters of the product). Wrap the surface tightly with soft paper and heat it with a hairdryer. To give the craft a neat look, the upper and lower parts of the soft paper are folded and also “glued” with a hair dryer.
It is important that the entire napkin sticks well. If the paper wrinkles in some places, it is carefully smoothed out. The swollen areas should be reheated with a hairdryer and pressed tightly against the candle.
Convenient decoupage technique
Option for decorating a finished candle
A candle with a photograph printed on it will become an original room decor. To do this, prepare:
- regular wax candle;
- tissue paper or tracing paper;
- wax paper;
- scissors, tape;
- hairdryer and printer.
Step 1. Select a photo to decorate the candle. Tape the tracing paper to the printer paper.
Step 2: Print the photo. To do this, you need to insert the paper into the printer so that the photo is printed on tracing paper. Next, separate the tracing paper from the paper and cut out the image. Leave a white frame around the photo.
Step 3. Wrap the candle tightly with wax paper and heat the image with a hairdryer.
Step 4. Warm up until the photo becomes bright and clear.
Step 5: Carefully and slowly remove the wax paper.
In this way, you can decorate a candle with absolutely any pattern printed on a printer. Or you can draw your own work, inscription, pattern or some saying that is meaningful to you on tracing paper.
In addition to the techniques described above, there are many more ideas for decorating a candle:
- wrapping with lace, burlap or fabric;
- painting with sugar mastic, acrylic paints;
- decor of the vessel in which the candle is located;
- all kinds of applications with dried flowers;
- decoration with sparkles.
Decor with flowers
Using fresh flowers to decorate candles is not the best option, since the plants will quickly wither and the whole composition will take on a dull appearance. To create a three-dimensional decor, it is advisable to choose artificial flowers made of polymer clay or made with your own hands from ribbons. It is recommended to attach them to a textile base attached to a candle.
Additionally, beads and beads will help give the craft a solemn and bright look. The elements are glued onto flower petals and a textile base. To prevent the product from turning out too elegant, the process must be controlled.
The selection of elements of the same color scheme is encouraged.
Product coloring
Real beautiful candles should look bright, colorful and interesting. The best dyes for homemade decorative candles are considered to be ordinary wax pencils.
Food dyes are not suitable, as they do not dissolve in a fatty environment and simply settle to the bottom. You can find crayons with pearlescent shades; the resulting candles will be very bright and elegant.
Note!
DIY furniture decor - 145 photos of exclusive and modern design ideas
DIY pot decor step by step: simple decorations and decor options for pots made from different materials
Having chosen the softest crayons, you need to grind them into shavings and pour them into the melted wax, stirring thoroughly. Colors can be combined to create beautiful combinations.
With shells
Natural materials look gentle and natural. Decorating candles with your own hands is easy. A simple option: small sea things are glued in a chaotic order. The gaps between the shells can be sprinkled with coarse sand. A great design trick is to cover the dried sand with a clear varnish.
A non-standard solution is to wrap dried seaweed around a candle and glue small shells onto it. Such products will visually remind you of the sea coast. This is a great decor for the bathroom.
How to create decor with a marine mood
Selecting the shape for the future candle
Let's start with the good news - there are no restrictions or strict rules in this matter. Your imagination will have plenty of room to run wild!
The most convenient are ready-made silicone molds, but if you decide to do everything yourself, you can easily use improvised materials. Yogurt boxes, tin cans, plastic cups are all perfect for making candles at home.
For example, let's take a plastic cup from your favorite yogurt. At the bottom, in the middle, you need to make a hole with a thick needle - this will be the place where we will insert the pre-prepared wick.
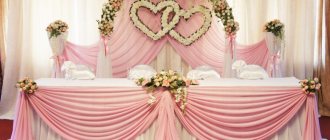
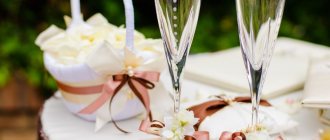
Wedding decoration
Every little detail is important to create the perfect wedding. Candles give the setting both a romantic and solemn atmosphere. There are many ways to turn an ordinary household item into stylish decor. It is important to take into account the color palette and style of the wedding ceremony. The most common material for decoration is lace fabric. It is easy to glue rhinestones, beads, and ribbons to the fabric.
An excellent design technique is to combine several techniques or available materials. As an option, decoupage napkins with a delicate ornate pattern. Rhinestones are glued onto the lines.
Candles decorated with green leaves look fresh and unusual. You can secure the foliage with satin ribbons or cords with lurex.
Original decor options for wedding items
New Year's candle decor
It’s hard to imagine the winter holidays without a flickering fairy light. Therefore, decorating a familiar product becomes an important stage in preparation for the New Year. At the same time, you don’t have to restrain your imagination: aromatic spices, shiny New Year’s balls, and fragrant fir branches are used.
For decoupage, napkins with New Year's motifs are selected. The bright contrast of finishing materials looks interesting: blue paper with images of snowmen and a red satin ribbon tied in a bow.
A win-win option is burlap wrapped around a candle. Small decorative cones and large red berry beads on wires are tied to the candle with jute ropes. The entire composition can be sprinkled with artificial snow a little.
Colorful composition for a winter holiday
Forms and containers
Glass or metal containers are used to cast molded candles. Sometimes plastic glasses or jars are used. The plastic must be refractory. Glasses of sour cream or yogurt are suitable for formulations with a low melting point.
There are a variety of split molds for casting molded candles.
You can use tetrapacks (packaging for juices, milk, etc.), cans for beer, drinks. You can also pour into silicone molds - it’s even more convenient to remove products from them. There is only one condition: in order to be able to pull out the candle, the container must have vertical or expanding walls. There are also detachable molds for candles. They are made of plastic that tolerates heat well.
For easier removal, lubricate the walls of the mold with vegetable oil or special silicone grease. If the candle “does not work,” put it in the freezer for 15-20 minutes. You can also tap it on the edge of the table. Or hit it with something not very heavy. When it has “moved” you can pull the wick. But don't overdo it - the wick can be pulled out. Then everything will have to be repeated all over again.
You can make an egg, a ball, a Christmas tree, a cone, a star and even a sculpture.
Please note that you will have to throw away the container, because it is very difficult to wash it. They can, of course, be reused for casting, but they are no longer suitable for other purposes.
For non-shaped candles, transparent white or colored glass is usually used. There is no need to pull them out, so they can be any shape.