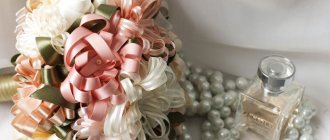
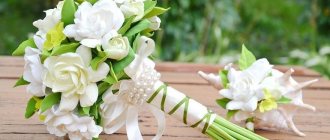
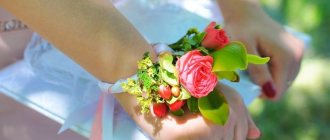
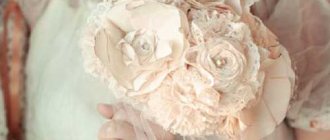
A beaded bridal bouquet is a fairly new, but rapidly gaining popularity trend in creating a wedding look. And although many still prefer fresh flowers, stereotypes are gradually crumbling, giving way to more modern and modern views on life and weddings in particular.
Recommendations from the experts
Masters recommend that before starting to create such an unusual bouquet, you carefully familiarize yourself with the necessary equipment and make a test sample in order to better understand everything.
In order to get a good beaded boutonniere, not to mention a whole bouquet, you need to select the right size of beads for the wire. That is, not all materials are universal and fit one another. And to decorate the branches and stems, it is recommended to use silk to match the color of the leaves, so the bouquet or boutonniere will look more harmonious.
And, of course, you need to proceed from the color scheme of the bride’s dress, the groom’s suit and the overall design of the entire celebration. If the wedding is done in white with gold elements, then a bouquet of blue or green flowers will not fit in: in this case, it is better to create beautiful silver or white elements, or use pastel shades.
Specifics of selecting compositions for the style of celebration
Every bride should know these rules:
- the bouquet should complement the dress, and not compete with it. A lush dress, richly decorated with beads, should be complemented by a modest bouquet. Conversely, a formal dress can be complemented with a bouquet of large mother-of-pearl beads;
- carefully select the shape of the bouquet. Ask the florist to show you all the options, even the most incredible ones;
- Pay special attention to the handle of the bouquet. Braid it with satin ribbons in the same color as the overall holiday color. Make sure the handle is not too big;
- The aroma of flowers is an important component of the entire bouquet. You can drop a drop of your favorite perfume on artificial flowers.
Also, to create a style, it is important to know the trends of 2019:
- small bouquet;
- coral shades;
- ombre effect;
- garden style;
- ears of corn and grass;
- mono bouquets;
- one color accent.
All this can be realized with the help of beads and beads.
Bridal bouquet made of beads: advantages and disadvantages
When deciding on unusual wedding accessories, we advise you to always carefully weigh the pros and cons. Alas, often expectations and results may not coincide. In order not to ruin your mood on such an important day, it is better to look through several options for bouquets made of beads and choose a bead weaving artist as carefully as possible.
Undeniable advantages:
- A beaded bridal bouquet is always unusual and original;
- The accessory will be made in any shape and size;
- The ability to create a bouquet for a wedding in any style. Experienced hands will create a composition for a traditional event or emphasize the magical mood of a wedding in the style of a favorite fairy tale;
- Flowers made from beads will be relevant at any time of the year. Especially in winter, when some fresh flowers are either impossible to find or very expensive. Wicker options will be an excellent analogue;
- You can be sure that a bouquet of flowers made from beads will enchant with its beauty and sophistication throughout the entire holiday;
- A wicker flower arrangement will delight the eye for many, many years to come, reminding you of a happy wedding day;
- This accessory is perfect for the traditional throwing of a bouquet to unmarried bridesmaids;
- With a little practice and patience, you can create a bridal bouquet with your own hands that will meet all your desires and requirements! To help you, there is a master class that describes in detail how to make a bridal bouquet from beads and more.
But, despite the huge list of advantages, beads in a wedding look also have several disadvantages that should not be discounted when thinking through the details of the festive style.
Disadvantages of wicker accessories:
- Production times are quite long. Therefore, bouquets of beaded flowers should be ordered in advance, preferably several months in advance. This way, you will be sure that the master will have time to complete the order on time, and the specialist will be able to pay maximum attention to the bouquet, avoiding shortcomings and mistakes. And, unfortunately, they are difficult to avoid in a hurry;
- The cost of beading can hardly be called affordable. In most cases, it is more profitable for brides to order a composition of fresh flowers, or to make a bridal bouquet from beads with their own hands;
- The weight of the accessory is a separate item. The wicker bouquet turns out to be quite weighty, even if you order a small composition. Be sure to take this fact into account, because you will have to carry the wedding bouquet in your hands for more than one hour;
- Failure to meet expectations is the scariest moment for a bride. You must be confident in the professionalism of the master so that the finished version does not terrify you. Therefore, do not chase an attractively low price, and also take into account the reviews of “experienced” clients. You should not trust orders to novice bead weavers, because a wedding is not the time for experiments. On this day everything must be perfect;
- It is difficult to find a ready-made bouquet. Most beaded compositions are made to order; craftsmen rarely offer to buy a ready-made version. And even if you are lucky enough to find a bouquet for sale, it is not a fact that you will like it.
It is important to understand that the final price depends on the size of the bouquet you need, the complexity of the weaving and additional decor. To get an impeccable result, it is the bride who needs to understand what she wants and describe her desires to the master as carefully as possible
Do not neglect the advice of a specialist; if necessary, find out from him how you can reduce the cost of a bride’s bouquet.
Only through personal contact will you be able to better understand each other, which will certainly affect the final result of the order.
Wedding brooch bouquets, ideas with photos
In order for a fashionable brooch bouquet to look harmonious in your wedding look, its shade range and texture must ideally match the color and decor of the bride’s dress and other accessories. For outfits with rich trimmings, stylists advise choosing plain brooch bouquets of satin and lace flowers, with not too flashy, elegant decorations.
A wedding dress with discreet decor can be complemented with a bright and eye-catching bouquet, entirely consisting of sparkling brooches, artificial cut stones and other jewelry accessories
In other words, the simpler and more laconic the decoration of the bride’s outfit, the more expressive, fanciful and richer the wedding brooch-bouquet can be.
Exquisite bouquet of balloons for the newlyweds made of pale lilac satin roses. Decor: lilies of the valley made of large artificial pearls, decorative brooches and pendants with transparent zirconium.
A spectacular wedding bouquet of white satin roses and blue kanzashi gerberas. The decor is large artificial pearls, oval mother-of-pearl medallions in a gold frame and openwork “butterfly” brooches.
Luxurious cascading composition of jewelry for the bride. The basis is a hemispherical bouquet of pearl and azure satin roses. Decor - stylish silver brooches, pendants with transparent stones, sparkling rhinestone threads.
Several ideas for creating fashionable wedding brooch bouquets, video:
Required Tools
During the work process, you may need many tools, but the basic set that should be on hand will be the following:
Beads. It needs to be purchased in sufficient quantities so that later you do not have to adjust the design of the bouquet or even stop work due to lack of material. The shades of beads may change, even if the packaging has the same markings, so it is advisable to order from one batch at once.
Fishing line, colored wire, thread
It is important that they are the same color as the beads, otherwise the composition in the final version may have a sloppy appearance. If you couldn’t find wires or fishing lines that are identical in color, you can paint them with regular nail polish
Speaking of threads, it is best to buy silk threads intended for embroidery.
Wire cutters, pliers. Needed for cutting wire, as well as for more convenient bending during work.
Ribbons, lace. The first ones will be needed for wrapping the stems, the second ones will serve as an additional decorative element.
Glue. It is best to use a special gun. With its help, you can quickly glue the necessary parts together without getting your hands dirty.
Container for materials. If you don’t want to spend extra money on boxes and boxes with compartments for beads and tools, then you can even get by with ordinary matchboxes or jars of cosmetics. The main thing is that beads of different shades do not mix and do not fall apart during storage.
Desk lamp. Weaving with beads should be done during the daytime, but few can afford such luxury
If you have to do needlework in the evening or at night, then it is important to provide the workplace with good lighting
Workplace organization
To make working with beads fun and enjoyable, you need to not only stock up on the necessary materials and tools, but also take care of the convenience of your workspace, especially how to arrange the beads on it. You can take a piece of plain flannel, fold it several times to make it look like a flat pillow, and sprinkle beads of the desired colors on it in small piles.
Some people think that it is more convenient to use a shallow saucer or box with low sides for work. But if you need multi-colored beads, then you will need a separate saucer for each color - otherwise the beads will get mixed up. In this case, plates from a children's toy dish set or jam sockets are suitable. If there is room on the table for only one container, place a piece of rough fabric in it - the beads will not roll around too much.
It is very important that when working with beads, the workplace is well lit, otherwise your eyes will get tired. To give them rest, you need to take a break of 10-15 minutes every hour.
If children take part in working on the bouquet, do not let them sit at this activity for too long. 6-8 year olds can work with beads no longer than 30-45 minutes, 9-11 year olds - 45-60 minutes, and teenagers 12-16 years old - an hour and a half a day.
Beaded wedding bouquets
Wedding bouquets for the bride made from beads look unique, unique, and elegant. It will retain its pristine beauty after the ceremony, decorating the interior of the room. You don't have to worry about it wilting.
Bouquets are not at all heavy as they might seem. It must be ordered in advance, as it is difficult to purchase in a regular store.
The main advantages are:
- unique, beautiful, interesting, unusual;
- it can be made in any size, shape, color,
- it is resistant to any environmental phenomena: rain, wind, snow;
- unpretentious in storage;
- matches the wedding bouquet to the style of the wedding dress.
Wedding bouquet made of beads
If you like sophistication, originality, comfort, a wedding bouquet made of beads will suit you like no other.
It's quite simple
To understand which shades of beads in a composition will harmonize most successfully, use the following advice. Scatter the existing beads on the table and see if the color combination is beautiful. Or watch a master class on combining shades.
Basically, that's all. Making a beaded wedding bouquet is not that difficult if you watch a good master class. The main thing is to be patient, because beading is a painstaking, almost jewelry-like work that requires increased attention, free time, and perseverance. However, upon completion of the work, you will certainly be satisfied with the results.
You can be sure that a beaded bouquet is an excellent solution for such an important and important day as a wedding. With such bouquets you will look very stylish, gentle, original
This composition can become a real talisman for your family, an heirloom that will be passed down from generation to generation.
Beading techniques
If the decision to make a wedding bouquet from beads with your own hands has already been finally made, but you have not had any experience in needlework until now, then you first need to become familiar with the basic techniques used in beadwork.
There are only three of them:
- Lowering. Beads are placed on a thin fishing line or thread, and only at one end. Using this technique, you can create both simple and complex elements, later collecting them into a full-fledged bouquet.
- Weaving. Here both ends of the fishing line or thread are already involved in the work. The technique requires a certain skill, but, as in any business, skills come with time. There are many master classes on this topic on the Internet.
- Weaving. Here additional equipment is already connected in the form of special weaving machines. When choosing this method, you need to understand that, due to the technical features of the device, it will not be possible to make three-dimensional compositions.
Beaded wedding jewelry options for the bride
In addition to the dress and veil, the bride's wedding look should include a gold ring on her finger, on which a precious stone will shine. And all other jewelry is simple jewelry. For example, a necklace made with beads looks very gentle, airy and elegant. This accessory perfectly complements any bride's dress and does not look cheap. To make a young look harmonious, you can choose beads, a necklace, bracelets, or a tiara. The butterfly pendant and earrings look beautiful.
Bouquet of beads, rhinestones and bugles
Wedding jewelry made of beads is exquisite, delicate, modern. A bouquet made from this material, complemented with glass beads and rhinestones, looks very beautiful, original and rich, ideal for almost any bride's look. The advantage of such an accessory is that it is not afraid of strong winds and rain, it tolerates frost well and will retain its beauty even at the end of the evening. For a long time, your bouquet will not change its correct shape and will long remind you of the happiest day in your life.
A bridal bouquet made using beads and bugles is a fashionable, stylish solution, but you need to follow a few tips when choosing it:
- The newlywed's bouquet should not overshadow her outfit, which is the main decoration of the young woman.
- Make sure that this product is not too faded.
- The colors of the chosen bouquet should go well with the bride’s clothes.
- It is advisable to choose a composition that was created using small square beads, pearls, bugles, and rhinestones. Such decoration will look elegant, and its weight will not be too much.
- A round or cascading bouquet goes perfectly with a dress with a full, voluminous skirt.
- If the bride has chosen a stylish outfit with a tight silhouette, she should choose a simple bouquet that is not overloaded with a large number of decorative details.
Necklace and earrings made of beads and stones
When choosing wedding jewelry made of white beads for the bride, it is recommended to immediately purchase a set - earrings, necklace. The beauty of the airy necklace is mesmerizing - it is a string of beads with a small hook at the end. Such products are very elegant and modern, and the transparent beads look like noble diamonds. However, the bride needs to be extremely careful and not overdo it too much, otherwise she risks looking like a bright Christmas tree.
If you have chosen an elegant dress with a tight silhouette, complement it with a set of beaded wedding jewelry - earrings, necklaces made with stones and beads. In order for the bride’s accessories and evening dress to harmonize with each other, you need to be able to combine them correctly:
- If the dress has a V-neck, a beaded necklace or bugle piece of the same shape will work.
- An airy necklace with beads matches the open neckline.
- Jewelry for the newlywed's neck should be selected taking into account the style of the dress.
- When choosing wedding accessories, remember that all products must be made of the same material.
Tiara for the bride's hairstyle
A tiara is an ideal decoration for a bride. To feel like a real princess, you don’t have to save for several years to buy jewelry. This accessory looks no less beautiful and stylish if it is made of beads. A tiara for decorating hair, like other wedding jewelry, should be selected taking into account the style of the bride's dress. To complement the look, the bride can use a bracelet, but you should not choose a lot of accessories so as not to look vulgar.
Hairpin "Morning Flower"
Author of the work: Anya Yakubovskaya
The morning sun covers everything around with golden pollen and of course does not miss the beautiful flowers. Today we will create such a flower from beads.
For this we need:
1. First, glue the stone to the felt and begin sewing gold beads around it. We sew with a “back needle” seam through 2 beads.
2. Then we begin to weave mosaics:
3. At the end, when the main part is sheathed, we narrow it, skipping the beads. Because I got 36 beads in the circle, so I weave 2 as usual and skip 3:
4. Cut the felt to the shape of the leaves, but a couple of millimeters less:
5. Now we begin to embroider. First of all, we outline our embroidery, then, while embroidering, we make some stitches looser. We also take gold beads along the edge of the petals. Don't forget about the dew:
6. We complete the embroidery itself:
7. Carefully trim, cut off a piece of leather of the same shape and sew the edges. I worked bead stitches around the edge.
8. All that remains is to glue it onto the workpiece and now we can see the flower, which, you can be sure, will sparkle on your hair.
Beaded lilies of the valley
Lily of the valley No. 1
This wonderful flower has an incredibly pleasant scent that, once smelled, is hard to forget. Beautiful delicate flowers will bloom forever on your windowsill if you weave them from beads.
Necessary materials and tools for weaving:
LILY OF THE LILY WEAVING PATTERN:
1. We begin weaving white lily of the valley flowers. To do this, pick up 9 white beads onto the wire, then step back the last one, go through the 8th bead, pick up 5 beads and go through the 2nd and 1st beads. You will get one petal (Fig. 1).2. Repeat 5 more of these petals next to each other so that you get a fan of petals as in Figure 2.3. Now, coming out of the top bead of the first petal, connect all the ends of the petals with wire and between each one, collect 2 white beads, close all the petals into a ring. Thus, you already have a flower in the form of a cup. All that remains is to decorate it and again go through the ends of each petal, but now collect 5 white beads between them (Fig. 3). One lily of the valley flower is ready.4. The first flowers should be slightly smaller than the lower ones, so weave 5 small flowers, then increase the petal by 1 bead on both sides of the loop and weave 4 medium flowers. Enlarge the bottom 4 flowers with a bead on each side of the petal. Make stamens from three yellow beads and insert them into the center of each flower.5. Green leaves just need to be cut out of corrugated paper. You can attach a cardboard model, trace and cut out 3 identical leaves.6. We collect lily of the valley. Screw all the flowers from small to large to a thick wire, guided by the photo of the finished work. Then wrap the leg with floral tape. Then dilute the plaster with water, place some paper in the pot, fill it with plaster and stick a lily of the valley with leaves into it. When the plaster has hardened, decorate its surface with satin ribbon grass. The lily of the valley is ready!
Lily of the valley No. 2
This lily of the valley is already made entirely of beads, unlike the first version. But this is not for everyone, and if you can devote a lot of time to beading, then of course it is better to make a lily of the valley entirely from beads, including large green leaves.
Necessary tools and materials for weaving:
HOW TO WEAVE A LILY OF THE LILY
1. So, each lily of the valley flower consists of five loops. Make loops of 7 beads each in three small flowers, 9 beads each in three medium ones, and 11 beads each in three large ones.2. Such flowers are attached to a double wire as shown in the diagram above, and then twisted. It turns out to be a leg. The flowers will need to be straightened at the end so that they hang in a row.3. The finished stem is wrapped with floral tape. Make another such branch. Now you need to start making green leaves.4. Using the French weaving technique with arcs, take the first main row approximately 3.5-4 cm in length, and then weave a pointed-type sheet. To ensure that the sheet is wide enough, make approximately 12-13 full turns (this is 24-26 arcs), but it also all depends on the size of your beads, so you should always be guided by the product.5. To keep the sheet in shape, it needs to be stitched. Make 3 more of the same leaves. Collect the finished parts into a bouquet. Lilies of the valley are ready!
You can put them in a vase or plant them in a pot.
pros
Artificial flowers have many advantages over real plants, and beads also add a positive accent.
- You can create any shape from beads - just string the beads on a wire. After this, you can make either a flower found in nature or invent your own.
- There are no restrictions that come with real plants. Bud blanks can be installed at any angle, while bending the leg as convenient.
- Beaded flowers do not lose their shape due to temperature changes or sunlight.
- The choice of bud color depends only on the wishes of the newlyweds.
- Such a bouquet will not lose its attractiveness regardless of the time that passes from the moment of its creation.
But unlike ordinary bouquets, it is quite difficult to find a master who will create an individual composition, and due to the time and resources spent on production, such an accessory will cost much more.
How to do
To create a wedding bouquet from it, you will need to stock up not only on a large amount of beads themselves, but also purchase several skeins of wire or fishing line, since it is this that makes up the frame of the entire bouquet and holds the beads on itself.
Weaving should begin with an idea. If the bride decides to create a bouquet herself, then first she needs to at least roughly draw it, and only then get to work.
In general, the process consists of the following stages:
- Creating petals. First you need to prepare all the petals for each flower, since the composition is assembled in parts. But depending on the shape of the flower, you can tie several petals together at once.
- Next, the middle is made, and the flower is assembled. The middle can be either one large bead or several smaller beads.
- Creating leaves. Each leaf is also tied separately, like the petals.
- Collection of the bouquet itself. It is best to make it denser so that the elements do not have a lot of free space between them.
- Decorating the composition with additional accessories. It has already been mentioned that these can be stones, ribbons, paper, which florists use. Of course, some stones are woven directly into flowers or leaves and cannot be added as an afterthought, but there are also elements that “complete” the composition as the final touch.
What to pay attention to
As you know, details give integrity and completeness to any image. What should you pay attention to when choosing a wedding dress for the bride and groom?
Depending on the season, the bouquet can be made more strict, winter, or, conversely, diluted with gentle warm shades - for example, adding citrus tones or unobtrusive greenery to the composition.
Hair clips, hoops, earrings, necklaces and other jewelry made in the same style as the bouquet look interesting. For the groom, you can make a boutonniere or a tie clip.
DIY wedding bouquet from toys: step-by-step instructions with photos
The master class with photos presented below will help you create a unique bouquet.
What you will need for an original, attention-grabbing holiday attribute:
- Several soft toys of the same size.
- Floral wire. The length varies depending on the number of toys in the wedding bouquet. In this case - 2.5 meters.
- Corrugated paper in matching shades (2 rolls).
- Satin or paper ribbon (2.5 meters).
- Decorative elements: stars, feathers, hearts, satin roses, etc.
- Transparent adhesive moment.
- Wrapping paper or a thick bag.
- Scotch.
- Scissors.
- Stapler.
Step-by-step instructions for creating a wedding bouquet:
- Place the toys tightly on the wire. To do this, wrap the selected soft toys with wire in the middle of the belly, bend and twist so that the short end is at least 10 centimeters. When you are done with the fastening, connect all the toys as in the picture, twisting the free end of the wire:
- Next, you need to wrap the wire with wrapping paper or a bag to hide its unaesthetic appearance and prevent the danger of tearing the corrugated paper. The top needs to be secured tightly with tape.
- After creating the base of the bouquet, you should proceed to the main decor. Cut the required amount (60-80 centimeters) of corrugated paper in two colors. Fold the edges of the sheets together separately and fasten with a stapler. When both pieces of corrugation are fastened, fold one into the other so that the outer roll is at a level of 7-10 centimeters above the inner one.
Helpful advice: when placing corrugated paper one on top of the other, be careful, because the lighter one always shows through, it looks ugly. For the outer circle, use a darker shade.
- You need to put the base of the bouquet with toys into the resulting fastened rolls, and then tie it tightly with a satin ribbon and carefully straighten the edges - the wedding accessory is almost ready.
- To further decorate the corrugated paper, you must first gently fold the edges of the lighter sheet about two centimeters inward, and then, using light finger movements, pinch the edges at intervals of 2-4 centimeters, creating “waves.” The same steps must be done with a dark shade, creating a fluffy underskirt.
- The final chord remains: decorating the bouquet with sparkles, flowers, rhinestones, beads, feathers. Choose decorative details according to your imagination and the overall style of the wedding. After the final decoration, the cute wedding accessory is ready!
Useful tips for creating a bouquet for beginners:
Many people don’t know where to buy many small identical toys, and products in children’s stores are expensive
There is a way out: pay attention to the key fobs, which are easy to find even in the underground passage. They are inexpensive, and toys from keychains are ideal for a wedding bouquet
The best corrugation is Chinese and Italian. However, the cheaper Chinese version stretches worse, unlike better quality paper made in Italy
The price difference is approximately 20 rubles. You can use paper tape to tie corrugated sheets, but you should take into account its features: you won’t be able to tie a roll twice with such tape because it wrinkles easily and the paint wears off. It is preferable to use the satin version.
However, the cheaper Chinese version stretches worse, unlike better quality paper made in Italy. The price difference is approximately 20 rubles. You can use paper tape to tie corrugated sheets, but you should take into account its features: you won’t be able to tie a roll twice with such tape because it wrinkles easily and the paint wears off. It is preferable to use the satin version.
A wedding bouquet of soft toys is an original solution against a classic flower arrangement. Such a bouquet will evoke many pleasant memories for those present about a happy, carefree childhood and will remind you of your favorite plush toys. In addition, the children present at the celebration will be truly delighted. At the end of the holiday, the newlyweds can play a beautiful accessory not between their unmarried girlfriends, but between the little guests of the event.
Top assembly
The prepared thick tourniquet will be very useful now. Carefully form a stem from it onto which the finished petals of a small rose will be attached.
It is important to follow the sequence of rows and combine all the blanks into one whole lush bud. The previous part must overlap the next one
The heaviness of each leaf will cause them to hang down a little. To prevent the structure from completely falling apart, the use of glue will be required; it must be used at the base of each row from the inside.
The top won't look complete without a rose sepal. You should work on its creation at this stage. Having cut off approximately 75 centimeters of wire, making an axis, you can begin stringing. So that all measurements are not made by eye, it is better to use a ruler or tape measure; the jagged sheet technique is easier if you observe each small length.
