Materials and preparation Ideas with ribbons Options with polymer clay Decoupage with napkins Decor with fabric Painting
Decorating champagne for a wedding with your own hands is a fun and creative activity that can be done by both the relatives of the bride and groom, as well as the organizers.
Traditionally, these unique bottles are not opened. They stand on the table as decoration, but they can only be opened on an anniversary or during the birth of the first child.
The design of champagne can be anything you want, because its design is in no way regulated by tradition. The scope for the designer's imagination is simply immense. We have collected several ideas with detailed descriptions of how to bring them to life, and also supplemented the text with colorful photos for inspiration, so that a couple of bottles at your wedding will look truly unique.
What materials are traditionally used to decorate a wedding bottle?
It is advisable to decorate both bottles using the same technique so that the paired combination can be seen.
For example, if it's just white spray painting, you can buy one larger bottle and decorate it with a homemade hat and a bow tie for the neck. Then a smaller bottle may have a white veil or skirt with 2-3 rows of flounces.
They can be gathered with elastic or sewn from a beautiful and light white fabric, gathered with a drawstring:
- tulle;
- atlas;
- silk;
- organza;
- tulle;
- veil;
- guipure;
- lace;
- embossed ribbon.
More attention is paid to the design of the “female” bottle; the “male” half of the table decoration looks more restrained. Modest decor can be sophisticated if you think through every detail.
You can spy on other people's ideas or make something from scrap materials that no one has ever had before, when you have such a desire.
Advice. The design of wedding glasses and bottles should not be taken lightly. These attributes will be in full view, so there is another opportunity to surprise your guests.
If the wedding is non-alcoholic, you can arrange any fizzy drink in a beautiful bottle. Some people want to decorate a bottle of cognac or other strong drink. The basis of the decoration is the same - wedding theme:
- he and she;
- rings;
- hearts;
- color;
- elements of the bride's outfit.
You can use beads and stones with a flat base (for gluing), sparkles and beads, small artificial flowers and fragments of jewelry.
If you are ready to do the work yourself, do not put this part of the wedding props on the back burner. It may take longer than expected. To choose something creative and unconventional when you don’t have your own ideas, look at the topic of decorating wedding bottles with your own hands, master classes and step-by-step explanations.
Of course, such a wedding attribute can be bought ready-made or offered to a craftsman to make it to order.
This won’t surprise anyone today, but where is the guarantee that your guests didn’t celebrate another wedding at a table with exactly the same decor? It can get awkward when asked, whose champagne is it? Therefore, it is better to choose something original so that no one around you has this.
An order for a craftsman will cost 2-3 times more, but it’s not even a matter of saving, although everything can be done from scrap materials. No one can put as much warmth into decorating your wedding as the bride and groom themselves or their loved ones.
Important! You can vary the color of the decor of wedding bottles with your own hands, but it should not bring disharmony to the overall design of the festive feast. If this is a wedding in lilac, gold or turquoise tones, then it is better to complement a white bottle of champagne with decor in the agreed upon range.
The original decoration can be made in duplicate and sold to guests at an impromptu auction. Or offer a souvenir as a prize in the most beautiful or original competitions.
Recommendations
- Be sure to prepare the glass before starting work - remove the label, degrease and dry;
- Remember that too much heat can negatively affect the taste of the champagne;
- When choosing a design, focus on the theme of your wedding , the overall decor of the festive table, as well as the groom’s suit and the bride’s dress;
- Study how much time is needed for this or that stage of work in order to finish everything before the ceremony in an emergency mode. For example, acrylic pre-hardens 30 minutes after application, but remains weak for several more days - this is important to consider if you are going to glue something on it;
- Decorating bottles for the bride and groom allows for a variety of experiments, but it is worth remembering about moderation in order to create a truly elegant design.
Types of decor for wedding bottles
Designing and decorating champagne bottles for a wedding can be done using several methods.
Types of decor:
- ribbons;
- photos;
- polymer clay;
- fabric trim;
- engraving;
- decoupage;
- paints;
- rhinestones.
Before carrying out it is necessary to prepare all the tools, as well as the bottle itself. The surface must be cleaned of labels and thoroughly degreased. This will help achieve high quality results.
Note. When decorating, it is recommended to adhere to the general style of the hall in which the celebration is taking place.
Polymer clay flowers
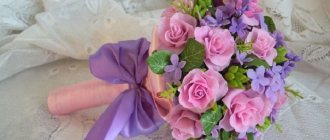
Polymer clay helps in creating delicate and realistic buds. You can either buy such flowers in a specialized store or make them yourself.
There are no uniform requirements on how best to decorate bottles for a wedding; it depends on the wishes of the newlyweds and the taste of those who decorate them.
Tools:
- clay;
- talc;
- latex gloves;
- stationery knife;
- rolling pin;
- varnish for polymer clay;
- toothpicks;
- dye;
- brushes;
- water;
- soft sponge;
- degreaser.
Callas are one of the easiest creation options. This method is suitable for beginners in working with polymer.
When working, you should use gloves to protect the delicate skin of your hands.
Reference. It is recommended to lightly sprinkle the clay itself with talc to avoid the adhesion of dust and small specks.
It is recommended to divide the working material into small identical pieces. They are rolled into sausages, from which a ball is formed. The resulting ball can be cut into two equal halves to create small flowers. The ball must be kneaded to obtain a round plate. It is necessary to carefully monitor the thickness - too thin petals can quickly break. One corner of the plate is slightly stretched and bent. The lower half is folded overlapping each other. The petal is ready. A toothpick is inserted into the center, which must be covered a little with clay in advance and painted in the required color.
The result is fixed with varnish.
When all the flowers are ready, you can start decorating the bottle. Remove the label from the surface of the container with warm water. After drying, the bottle should be treated with a degreaser. The vessel itself is painted in the desired color. The stems are painted with green paint and flowers are glued around them. For additional decoration, rhinestones or beads, ribbons, and tulle are suitable.
Floral decoration of champagne bottles for a wedding will quickly attract the attention of guests.
How to choose a decor style?
Champagne is the most traditional drink for wedding celebrations; any festive table is abundant with it. Many wedding competitions and games also use bottles of this drink. This is a good reason to make champagne a small highlight of the holiday.
You can turn bottles into real exclusives by showing a little imagination and ingenuity. You can do the decoration yourself, which will save money.
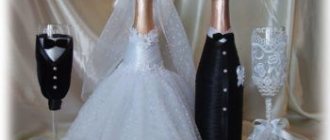
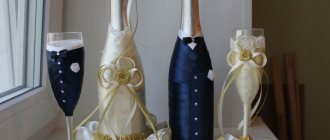
There are a lot of design options for champagne bottles. The most common option is to decorate the sparkling wine in the “bride + groom” style. Such a “couple” is usually placed on the newlyweds’ table. The classic color scheme in this case is black and white.
But if the celebration involves the use of some bright color (this is fashionable now), then the bottles can also have colorful elements.
It is popular to celebrate weddings using bright colors in addition to classic colors (white, ivory, champagne, milk). It can be turquoise, blue, orange, purple and even red.
The holiday will clearly become bright and unforgettable, but then it’s worth thinking about color accents in everything. Including in the decoration of wedding attributes.
There are a lot of design options - decoration with three-dimensional elements, fabrics and lace, pearls, scrapbooking, modeling. The drink looks good in bottles hand-painted with acrylic paints.
The most important thing is not to overdo it and create such decor that the bottle of champagne does not stand out from the overall style of the holiday.
Two beautifully decorated bottles are usually made and it is not customary to open them during the celebration. They remain for the couple for the future: one for their wedding anniversary, the second for the birth of their first child. Here is another reason to make a bottle of champagne beautiful and unusual.
The main rules of decoration are compliance with the given level of solemnity, combination with the furnishings, dishes, and outfits of the newlyweds
. For example, gold and silver engraved bottles would be completely out of place at a boho or Provence style wedding. But delicate floral motifs and lace are an excellent decorative option for a classic wedding with aristocratic notes.
If the wedding takes place under the auspices of a specific theme, for example, maritime, then the decor may include appropriate details. Bottles of champagne can be painted to resemble a sailor’s vest or decorated with anchors and chains, painted with sea waves, etc.
An autumn wedding in the Russian style presupposes the presence of autumn fruits and vegetables in the paraphernalia and the use of a red-red color scheme. Here bottles can be decorated with stylized painting, autumn apples or leaves.
The main thing in decorating is to show your imagination.
You can find many master classes on the Internet, which detail the sequence of actions and the necessary materials for the work. It’s these little things that make up the overall atmosphere of the holiday, so pay due attention to decorating not only the newlyweds, the cortege and the banquet hall, but also small accessories.
Painting with paints
The use of paint is one of the most lightweight decorative options. The choice of colors and patterns allows you to create a bright and unusual decoration for the festive table.
Tools:
- soft sponge;
- degreaser;
- paint (preferably in cans);
- unnecessary newspapers;
- gloves;
- stencils for applying drawings or inscriptions.
The surface of the vessel is cleaned of labels, foil and traces of glue, and degreased.
Spread newspapers on the work table to prevent dirt and streaks. The paint application process is carried out with gloves.
Attention! It is recommended to work outdoors or in a well-ventilated area.
After the background has dried, you can begin painting. If you do not have the necessary skills, you should use stencils. When finished, the bottle must be thoroughly dried.
The result can be sealed with varnish.
DIY wedding bottles with ribbons
So there are at least two bottles of champagne. Making it exclusive is not at all difficult, the main thing is to prepare well.
To begin with, get rid of unnecessary labels, only carefully so as not to scratch the glass. Then you can start decorating. One of the most popular methods for decorating champagne is using satin ribbons. This method is simple and affordable, but the result is a bottle that looks gorgeous.
Ribbons are needed to wrap vessels with sparkling wine, and also as an additional decoration. The satin ribbon should be the optimal size and color.
ADVICE. It is better to process the edges of the tape (carefully burn it) so that it does not diverge.
What are "bulls"?
Bulls at a wedding are two bottles of alcohol, usually champagne, which are given to the newlyweds. Bottles should be beautifully decorated and tied with a ribbon. Where did this strange name come from: “bulls”?
This tradition arose somewhere between the Dnieper and Don, in the south of the Russian Empire. In Ukrainian and Don villages, it was customary to give newlyweds a cow and a young bull. Firstly, there was a joke at the expense of the newlyweds, and secondly, own cattle was an excellent help for a young family. And this gift, by the way, was not cheap! After a year, the newlyweds had to call the guests and give the guests cow's milk to drink, as if declaring that they had managed the housework. And the bull was slaughtered in honor of the birth of the first child.
In approximately the same form, the tradition has survived to this day, only real bulls have become conventional “bulls.” The first bottle is opened a year after the wedding, and the second when the child is born. The comic tradition of stealing bulls and demanding a ransom for them, as well as for the bride’s shoe (and for the bride herself), has also been preserved.
Decorating champagne with satin ribbons master class
The method is simple and universal; satin ribbons can be selected to suit your taste.
Materials:
- tape – 2.5-3.5 m;
- gold brocade ribbon – 1.5 m;
- instant glue;
- champagne with gold foil;
- scissors.
How to decorate a bottle with ribbons master class
1. Let's get started! First you need to measure out enough tape for the first layer.
2. Cut the tape and use glue to mark the points.
3. Wrap a satin ribbon around the vessel, pulling it tightly. Do the same with the other cut, which will be larger as the bottle expands. Make the third and fourth layers in the same way.
4. Now it's the turn of the brocade ribbon. Two layers are enough.
5. Glue the gold ribbon to the bottom of the bottle so that the seam is at the back. And also cut 7-8 ribbons of the same length of the chosen color, glue them in the same way so that the seam is at the back.
6. You can remove a sloppy seam using another tape.
7. Cover empty spaces with gold tape.
8. Carefully trim off any protruding corners.
9. For additional decor, you can use beads, lace, bows - whatever you like, the main thing is not to overdo it.
10. DIY wedding champagne is ready!
Decorating wedding bottles with velvet
You can decorate champagne for the newlyweds' festive table using velvet. This luxurious and elegant material looks great.
Even an ordinary container is transformed thanks to the velvet decor.
Decorating champagne for a wedding with your own hands is very easy to do. You only need stretch velvet, thread, paper and a pencil, as well as two bottles and decor.
ADVICE. It is better to lightly burn the pieces of fabric needed for processing along the entire perimeter.
Wedding champagne: what to consider when choosing alcohol
There is no doubt that a wedding requires a lot of champagne. But you still have to calculate exactly how much alcohol you need to buy. Otherwise, guests will quickly switch to drinking stronger drinks or will have to urgently purchase what is available in the nearest supermarket, rather than treat their friends to a high-quality aromatic drink.
But there is no need to spend extra money when preparing for a wedding. Therefore, before we go shopping, let’s try to figure out what to choose and how much.
When calculating alcohol, be sure to take into account the number of guests and the time of the banquet.
Perhaps these are the main factors that will have to be taken into account in the future. But it’s also worth making adjustments for quantity:
- non-drinkers, light drinkers, lovers of a good walk - this can only be done by knowing the alcoholic preferences of the guests;
- youth - it is young people who drink more at such holidays;
- women - ladies prefer light alcohol.
The wedding season also influences the choice of alcohol. During a sultry summer celebration, many times more cold champagne is consumed than at winter weddings.
You can learn about the history of champagne in the article: Happy Birthday, champagne: the most interesting facts about the sparkling drink.
How to decorate champagne for a wedding with engraving
Perhaps not everyone can do this work with their own hands. Engraving on glass requires a special machine, so in this case a professional will do everything in the best possible way. The main thing is to decide on the pattern, image, inscription and the master will create an exclusive, impeccable decor.
Engraving is an original design for wedding glasses and bottles; you can add decorations with flowers, ribbons, beads and bows with your own hands.
Tradition with wedding champagne glasses
It’s better to go for a walk and congratulate the young family on their birth. Here you can observe another beautiful tradition of breaking wedding glasses.
If disposable cups are usually prepared for all guests, then glass wedding cups are required for the newlyweds.
This is not the couple that will show off next to the champagne on the banquet table. And simple glass ones or with minimal decoration, since their fate is already predetermined.
According to wedding traditions, such champagne glasses will simply need to be broken.
Today it is quite difficult to say what this beautiful symbolic ritual is connected with.
Maybe with the custom of Jewish weddings, where since ancient times the groom broke a glass wrapped in a napkin for good luck. Or maybe from the traditions of Russian officers who smashed glasses after toasts.
Most likely, the roots of such a ritual go back to the Middle Ages, when it was believed that the sound of breaking glass drove away evil forces from the young.
By the way, some peoples suggested that the bride break a pot in order to evaluate her innocence based on the results of this ceremony. Echoes of this custom have survived to this day.
Many people try to determine the sex of a young child's unborn child using the fragments of broken glasses. Large fragments from broken glasses promise the birth of a boy, and small ones promise a girl.
And as lawyers advise, to avoid troubles, drink glasses in nature carefully, drink a little and do not disturb the peace.
And don’t forget to collect the fragments from broken glasses and disposable cups in a prepared bag.
By the way, take as many disposable cups as possible so that guests do not have to take already used dishes with them until the next stop of the wedding procession.
Decorating bottles for a wedding with your own hands: champagne for the bride and groom
The bride and groom at a wedding can be not only at the table, but also on the table. Of course, we mean decorated champagne. You can make a bottle bride and groom with your own hands using bias tape or ribbon.
For two bottles you will need the following materials and tools:
- 10 m of white bias tape;
- 8 m of blue or black bias tape;
- 4 m of bias cream binding;
- 10 cm white lace;
- 3 m of wide lace, bow or piece of tulle;
- glue in a pencil (super glue moment);
- scissors;
- decorative ornaments;
- cardboard for hats.
Below is a step-by-step process for making wedding bottles.
Bottle for a wedding - Bride: step-by-step master class with photos
- Just like a real bride, the bottle of champagne in this outfit should be the center of attention, and this requires perfect execution of the job.
- Initially, use a marker to draw a straight line in the front center, along which you will need to glue the edges of the tapes. Try on the lace at the neck, cut off the required piece. Spread the bottle with glue and glue the lace. Coating the glass of the bottle, glue the bias tape, cutting off its long part after gluing.
- Continue oblique gluing until the middle of the bottle. From the middle, the bias tape is glued in a circle to the very bottom of the bottle.
- Take a wide bow near the subway, use an iron ruler and a hot soldering iron (a knitting needle heated over a fire) to solder the edges of the bow. It should look like this.
- Fold it in half and sew with a cast-on stitch. Put the resulting skirt on the bottle, tighten the thread to its size. Remove part of the skirt and follow the same example to make two more skirts.
- Determine the place where the skirt will be attached. From its upper part you need to mark a place for two petticoats, coat these places with glue and glue two blanks.
- Sew golden bias tape to the overskirt. Glue it onto the bride bottle.
- Fold a piece of a wide bow in half. Using a mug and a hot soldering iron, make a circle (the edges will stick together under the influence of the heat). As shown in the photo, cut out the darts so that the brim of the hat can be glued on.
- Make a ring out of cardboard to fit the diameter of the bottle neck. Cut out a circle with teeth for the top of the cap.
- Bend the teeth, glue the top part of the cap and brim. Glue a white ribbon in a circle on the outside and tie an organza ribbon.
- Glue beads to the bride’s “neck” and put on a hat. The bottle-bride is ready for the celebration.
Champagne at the registry office
The beautiful tradition of congratulating the newlyweds immediately after the painting is accompanied by kisses, wishes of happiness and love, sprinkling with coins, wheat, flower petals, and giving bouquets. And you can't do without champagne.
Stop. Here the question arises: is it possible to drink champagne in the registry office? By the way, the question is quite pressing. Since after the adoption of the law banning drinking alcohol in public places, this became simply impossible.
Many registry offices have refused to provide buffet halls and special rooms.
It is also prohibited to open a sparkling drink in the areas adjacent to the building of the Wedding Palace.
Since a lot of controversy arose around this problem, the heads of the registry offices began to look for a way out of this situation. Therefore, options appeared.
In institutions that have received an official license, they offer buffet rooms or specially designated rooms for rent. Most often, this service is paid, and for the standard 15 minutes provided you will have to pay a decent amount.
But you shouldn’t count on the opportunity to congratulate the newlyweds with champagne in the lobby or at the exit from the registry office. These places fall under the prohibited law and you can start the wedding not with pleasant congratulations and emotions, but with a real fine.
To maintain tradition and avoid trouble, some newlyweds offer their guests non-alcoholic champagne.
But how solemn this approach will be is difficult to say.
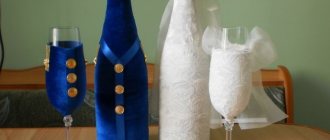
Bottle for a wedding - Groom: step-by-step instructions for working with photos
The bride is ready, now let's get down to creating the groom. The work is carried out identically to the execution of the bride bottle.
First, fold the white ribbon in half and try it on the neck of the bottle.
- Apply glue to one half of the folded tape and glue it to the neck of the bottle so that the upper part can bend.
- Raise the top of the collar of the first tape, glue another 2-3 rows to the bias underneath it.
- Measure out the main color of tape to attach to the bottle. Raise the collar and tie a ribbon tie for the groom.
- Lower the collar and continue gluing the blue ribbons (on top of the tie) onto the bottle.
- When the narrowed part of the neck ends, cover the bottle in a circle with ribbons to the very bottom.
- Glue buttons to the groom's jacket. Decorate the “chest” with a boutonniere.
- Prepare such parts for making a top hat for the groom.
- Glue a cylinder out of cardboard. Cover it with ribbons and decorate it to match the jacket.
- Place the top hat on the bottle and the groom is ready.
Ribbon costumes
On the most “masculine” day, a non-trivial gift for a representative of the stronger sex will be a bottle of cognac, which is “dressed” according to its uniform. Such a gift will be of particular importance for a military man, rescuer or police officer. Satin ribbons are used to make a jacket, which is decorated with miniature chevrons, shoulder straps, buttons and ties with clips.
The costume is created using the technique of overlaying ribbons on top of each other. The first white layers are formed near the neck, which imitate a collar. Then the uniform is decorated with green, black or blue stripes (depending on the type of troops). Some craftswomen sew it separately from fabric and then simply put it on the bottle. Special attention is paid to the neck and plug. They are decorated with tiny berets, peakless caps, budenovkas, caps or caps. The elements are sewn separately and the finished miniature of the headdress is simply attached to the neck.
Do-it-yourself champagne bottles for a wedding using decoupage technique: instructions with photos
Decoupage is a decoration technique based on transferring an image onto a specific object.
To make a wedding bottle using this technique, you will need to spend a decent amount of time, but the end result will certainly please both the newlyweds and their guests. To complete the decor you need to prepare:
- napkins with the image or decoupage cards that you want to apply to the bottle;
- primer for glass of the desired shade;
- sponge;
- acetone;
- fine abrasive sandpaper;
- brush;
- tweezers or clothespin;
- glue;
- acrylic paints;
- clear nail polish.
Initially, clean the bottle from stickers, dry it and spray it with acetone. Apply glass primer to the bottle. If you don't have one, it doesn't matter. Mix acrylic paint of the desired shade with PVA glue in equal proportions. Cover the bottle with the mixture.
Gently secure a piece of sponge in tweezers or a clothespin and apply the composition using patting movements.
The primer must properly matte the green color of the bottle, otherwise the end result may be spoiled by the green color showing through.
- After the primer has completely dried, you need to go over the bottle with sandpaper. The surface of the primed glass must be smooth. Place napkins on the cork and prime it so that the top does not differ from the rest of the composition.
Separate the lower layers of the napkin, leaving only the top one with the pattern. Cut out the selected picture, stepping back from the beginning of the image by 2-3 cm. Use your fingers to carefully tear off the remaining strip so that the edge of the decor is not more than 0.5 cm from the starting line of the image.
The torn structure of the edge will help smooth out the sharp transition of the decor to the background of the painted bottle.
- Place a napkin on the surface of the bottle. Use a brush dipped in glue to cover the entire pattern.
- You need to start from the center, smoothing out all the bubbles and irregularities towards the edges. Wait for the picture to dry.
- If the base of the napkin was not white, then using acrylic paints you need to select the appropriate shade and paint the white spaces between the pictures with a brush. After complete drying, the entire bottle must be coated with clear varnish.
When it dries, if desired, you can glue sparkles to the picture, decorate the composition with sequins or beads.
DIY champagne bottle painting for a wedding: painted bottles
You can beautifully decorate bottles of champagne for a wedding using your talents. We offer several options for painting bottles at home.
Painting with decor.
Glue pieces of paper tape in the shape of the chosen decor onto the prepared bottle. Paint the bottle with spray paint. To ensure an even color, the bottle is painted 3 times. Before applying the next layer, you need to wait until the previous one has completely dried.
- Remove the tape from the dried bottle. Decorate the pattern with flowers, butterflies, beads, etc.
- Paint with acrylic paints and tie a ribbon.
- Spot painting. You can beautifully paint a bottle of champagne for a wedding using a glass outline.
- You can apply the design to the glass itself, or by pre-matting the bottle in the desired color.
Bottle decoration
There are a wide variety of methods that can be used. These include:
decoupage , which involves transferring a design from one surface to another, while applying a layer of varnish to secure it;- stucco molding - an ornament in relief or a composition that is transferred to glass and painted over;
- using sand and salt - this method is used to decorate the inside of the bottle;
- painting , which involves the use of acrylic paint;
- weaving using threads and ropes.
In addition, glitter can be used and the design is etched. Some methods imply that a chemical type reaction is carried out, as a result of which the material becomes dull, while remaining transparent.
Decor that involves the use of cereals or pasta. For decoration, you can use fabrics or ribbons, or combine several techniques.
Reference! All methods imply that simple materials will be used, and the result is quite chic.
Decoration using photographs of young people
Festive bottles of alcoholic drinks, decorated with photographs of young people, look quite original. Photos can even be placed on labels, the main thing is to use your imagination in time and not be limited to standard ideas.
In addition, sometimes images are placed on glass using a special decoupage technique.
You can create such an original decoration yourself. If you don’t have enough time for this, contact a printing company, where they will print a label or a separate photograph on thin paper.
Engraving on bottles
For true lovers of luxury, an excellent option for bottle design is glass engraving. But here you cannot do without the help of a professional. Only a master will be able to apply any pattern you choose, regardless of complexity. Even simple and small patterns will look great on dark green glass.
With this decor you will add luxury and aristocracy to the bottle.
The choice of bottle decoration depends on the personal wishes of the newlyweds. Some people choose patterns in the form of angels, curls, rings, doves, etc. Any version of the design looks great, and you can choose engraving in silver or gold.
But modern experts can offer you images in other shades, even transparent ones.
Ideas
Champagne decor allows you not to limit your imagination at both an unusual and classic wedding. Bottles become a highlight, a decoration, and one of the main accessories of the holiday.
Often in their design they use motifs from the newlyweds’ costumes - the groom is dressed in a formal suit, the bride in a lace dress.
A fresh, interesting option is to decorate the alcohol with fresh flowers, echoing the bride’s bouquet. It looks very romantic, gentle, but, unfortunately, such decor is extremely short-lived. An alternative is artificial flowers made of felt, paper, or polymer clay. Bright and touching, they will never fade, just like the love of spouses.
A colorful wedding encourages the champagne not to be in the classic green and gold bottle, but in a more appropriate design. Foil, fabric or paint of the desired color will add the necessary bright accents to the festive table, setting the guests in the right mood.
Polymer clay flowers
Delicate flowers, almost like real ones, but at the same time strong and durable - a wonderful option for decorating special champagne. For craftswomen who know how to create such a miracle on their own, this is also an opportunity to demonstrate their talents to all guests.
However, you can buy ready-made products in the desired color at any craft store. They also sell leaves, twigs, berries and anything else you want to use in decoration. In addition to the flowers themselves, you will need aerosol paint of the required color, usually white, Moment glue and additional decorative elements from lace to rhinestones. Paint is an optional step, but it makes it easier to stick everything you need on it. We advise you to prepare the bottle for decoration - remove the label, dry it, check the evenness of the glass and coat it with paint. By the way, here you can already play with the design. For example, glue (most importantly, not very durable glue) paper pieces of the original shape onto the glass surface. After you remove them, a perfectly smooth and unusual pattern will remain on the painted surface.
Next, think over the sketch and draw with a pencil the points where you are going to glue the flowers. Now start fixing the buds on the glass. This is where “Moment” or any other quick-setting glue comes in handy.
Advice! If the flowers are too voluminous and bright, then it is better to leave the remaining space between them empty. If decor of a modest design is glued, then the voids can be decorated with ribbons, rhinestones, and beads.
Photos of the newlyweds
Your happy laughing faces on the label along with the date of the celebration or any other inscription is an original design option that will not leave anyone indifferent. This champagne looks great both at a classic wedding and at a themed one, for example, if you design the labels in the form of a movie poster or a “Wanted” poster. Making a creative image yourself is easy if you know Photoshop. If a popular image editor is not available to you, you will have to turn to a specialist for help. It is necessary to print labels on thin paper, and then transfer it to glass using the decoupage technique. Remember that the bottle is also pre-prepared before this - cleaned, degreased, dried.
Engraving
For lovers of luxury, decorating champagne with glass engraving would be a great idea. A good master will be able to apply almost any pattern, regardless of its complexity. Even simple and thin openwork lines look great on dark green glass, giving the bottle a flair of aristocracy.
Which drawing or inscription should I choose? It depends solely on your wishes - the names of the newlyweds, vows of fidelity, images of doves, angels, rings, hearts. Any pattern looks great: either a rather restrained one, with a small number of lines, or a stunning one with a riot of curls.
You should not think that the design must be gold or silver in color - a professional engraver can create a colored, transparent, absolutely any masterpiece. Of course, before choosing a master, you should look at his work. It's best to do this in a workshop to get a full idea of what your order will look like.
Decoupage of bottles and glasses
This design method is gaining increasing popularity, as it combines ease of execution and chic results. It is used not only to decorate bottles, but also to decorate newlyweds’ glasses.
Decoupage is the gluing of paper elements onto a glass surface treated with acrylic. The paper must be thin; for example, napkins with the desired pattern are suitable - delicate flowers, hearts, angels or something more original.
Before starting work, remove the label from the bottle, degrease it with alcohol and dry it. Our master class will help you create an original design and enjoy the creative process.
Next, you need a primer for a smooth and uniform surface. You can do it in two ways - buy a special primer for glass in a specialized store or prepare a mixture yourself from acrylic, water and PVA glue. Then apply the mixture to the glass in a thin layer. You can do this with a brush, but it is much more convenient to use a foam sponge. After drying, add the next layer of acrylic.
When the surface is completely dry, we begin gluing the paper elements - in this case, glue can be used either special for decoupage (sold in any craft store), or regular PVA or even a glue stick. The wrinkles that inevitably appear along the edges must be carefully smoothed out with a piece of sandpaper, but be careful, because the napkins are easily torn. At the end, secure the resulting decor with transparent acrylic varnish. It will have to be applied in several layers, and each one only after the previous one has completely dried.
So, the bottle is ready. Now you can decorate it with sparkles, rhinestones, feathers or any other additional decor. The decoupage technique looks gentle, festive, and allows you to realize almost any fantasy.
