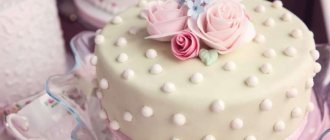
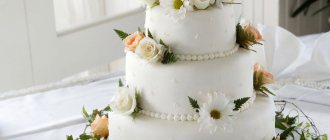
The spectacular culmination of the wedding celebration is the cake. Gone are the days when huge cakes in several tiers were brought out at a wedding, richly decorated with cream or mastic; today, wedding cakes made in the style of minimalism are increasingly preferred.
A wedding cake is not just a pastry, but a symbol of a happy, long and sweet life for the newlyweds
Anyone who has at least modest culinary skills, time, desire, quality products and, most importantly, the right attitude, can create such a dessert.
Homemade wedding cake
DIY wedding cake at home
Wedding bustle! I think every girl and woman has encountered it on the eve of her own wedding or the wedding of her daughter or son. A lot of things need to be prepared: rings, dresses, bouquet, hall, table and of course the main attribute - the wedding cake!
Well, since we have a culinary site, we will prepare a homemade wedding cake, with our own golden hands! I very much doubt that it will be the bride who will cook it, more likely a mother or mother-in-law, or maybe a grandmother or aunt will have the strength to please her granddaughter/niece?
Homemade wedding cake recipe:
- For the base, prepare a honey sponge cake. In order for the cake to be tall and voluminous, you will need to bake 2 biscuits and divide them into layers. First, prepare one biscuit. Sift 2 cups of flour.
- Separately, beat until white and the mass increases in volume: 3 eggs, half a glass of sugar and a pinch of salt.
- Take 3 heaped tablespoons of honey and melt over the fire, as soon as it melts add 1 tsp. soda and as soon as the reaction begins, the soda begins to boil, immediately remove from the heat and stir.
- Add honey to the beaten eggs and beat well. Add all the flour little by little, whisking or stirring well.
- Line a baking pan (30 cm in diameter) with parchment, pour the dough into a large pan so that it takes up 1/3 of the part. Cover the top of the pan with foil to prevent it from burning. Bake in the oven for 45 minutes. Check the readiness with a stick; if the dough sticks, put it back in the oven for another 10-15 minutes.
- Remove the foil from the pan. Line a cake rack with a kitchen towel and carefully place the cake on it. Remove parchment from cake. Leave to cool for 6-12 hours. Prepare another sponge cake as well.
- When the biscuits have cooled, divide each of them into 2-3 layers.
- Now let's prepare the cream. Whip 600 ml of store-bought special whipping cream 30% fat, add 1 regular jar of boiled condensed milk and beat again. You will get caramel cream.
- Place an even bottom layer on the cake stand. Divide the cream into 4-5 equal parts and brush each cake. The top cake should be smooth and do not spread cream on top.
- Now prepare the cream for the sugar mass (mastic). Separate 6 egg whites, add a little salt, 2 packets of vanilla sugar. Beat in a water bath, add 1 cup of sugar and beat some more. Cool the whites a little. Remove from the bath and beat until stiff peaks form. Add 1.5 sticks of butter (82% fat) in pieces and beat until thick and white.
- Coat the cake thinly with butter-white cream, leveling it with mastic. Place in the refrigerator for 1-2 hours until the butter hardens.
- You can make mastic and various decorations to your taste!
- Beforehand, we make lace from icing, roses, flowers, paint them silver with a spray, and when dry, decorate the sides of the cake.
- We cover the cake with white fondant and decorate it, placing a figurine of the bride and groom in the center.
Ingredients: for the biscuit:
- 2 tbsp. flour
- 3 eggs
- 0.5 tbsp. Sahara
- 1 tsp soda
- 3 tbsp. honey
for cream:
- 600 ml whipping cream (30% fat)
- 1 can of boiled condensed milk
for cream under mastic:
- 6 proteins
- a pinch of salt
- 2 packs vanilla sugar
- 1 tbsp. Sahara
- 1.5 sticks of good butter (82% fat)
Festive inscriptions on dessert
An anniversary cake can be decorated with memorable inscriptions. For example, put the names of the spouses “Vasya + Lena = love.”
Relevant thematic quotes:
- Madly in love!
- You are the reason for my happiness!
- When I'm with you, nothing else matters.
- We can do anything when we are together.
It is important that such epigraphs are short and succinct.
The inscription is applied using special contours or felt-tip pens, sold in confectionery departments. You can make “ink” with your own hands.
- Break the chocolate and put it in a bowl.
- Heat in a water bath.
- Add butter and warm milk.
- Stir. Place in a thick plastic bag, cut a small hole in the corner and, carefully squeezing out the mass, make an inscription.
This can be done directly on the cake, or depicted on a file, and after hardening, decorate the cake.
How to decorate a jelly cake
Now it's time to talk about how to decorate a homemade cake using jelly. Theoretically, you can buy a concentrate of this product in a store, dilute it according to the instructions and decorate the cake with it. This is even a very good option, allowing you to get a wonderful decorative element without much labor. Although in fact, jelly is not so difficult to make yourself. To do this you need to have on hand:
- fruit juice – 0.6 l;
- powdered sugar – 200-250 g;
- instant gelatin – 1 sachet.
Let the gelatin swell in one glass of juice, then melt in a water bath. After this, pour the remaining juice into the mixture, add powder, stir everything well and put it in the refrigerator. There is no need to let the jelly harden completely. It just needs to set a little. Place the finished cake in a springform pan so that the sides rise above the cake layers by about 30 mm. Remove the prepared jelly mass from the refrigerator and place in the mold. You can immediately put fresh fruit on the surface of the jelly and put the cake in the refrigerator for 12 hours. What to do with the rest of the jelly? It can be put into molds and put in the refrigerator. When they have cooled a little, place them on a jelly surface that has not yet hardened. By the way, it is not necessary to make jelly from juice alone. You can take several varieties of multi-colored fruit drinks, divide the surface of the cake into sectors and make a colorful fill. Or you can make the surface monochromatic, and put colored figures on it.
Chocolate cake decoration
A special treat is decorating a chocolate cake with chocolate. In fact, there are a huge number of options for chocolate decoration. All of them are perfect and original in their own way. The choice is yours!
Chocolate chips
The easiest and fastest way to decorate a cake is with chocolate chips. To do this, you just need to grate the chocolate on a coarse or fine grater. But there is also a more interesting and unusual way to get chips: put the chocolate bar in a warm place for a while, and then cut thin chips from the bar with a knife. They will immediately begin to curl up. Place these curls on a plate and place them in the refrigerator. Sprinkle them randomly over the cake once they are completely set.
Openwork chocolate
Openwork chocolate is a more sophisticated option for decorating a cake. Such jewelry looks so chic that it’s hard to believe how easy it is to make.
Melt the chocolate bar over low heat, stirring constantly, or use the microwave. You should not heat the chocolate in a water bath, otherwise drops of condensation will mix with it, which we absolutely do not want.
While it melts, draw whatever you want on parchment paper. These can be patterns, hearts, flowers, snowflakes, etc. Then scoop up some more hot chocolate with a confectionery syringe or place it in a plastic bag in which you will need to cut a tiny hole. Trace your drawings on parchment along the outline.
The design turns out to be very fragile, so we recommend making several spare patterns. When finished, place your sketches in the refrigerator until completely frozen. After this, very carefully separate the openwork ornaments and transfer them to the cake.
Ready-made templates for openwork chocolate curls, which you can simply print out and outline with chocolate:
Chocolate leaves
Chocolate leaves on the cake look impressive, and do not require much effort in terms of production. To create them, you will need leaves of any tree (in winter, leaves of indoor plants can help out). They need to be thoroughly washed and dried. Then apply melted chocolate evenly over them with a brush. Chocolate leaves will look more realistic if the chocolate is applied to the back of the leaf - the part with the veins. Once hardened, carefully separate the real leaves from the chocolate ones.
As you can see, decorating a cake with chocolate is quick and not at all difficult. A creative approach and a bit of imagination can create incredible things!
Wedding cake with cupcakes
A very popular trend in Europe lately is to prepare not a cake for a wedding, but portioned cakes - cupcakes, which are beautifully arranged on a stand in layers and look like a whole cake.
This is a very convenient way, thanks to which young people do not have to worry about cutting the cake into portions, which is often difficult to do due to the abundance of creams and decorations. In addition, it is impossible to determine by eye whether guests will receive the same pieces of cake. And if you prepare cupcakes from the beginning, you won’t have to worry about this.
In this version of the cake, only the top layer, which is intended for the young, can be prepared like a cake - with layers, cream and filling.
Peculiarities
There are many options for both the base and impregnation of the cake. Biscuit, shortcrust pastry, honey cake - choose what you like best. As for the filling, it is better to use light options - soufflé, yogurt, cream, since there may simply be no room left for a rich buttercream at the end of the banquet. Idea! Simple and tasty - soak the cakes in syrup or cover with melted chocolate.
For cakes, choose a base that is easy to cut - sponge cake, cake, well-soaked shortbread dough. The wafer layer or meringue inevitably becomes deformed and crumbles during the portioning process.
Do-it-yourself wedding cake is quite possible!
A cake is a beautiful and delicious decoration for a wedding celebration. Some people buy it in the store, some make it to order, but few have tried making the dessert themselves. And this, by the way, is not such a difficult and very exciting process. Anastasia Semkina, food photographer and culinary blogger MissisN, told us how to make your own wedding cake at home.
The thought of making your own wedding cake seems scary at first glance. In fact, even a person with the most modest culinary skills can make it. To make sure of this, I suggest preparing a two-tier wedding cake in a fairly simple, but very popular design.
This recently emerged trend in cake decorating is called naked cake, or “naked cake”: it is not covered with cream on the sides (so that all layers are visible from the side) and is decorated only with natural decorative elements, most often fruits or fresh flowers.
So, what do you need to make a wedding cake at home? First of all, prepare all its components, namely cake layers, cream and decor.
For the first cake, I suggest baking sponge cakes and making cream cheese frosting. If desired, the cakes can be coated with various jams, chocolate sauces and curds, or layered with thinly sliced fresh fruit (as in this example).
Choosing a wedding cake
It is not surprising that the choice of holiday dessert is approached so carefully. It must be a real masterpiece. After all, it is a piece of the pie, like a piece of the festive atmosphere, that the departing guests will take with them.
Fashion trends for 2022 include beloved classics and innovative ideas. Products in a thematic manner using modern culinary techniques and ingredients are popular.
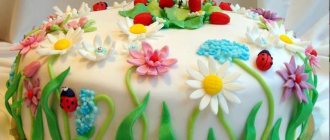
Beautiful wedding cakes with flowers
Sweets using flowers are becoming increasingly popular. Whether they are live or candied, marzipan or chocolate. It always looks very gentle and bewitching. The great advantage of such decor is the difference in textures and endless palette.
The arrangement and arrangement of flowers on a cake can be the most unpredictable. You can place it in a cascade or make an edging for each tier. Chaotically scattered floral elements will also not go unnoticed.
Only petals can be used. This will give the effect of visual lightness and airiness. But, as in any business, the main thing is not to overdo it.
Fruit desserts
They are at the peak of popularity at the height of the berry season, when you want something refreshing.
Their advantage is that during production you can do without baking the cakes. Add your favorite fruits to the base of whipped cheese with gelatin and the delicacy is ready. As easy as pie. You can use fresh fruits or boil them in syrup, then the taste will be a little richer. If this is a fruit dessert based on shortcakes, then you can use biscuit, shortbread, honey and even puff pastry.
The cream will require special attention. Fruit cake implies lightness, so you should not coat the cakes with too high-calorie cream based on margarine or condensed milk. It is better to use light cream cheese or custard.
Delicate wedding confectionery with ruffles and openwork
The cake is in a bridal style, cute and airy. He is all tenderness, all grace.
Fashionable cake with metallic shine
Covered with gold leaf or confectionery silver, this cake will easily amaze your guests. This novelty in the design of confectionery products will look truly luxurious and will be remembered by the newlyweds and everyone present for a long time.
Beautiful ombre wedding dessert
Desserts with this design do not require many figures, inserts of flowers and lace. Ombre is a smooth transition of color from dark to light and vice versa. This technique in itself attracts attention, does not require additional details and will a priori delight all guests of the celebration.
Coloring mastic. What do you need to know?
Before you plan to make a mastic cake, you need to clearly imagine what exactly you want to see in the end result. What color will the dessert be, how will you decorate it, will there be inscriptions on it and much more.
After you decide on the type of mastic (it doesn’t matter whether it’s purchased or homemade), it’s time to think about the color
There are several options for coloring mastic:
- If you make it yourself, you can color it during the cooking process. Dye (dry or gel) is added at the stage of mixing the still liquid marshmallow or white chocolate. This method is only good if the entire mastic cake is the same color - both the coating and the decorations.
- You buy or make white mastic, and add a few drops of dye to the finished one, kneading the mass until it acquires a uniform, even color. Dye is added using a toothpick. It is dipped into colored gel and lines are applied to the finished mastic. Knead. Evaluate the resulting color and, if necessary, repeat the procedure. This option is good because you can paint the mastic in different colors and do it with exactly the volume that you need.
- The disadvantage of the first two options is that the color of the mastic will not be very bright. It will always be more pastel than flashy. The third option is suitable for those who want a rich, eye-catching color. It is necessary to dilute the gel dye with a few drops of vodka, apply it to a sponge and use it to quickly blot the already covered mastic cake. The color is even and bright.
So, your mastic is already ready. You decided on a color and painted it. It's time to think about the filling: what will you hide under the mastic?
Requirements for an anniversary cake
There are some rules that you should pay attention to when ordering:
- it is desirable that the top of the product be decorated with mastic figures hinting at the theme of the holiday;
- the inscription should indicate the number of years lived together;
- the top of the cake should match the color of the anniversary;
- with a classic design, you can use figurines of swans, rings, flowers or figurines of the bride and groom. and it doesn’t matter if the cake was ordered for 1 year or 5 years of married life;
- a plot from a couple’s life sculpted from mastic or an incidental situation known to many of the invited guests looks original and interesting;
- It is indisputable that confectionery products must be fresh, so you need to order them on the very last day;
- the size of the dessert depends on the number of guests, hoping that everyone gets a piece of the wedding delicacy.
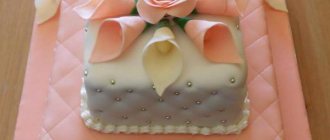
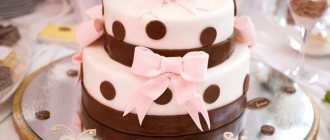
Wedding cakes made from mastic. Photo. Nuances in preparation
These mastic cakes are especially popular. They are very beautiful, and there are a lot of ideas for their design. But it’s not at all necessary to come up with grandiose bouquets of flowers. A simple design that even a beginner can handle is by no means the worst thing.
Perhaps the easiest, but no less beautiful decoration for a wedding cake can be ordinary mastic balls or confectionery sprinkles.
Bows of various sizes can also serve as a simple but elegant solution. You can play with colors, because no one said that wedding means it has to be white.
The most ordinary stripes on a cake can add real zest and elegance to a sweet dessert. A wedding cake made from mastic is actually not so much difficult to decorate as it is to “assemble”. The main difficulty in cooking is attaching its tiers if there are several of them. If there are two tiers, then usually the second is simply placed on the first. But in this case, the sponge cake should not be too soft or with a delicate filling, otherwise the lower tier threatens to be crushed under the weight of the first.
Everything becomes much more complicated when there are three or more tiers. Then a substrate of the required diameter is purchased for each of them, and each layer of the cake is placed on it. In addition, each tier is strengthened with special wooden sticks. They are used to pierce all layers (except for the very top) in several places and cut them so that their height exactly matches the height of the tier itself. Thus, the upper tier on the base will lie not just on the lower ones, but also on wooden sticks that will not bend and will firmly hold the weight of the entire cake, preventing the dessert from deforming.
Now you know how to make a mastic cake with your own hands. The master class revealed in detail all the stages of preparing this delicious dessert. And if before reading our article the task seemed impossible for you, now you are probably excited about this idea and will delight your loved ones with a wonderful, incomparable cake! We believe in you! Everything will definitely work out!
We calculate the weight of the cake depending on the number of guests
It is very important that each guest gets at least a small piece of dessert. Therefore, you need to think in advance about how many kilograms of cake you need to prepare.
When calculating the weight of a wedding cake, you need to consider the following factors:
- number of guests: adults and children;
- will the cake be distributed after the end of the celebration as a gift to each guest;
- is there a need to leave dessert for the second day of the celebration;
- duration of the feast;
- calorie content of main dishes.
To calculate the weight of the cake, you need to allocate 150-200 g for one adult, about 120 g for a child. This is a basic indicator.
If you plan to distribute the cake or leave it for the second day, then the base weight must be multiplied by 1.5.
When the feast is short or the main courses are low-calorie, then guests can attack dessert especially zealously, so it is best to add about 20% to the base weight.
How to decorate a cake with whipped cream, jelly, frosting?
Store-bought whipped cream is often used to decorate cakes. This option is ideal if you do not know how to work with mastic. Often the cream is combined with berries such as strawberries, raspberries and mulberries.
decorate the cake with whipped cream, jelly, icing
decorate the cake with whipped cream, jelly, icing
An excellent option for decoration is jelly. You can make a separate top layer from it or simply cut it into pieces and place it on top. The result will be a kind of broken glass. You can place the “shards” on top of the cream.
decorate the cake with whipped cream, jelly, icing
decorate the cake with whipped cream, jelly, icing
An excellent option for decoration would be chocolate icing made from cocoa, milk, butter, sugar and flour. You can watch the video on how to make chocolate glaze.
decorate the cake with whipped cream, jelly, icing
decorate the cake with whipped cream, jelly, icing
Lace or its imitation
Such a delicate material as lace can be used to decorate the main wedding treat. Moreover, this can be either the fabric itself (within reasonable limits, because who wants to separate the lace from the edible part of the cake), or its imitation, “painted” with mastic.
How to Decorate the Popular Red Velvet
Nowadays a cake called “Red Velvet” is gaining popularity on the Internet.
If you are not yet familiar with it, here is the composition of the ingredients for the classic version. Having become popular, it acquired a number of different variants, since everyone who began to prepare it brought something of their own.
Ingredients:
- kefir – 450 ml;
- flour c. With. – 400 g;
- soda – 10 g;
- cocoa – 40 g;
- spread and scrambled eggs 200 g each;
- sugar – 300 g;
- eggs of category 1 – 4 pcs.;
- red food coloring – 40 ml.
For the layer:
- cream cheese (for example, Cremette) – 400 g;
- powdered sugar or ground sugar – 125 g;
- whipping cream – 350 ml.
The cake is made from sponge cakes with cream.
The principle of decorating such a cake is still the same. If you decorate with cream, then by squeezing it out of the bag, we draw flowers or some other figures. You can also use confectionery powder and fruit.
Another option is beauty!
Or like this
How to use the package?
Of course, the most convenient way to decorate baked goods is with a special pastry syringe, but if you don’t have one, you can take a cellophane bag or a regular stationery file and make a cream bag with your own hands. In order to use it, you need two things:
- thick plastic bag;
- scissors.
It's best if it's a ziplock bag, but you can use a simple one. Fill the cellophane with cream, tie it tightly and secure the neck with a rubber band, then use scissors to cut off the edge through which the cream will be squeezed out. Remember that the more you cut off the corner of the bag, the thicker the squeezed strip of cream will be.
For the same purposes, bags of condensed milk, mayonnaise, ketchup, and baby purees are used. They already have a comfortable plastic spout that is firmly fixed and will not fall out under pressure. Of course, they must be rinsed very well with water and then doused with boiling water from the inside so that no particles of the previous product remain. After washing, simply cut off the bottom, fill with mass and sculpt.
How to decorate a cake with icing
Thin shiny icing is a fairly popular way to decorate cakes. To prepare it you will need:
- icing sugar – 200 gr.;
- oil – 2 tsp;
- water as needed.
Cooking time: 15 minutes.
Calorie content: 48.93 kcal.
Mix the ingredients and melt in a water bath. For smoothness and density, you can add a little water. Constantly stirring the mixture until the glaze becomes shiny and smooth.
Types of glaze:
- Lemon or orange. Add 1 tsp to sugar and butter. zest and 2 tbsp. l. lemon (orange) juice.
- Passion fruit glaze. Add 2 tbsp to butter and sugar. l. fruit puree.
- Coffee shop. Pour in 2 tbsp. l. water and add 1 tsp. instant coffee.
- Chocolate. Add 1 tsp. cocoa and 2 tbsp. l. hot milk.
- Original glaze. Cream cheese is used to prepare it. 100 gr. beat cheese with 50 gr. icing sugar for about two minutes or until consistency is smooth. It is advisable to use it immediately, so the surface of the cake will be smooth and the taste will be delicate.
- Lemon glaze. Add 2 tsp to the main ingredients. finely grated lemon zest and 2 tsp. milk.
- Honey. Pour 2 tsp into the cream cheese and icing sugar. milk and the same amount of melted honey.
Principles of decorating with glaze
- When cooking, be sure to stir vigorously to prevent the ingredients from burning;
- Chocolate can be replaced with cocoa. For example, if the recipe requires 100 g. chocolate use 50 g. cocoa and the same amount of butter;
- after decorating with icing, the confectionery product must be kept in the refrigerator for at least 3 hours;
- For snow-white color you need to add a drop of blue dye. The tint neutralizes the yellowness imparted by butter;
- You can also melt the chocolate for the glaze in the microwave.
Mirror glaze
Makes the surface glossy and smooth.
Before cutting, it is necessary to wet the knife in hot water or heat it, otherwise the mirror glaze will crack.
To prepare it you will need:
- chocolate – 1.5 bars;
- glucose syrup -150 ml;
- water – 75 ml;
- sugar -150 gr.;
- condensed milk – 100 gr.;
- gelatin – 12 g (melt in 60 ml of water).
Cooking time 30 minutes.
Calorie content: 170.75 kcal.
Preparation:
- Soak the gelatin and leave to swell;
- Mix glucose syrup with sugar and boil;
- Remove from heat and cool;
- Add gelatin and pour in condensed milk;
- Pour the chopped chocolate into syrup and beat with a blender;
- Place the resulting mass in a cold place overnight, and in the morning heat it in a microwave oven to 35C, beat again and begin coating the cake.
Mirror chocolate coating option
- Gelatin (12 g.)
- Low temperature water (140 gr.)
- Cocoa powder (80 gr.)
- Granulated sugar (240 gr.)
- Cream with a fat content of more than 30% (160 gr.)
Mix 60 grams of water with gelatin. Pour sugar into a saucepan (preferably with a thick bottom) and add the remaining amount of water. Bring to a boil on the stove.
Sift the cocoa and pour into the pan, cook for about 2 minutes, stirring occasionally. Bring the cream to a boil in a separate container. Next, stirring thoroughly, pour into the mixture with gelatin.
Add the contents to the cocoa syrup. Next, use a blender to beat until smooth. You must try not to move it, fix it in place to avoid the appearance of unnecessary large bubbles. To eliminate small bubbles, pour the liquid into another container through a sieve.
To achieve the desired smoothness of the coating, you can simply leave it for several hours (at best, a day), until the temperature of the glaze drops on its own. Under no circumstances should you put it in the refrigerator: the mixture behaves too capriciously afterwards.
Decorate with fruits
How to beautifully decorate a cake at home using fruits? First you need to select the fruits themselves. They must be free of visible defects, dents or stains.
Experienced confectioners give advice on DIY cake decoration for beginners.
They prefer to work with:
- strawberries;
- blackberries;
- blueberries;
- currants.
You can also use apples, citrus fruits, grapes, bananas, kiwis, pears, plums and peaches for decoration.
Please also note that if you decide to decorate the cake at home using canned fruits, such as pineapple or peaches, you must first dry them completely before using them.
To add shine to the fruit on the cake, they are poured with a thin layer of jelly.
It is important to know one fact here. Kiwis and pineapples are watery in structure and therefore do not allow the jelly to set
To get around this problem, you need to pour boiling water over them in advance.
How can you decorate a cake with fruits?
This is a very simple but fun process. You can cut out various figures, flowers or hearts from the fruits. It all depends on your imagination and practice.
As for laying out fruit, you can lay out a fan from the sliced slices. Make an ornament from the figures. And by combining different shapes you can make flowers and leaves.
In addition to the usual filling of fruits with jelly, you can also pour chocolate over them or sprinkle powdered sugar on them. The combination of citrus fruits and coconut flakes looks original.
Please note that powdered sugar should only be poured onto completely dry fruits, otherwise it will simply melt.
Introducing a simple DIY cake decoration at home that anyone can do.
For this process we need:
- oranges;
- apples;
- kiwi.
Cut the oranges into thin rings. We divide them in half. We form flowers from them and place them in the middle of the cake. Next, cut the apples into 4 parts along the pit. In each part we cut out long strips of skin and stretch them, forming petals. Place kiwi slices along the edges of the cake. You can add jelly to the decoration, or you can leave it as is.
An original treat for a celebration
The usual wedding cake can be replaced with an original treat made from fruits and marshmallows. All you need is a multi-tiered dish and skewers with hearts.
Ingredients:
- small marshmallows - several packs;
- seedless grapes – 0.65 kg;
- banana – 2 pcs.;
- kiwi – 3 pcs.;
- pineapple – 0.65 kg;
- strawberries – 0.65 kg.
How to cook:
- Tear the grapes from the branches, peel the banana and cut into slices 1 cm thick.
- Peel and cut the kiwi and pineapple into cubes, remove the stem from the strawberries.
- Thread marshmallows and 2 types of chopped fruit onto each skewer.
- Place the treat on a multi-tiered dish.
It is recommended to prepare 3 skewers for each guest.
Cake leveling cream recipes
What kind of magic creams are these? You probably already have this question. There are only two most popular types of leveling creams.
“Cream from boiled condensed milk with butter”
It is perhaps the most common, as it does not require much skill or time. It is necessary to mix well 200 grams of soft butter at room temperature and 150 grams of boiled condensed milk. The cream is ready!
"Chocolate ganache"
To prepare it you need:
- 2–3 tablespoons of powdered sugar;
- 30 grams of butter;
- 100 grams of chocolate;
- 110 ml cream (30–35% fat).
Let's start cooking:
- Chop the chocolate and place in a bowl.
- In a saucepan, thoroughly mix the cream with sugar, bring the mixture almost to a boil and turn off (do not boil!).
- Pour the hot mixture into the chocolate, wait a few minutes and mix thoroughly.
- Add butter and stir the mixture again. Ready!
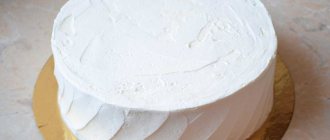
And now, using any of these creams, the cake must be prepared for covering with mastic. It's not enough to just coat the cake. Its surface must be perfectly flat!
- Spread a thin layer of cream over the top and sides of the cake; it will smooth out all the major irregularities. Cool in the refrigerator until the first layer of cream hardens.
- Cover the cake with a second, thicker layer of cream. Try to give the surface as even a finish as possible. Chill again in the refrigerator until firm.
- Heat the knife on the stove (not hot water, it should be dry). Using a hot knife, smooth the cream to an ideal, beautiful and even surface. Place the cake back in the refrigerator.
So, a huge, important stage has been passed! We already have a beautiful, leveled cake! The mastic for a birthday (or other holiday) is also ready, all that remains is to cover our gorgeous, delicious dessert.
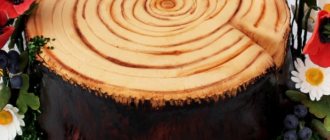
For the fifth anniversary
For a wooden 5-year wedding anniversary, a dessert with the original name “log” would be an excellent option.
- biscuit cakes – 2 pcs.;
- coffee – 1 cup;
- ice cream – 1 briquette weighing 0.5 kg;
- sugar – 1 tbsp;
- eggs – 5 pcs.
Step-by-step instruction:
- Soak the cakes with coffee.
- Place an ice cream bar on the first one.
- Cover with the second donut and “wrap” it with ice cream so that there are no gaps.
- Wrap and put in the freezer.
- Beat the whites into a foam with sugar. Place in a plastic bag. Cut a hole in the corner.
- Remove the workpiece from the freezer and remove the film.
- Decorate with cream, depositing it in the form of strips imitating bark.
- Preheat oven to 250°C. Let the cake sit for 5 minutes and serve immediately.
This sweetness is unusual and original. When the hostess cuts the dessert taken out of the oven, and there is ice cream inside, it causes sincere delight among the guests.
Instead of coffee, you can use syrup or fruit drink.
Jewelry made from mastic
Today, creams are being replaced by jewelry made from mastic. It looks like clay. It produces both figurines and the whole covered. Also, ready-to-use mastic can be stored at a minimum temperature for up to three months. And this is a big plus!
You can buy ready-made mastic or make it yourself. It is clear that the one made with one’s own hands will be tastier. After all, you yourself can control the sweetness and its color.
To prepare mastic, take:
- 1 package of powdered milk;
- 1 can of condensed milk;
- 1 pack of powdered sugar.
Mix everything together. The amount of products used is determined by taste based on what exactly you will do with it. We bring the density of the mastic to hard plasticine. As a result, you will get it white. If necessary, you can use water-soluble food coloring. They must be mixed with the condensed milk itself.
If your store doesn't have powdered milk, don't worry. Then prepare mastic with marshmallows. For this, take a bag of chewing marshmallows and melt the contents in the microwave. If you need different colors, divide the melted marshmallows by the number of colors and add coloring. Also add a small amount of water with citric acid to each container. If the mastic is not very flexible, add a little butter.
To thicken the marshmallow mastic, add powdered sugar to each color, which you sift through a sieve in advance. And add 1/3 of the potato starch content in the plate. Mix the mixture thoroughly between each step.
As soon as the marshmallow dough stops sticking, you can start working on decorating the cake.
How to decorate a cake with fondant at home for beginners?
The first option is to make a simple cover with it.
To do this you need:
- roll out the mastic into a thin layer;
- cut a circle out of it (it should clearly be with a margin so that you can trim off the excess);
- transfer it to the rolling pin, and from it to the cake itself;
- Using an iron, iron the top and then the sides;
- Trim off the rest at the bottom of the cake using a knife or a special roller.
For a dessert with a diameter of up to 15 centimeters, you need about half a kilogram of mastic. And for large cakes over 30 centimeters - up to two kilograms.
How to decorate a cake with fondant? Using various rollers or tongs, you can create different textures and patterns on the mastic. Regarding the usual decor on marshmallows, you can use sugar decorations, sprinkles and figures made of the same material.
Using rolled out fondant, you can cut out bows, snowflakes, stripes and much more yourself, and then glue them on for dessert.
Skirts look very gentle on pastries and cakes. To begin, cut out strips of mastic. Small folds are made on the table and attached to the cake in several rows one below the other.
To make a color transition on the dessert, you need to cut out two rectangles. Place the darker color at the bottom and the lighter color at the top with a half offset. Then, using a rolling pin, they are rolled out to a thin layer. A circle is then cut out, which is subsequently covered on the cake. You can also use it not on the entire surface, but only on half, creating waves. This option looks unusual and mysterious.
Watercolor tenderness
Watercolor wedding cakes look like a real work of art, because you can paint entire pictures on them. Don't have artistic talent? Then choose light watercolor stains that you can do yourself, giving the cake tenderness and airiness! In addition, you can put your wedding vow on the cake - touching and romantic!
How to decorate a cake with bananas, strawberries and oranges: ideas, photos, decoration recipe
Banana is a very nutritious fruit with a lot of vitamins. In addition, it contains a lot of protein, so the product is recommended to be given to children.
Options for decorating with bananas and oranges:
- Make a jelly top. To do this, lay fruit on top of the cake and pour it with frozen jelly. This is all done in a springform pan so that the cake can be removed.
- Flowers. Bananas and oranges can be used to arrange flowers on top of the cake. To do this, the fruits are thinly sliced and laid out in the form of buds or blossoming flowers. Strawberries are generally an excellent berry that makes beautiful flowers. To do this, large berries are cut lengthwise.
- Hill. The fruits are placed on top of the cream in the form of a slide. You can make a fruit mosaic.
- Glade. This option is ideal if you have a few different fruits. It is necessary to divide the surface of the dessert into zones and lay out the fruit.
decorate the cake with bananas, strawberries and oranges
decorate the cake with bananas, strawberries and oranges
decorate the cake with bananas, strawberries and oranges
decorate the cake with bananas, strawberries and oranges
How to decorate a dessert in an unusual way - fresh ideas
The traditional color of wedding sweets is white. But in photographs and videos, such confectionery products look like a snowdrift. Therefore, jewelry usually comes in contrasting colors.
You can play with the shape even with a small weight of the product: the cake can be made in the shape of a circle, square, oval, ball, horseshoe, heart or other shape.
It has become fashionable to order a small cake with decorations and place it at the top of the shelf. This is what the young people cut. The remaining tiers are filled with individually packaged portioned cakes, which are served to guests. It’s easy to make a selection and please everyone, even diabetics and allergy sufferers.
How to decorate a cake for a boy with your own hands
There is nothing complicated in this matter, because absolutely all boys love cars, cartoons, and want to become super heroes.
A cake made from Lego figures will look original, since all the boys love to build something from this construction set. To do this, bake the cake in the form of a rectangle, and make the round parts using Oreo cookies.
For a boy athlete, a cake in the shape of a ball would be an ideal option. There is nothing complicated in preparation. It is enough to bake round cakes and, after completely coating them with cream, give the product a spherical shape.
For the laziest, there is also a decor option. Find round foam molds and attach candy bars, chewing gum, and chocolates to them.
Stand
In addition to the classic stand of dishes located at different heights, there are also completely unexpected solutions - stands in the form of a carriage, a tower, or a waterfall.
The material from which the accessory is made also varies - iron, food-grade plastic, wood. Gold or silver plating is often used, giving the baked goods an aristocratic look. And on a glass stand, the wedding cake will “float” in the air, attracting admiring glances.
The shape of the stand does not have to follow the geometry of the cake. You can easily place square baked goods on an oval dish, and round ones on a heart-shaped tray. The main thing is that the entire cake fits on the stand without hanging over the edge. A good idea is to place special cake mats on each dish. This way you will be sure that the delicacy will not collapse at the edges at the most exciting moment and will not melt even at a summer wedding.
Culinary secrets
Pastry chefs, like all chefs, use culinary tricks. Some were told them by their mother or grandmother, others learn about everything through trial and error. We want to speed up the process of obtaining the necessary knowledge and reveal to you several culinary secrets of experienced confectioners.
- Add diluted potato starch to your baked goods and you will be surprised how long the mixture will remain soft and not go stale.
- If you want to decorate the cake, wait until it cools completely. While the cake is still warm, it will begin to crumble and the frosting will not harden well.
- Need a fluffy protein foam? No problem. Cool the whites and add a drop of lemon juice while whipping.
- When you beat the cake with a mixer, turn it off periodically and stir the contents of the bowl with a spoon. This way you will get rid of unwanted lumps and get an excellent cake.
- The butter dough will become airy and tender if you knead it with mineral water rather than milk.
And there are many more such secrets. We hope that after reading this article, you have been inspired for new achievements and culinary exploits. And now you can easily prepare the perfect wedding cake.
Treat in the form of a number made from cream
Recently, cakes in the form of numbers have become popular. It's not difficult to bake one of these.
Here you can use any cakes. The main condition is that they should be thin and the cream dense.
Before baking, cut out a number stencil from paper. If there are two of them, then you need to double the amount of ingredients or make a small size.
- egg – 1 pc.;
- honey - 1 tbsp. l.;
- butter – 200 + 60 g;
- sugar – 0.5 tbsp;
- soda – 0.5 tsp;
- cream – 33% – 100 ml;
- powdered sugar – 1 tbsp. l.
Step-by-step instruction:
- Place sugar, honey and 60 g butter in a saucepan. Heat the composition.
- Add soda and after stirring, remove from heat.
- Beat the egg into the mixture, add flour and cocoa, knead the dough.
- Divide it into 3 parts. Roll out a thin crust. Cut out the outline of the number.
- Bake the dough in the oven. Temperature 180 °C, cooking time 7–8 minutes.
- If there are small pieces of dough left, you can cut them out and bake them into figures for decoration.
- For the cream, beat 200 g of soft butter with condensed milk. Transfer to a pastry bag.
- Pour the cream onto the cake from the bag in equal peaks. Place the second donut on top without pressing down. Repeat the procedure.
- Place cream on top of the third product; you can decorate it with curls of flowers and berries.
The cake should sit for at least 12 hours.
How to decorate your own wedding cake
If you know how to bake well, you can make your own wedding cake. This will save a lot of money on purchases at the candy store. But how to decorate a wedding cake at home is a completely different question. We have prepared for you the most original ways to decorate wedding cakes.
Heart shaped cake
Love and wedding are always symbolized by hearts. If you are planning a small banquet, bake one or two heart-shaped cakes and put them together. You can decorate such a product with red mastic and white cream. As a result, you will not be able to distinguish your cake from the cakes of expensive confectionery shops. It is best to buy mastic ready-made in special confectionery stores, as it is very difficult to prepare. There you can also look for other 'accessories' for the cake. For example, chocolate figurines of the bride and groom or edible beads. A huge advantage of such a cake is that it is very easy to cut.
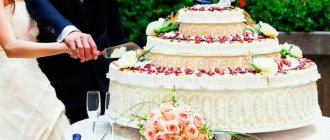
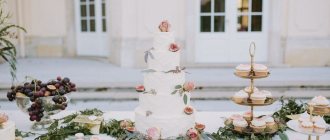
Multi-tiered cakes
For large banquets, young people prefer to order multi-tiered cakes. But the tradition of placing one cake on top of another gradually faded away. This is not practical, since such a cake is difficult to cut, and the layers often sag under their own weight. Nowadays it is very fashionable to make several cakes and place them on special stands. This way, each cake can be cut separately, and it looks very presentable.
You can decorate this cake with white fondant and fresh or edible flowers. On a white background, a bright and colorful flower will look especially impressive. You can also use fresh fruits or berries. Try to choose those that do not release juice. Strawberries and all kinds of berries work well.
Cake with cupcakes
It is very popular in Europe to treat wedding guests to a cake that consists of different cupcakes. These are small cakes in the middle with filling and decorated with cream. They can be combined with a small cake, or served instead of a cake. The advantage of cupcakes is that they are convenient to share among guests, and everyone can take as many as they want. Whole compositions are made from cupcakes. They can come in different colors and shapes to suit the theme of the wedding. We recommend decorating the main cake with fondant and sweet figures. This composition looks simply great.
Decorating a wedding cake with your own hands is an easy task if you have a little time and a good imagination. We wish all newlyweds a sweet and tasty life together.
Your Wedding.ua
The benefits of cooking at home
Of course, you can order a ready-made cake, but if you decide to make it yourself, you will be able to:
- demonstrate your talents;
- choose the best and freshest products;
- get absolute confidence that the cake contains only safe substances;
- save a lot of money on your wedding budget without losing the taste of the dessert.
A good solution for beginners is a thin layer of chopped fruits or berries. Apples that quickly darken or other cut fruits that lose their attractive appearance in the air are poured with jelly.
You can use unusual options. For example, instead of one large cake, place identical cakes or cupcakes on a multi-tiered stand. In this case, the delicacy does not need to be cut, and each guest will receive the same piece.
It's easy to create a cake from candies or cheese wheels. In this case, you won’t even have to go near the stove. If you have experience in making pies, cream cake can be replaced with tall loaves, pies or kulebyaki, which fit perfectly into a village wedding or rustic style.
Fairytale cake for parents
To surprise your parents, you will have to try very hard. If you are celebrating your anniversary with your family, you can bake the cake yourself, but for a big celebration, it is better to give the order to professionals by turning to the services of a confectionery shop.
Useful tips when decorating a cake:
- Every family has its own favorite recipes. Try to prepare a traditional dessert with your own hands, using fruits, berries or ready-made mastic figures for decoration;
- on the side or at the top, do not forget to indicate the number of years lived in a couple of years;
- It looks very touching when the grandchildren bring out this delicacy, entrust this work to them;
- be sure to discuss the tastes and preferences of your parents with the pastry chef;
- Accompany the serving of delicacies with wishes and enthusiastic words about their strong marriage and devoted love.