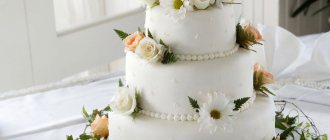
For a significant celebration, a multi-tiered cake is the highlight that everyone expects to see and taste to crown the celebration.
Festive multi-tiered cake
A dessert of several tiers (two or three, or even more, which is typical for wedding ceremonies) must be carefully assembled so that the lower tier does not sag under the pressure of the upper ones.
Incorrectly assembled multi-tiered cake
Even if the cake doesn’t fall all over, the sides will definitely become “pot-bellied.”
Incorrect decoration and assembly of the cake
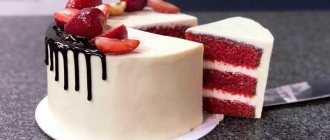
Two tier cake
Very often there are events in our lives that require special solemnity, for example, a wedding or anniversary. Or, on the contrary, small holidays that you want to decorate with something special. In both cases, the cake will be a wonderful elegant detail. Of course, the easiest way is to order it from a professional pastry chef, but sometimes you want to try to surprise your guests and cook everything yourself. In this case, our article on how to make a two-tier cake at home will be a great guide for you.
DIY two-tier cake
In order to properly assemble a two-tier cake with your own hands, a dense sponge cake for the bottom tier and lighter cake layers for the top are ideal. Moreover, the first should be approximately twice as large as the second. Whipped cream with powdered sugar is perfect as a cream, but if you are planning a two-tier cake with mastic decorations, it is better to take a thicker butter cream, which is perfect as a base.
How to assemble a two-tier cake?
We will tell you in detail about the assembly using the example of a two-tier cake with fruits without mastic.
Ingredients:
- cream;
- biscuits;
- berries and fruits;
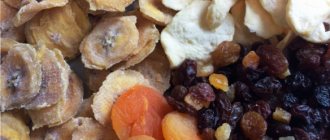
- aromatic herbs such as rosemary or thyme;
- jam or liquid jam;
- any chocolate cream or Nutella;
- melted chocolate glaze.
Preparation
- We will also need cocktail tubes and substrates, which can be made from thick cardboard and wrapped in cling film.
So, cut the first sponge cake horizontally into three layers, grease the base with a small amount of cream so that the cake does not slip, and use a pastry bag or bag to make a side. This is to prevent the jam layer from spreading and ruining the appearance of the cake.
Place jam into the resulting pool.
Now you can place nuts, berries, chocolate chips, etc. in the middle.
It is better to seal the top with cream so that the next cake lies flat.
We repeat the same procedure with the next layer, you can take other berries or fruits.
Cover with the third layer and cover the entire cake with cream. We work especially carefully on the sides to fill all the voids, hide unevenness and in no case allow the filling to break out. If your recipe for a two-tier cake involves covering it with mastic or another decorative layer of cream, then you don’t have to bring the surface to perfect smoothness. Considering that in our case the lower tier will remain “bare”, we align the sides more carefully.
We do the same with the top tier, but it is better not to weigh it down with various fillings; in our case, instead of jam, we use Nutella. We send the preparations to the refrigerator, they should harden thoroughly and the cakes should be soaked. This will take at least a couple of hours, or better yet the whole night.
Now let's move on to assembly. Using, for example, a saucer, we outline the diameter of the upper tier so that we know where to install the supports, which serve as cocktail tubes. There are two options for installing them. You can immediately insert them and cut off the excess with scissors. Or you can first measure the height with a skewer, cut off the required length and then insert it. In any case, the height of the tubes should be 3-4 mm less than the height of the tier, because After a few hours, the whole structure will sag a little and then it may turn out that the upper tier is not standing on the cream, but on supports and can easily move out. For an upper tier weighing no more than 1 kg, three pieces will be enough.
Insert the tubes and cover the intended center with cream.
We install the top tier together with a cardboard backing, level its surface with cream and let the whole structure set a little in the refrigerator.
Then imagination comes into play, with the help of which we decorate the cake with fruits and berries. They stick well to cream and chocolate icing.
There can be many design options, the main thing is to follow the basic assembly rules and then you won’t have to worry about your work.
Two-tier birthday cake: recipe
First, let's prepare the white sponge cake. To do this, separate the whites and yolks. Sift the flour into a separate container. Beat the whites into a fluffy foam using a mixer. After this, add sugar to the mass and continue to beat it until it increases in volume and turns white. Then gradually add the yolks and do not stop beating the mixture, it will gradually become homogeneous and airy. Gently pour the resulting mass into the flour and stir with a silicone spatula until smooth.
Next, prepare the baking dish by greasing it with vegetable oil. Transfer the dough into it and place it in a hot oven. Bake the cake for about 35 minutes at 200 degrees. You can check the readiness of the baked goods using a toothpick. The finished biscuit should cool slightly in the mold, after which we take it out and then cool it on a wire rack.
When preparing homemade two-tier cakes, you can make cake layers of different colors. In our case, the bottom tier will be white, and the second will be chocolate.
Let's move on to preparing the dark sponge cake. Sift the flour together with cocoa, separate the whites from the yolks. As in the first case, beat the whites, add sugar and then continue the process. Gradually add the yolks and bring the mixture until smooth. Transfer the mixture to the flour and mix with a silicone spatula. Next, prepare the mold and bake the dark sponge cake in it.
When both cakes are ready and cooled, each of them must be cut into two parts. Each layer needs to be soaked in some kind of syrup (you can add liqueur to 0.5 liters of coffee and soak the shortcakes with this mixture).
Open cake options
The design of the cakes for the open dessert is created in accordance with the style of the wedding. The palette of the cake should be in harmony with the main colors of the celebration, and its decor should reflect the general direction of the event.
With berries and fruits
The most popular decoration for these wedding treats is fruit and berry decoration. Cakes made with real berries and fruits look very juicy and appetizing. The presence of these components well emphasizes the naturalness of the dessert. The fruit and berry mix improves the taste of the biscuit; in addition, it is very beneficial for the body.
Berries and pieces of fruit are laid out on the cakes in large quantities. The more there are, the more beautiful and brighter the dessert will look. Sometimes the top of the cake is made of transparent jelly in order to secure the berry layer. A jelly layer can also decorate the space between the cakes.
If the wedding is being held in a specific color, such as red and white, the biscuits can be made using berry juice. Red-painted cakes with a layer of white cream look very impressive. Whipped cream is placed on the top of the cake and decorated with strawberries or raspberries.
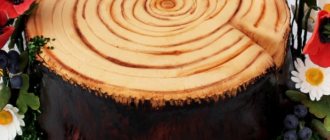
With plant decor
Wedding treats for eco-style and rustic events are decorated with fresh flowers and herbs. A cake with open edges of sponge cakes surrounded by herbs and twigs looks very beautiful and natural. Branches are placed around the tiers in small quantities. Herbs such as basil, mint, dill, lemon balm, rosemary, etc. can be used for decoration.
Provencal style cakes look very delicate and elegant. The sides of the biscuits are coated with a small amount of white cream and then decorated with sprigs of lavender. This stylish and elegant composition highlights the natural beauty of nature.
Naked cakes at winter wedding events can be decorated with pine cones, moss, and tree branches. Succulents that have an unusual appearance are an original decoration. In such cases, there should be little decor. The elements are placed in several places on the tiers and near the stand.
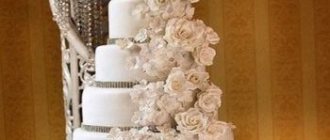
With flowers
A naked wedding cake can be decorated with fresh or pastry flowers. At traditional events and romantic weddings, white, pink or red roses, peonies, carnations, etc. are mainly used. Various garden and meadow flowers are used to decorate events in a rustic style. To prevent the buds from spoiling and staining the dessert, florists treat them with a special product in advance.
If the cake is decorated in a minimalist style, single large buds are placed in separate places and on the top. For magnificent celebrations, cascading compositions are used, descending from the upper tier to the lower.
With figures
Various edible figures decorating the top of the wedding cake are an interesting accent that reflects the theme of the celebration. These can be small copies of the newlyweds, swans, bear cubs, doves, etc. The top of the dessert can be decorated with the chocolate initials of the newlyweds.
Eco-style wedding cakes are often decorated with a nest with birds sitting in it, which is symbolic. Doves mean fidelity and tender love, and the nest evokes thoughts of offspring.
Ombre coloring
Open cakes look very beautiful, painted in different colors, having a smooth transition from the dark lower tier to the light or white upper one. This design can be successfully used at weddings in a certain color scheme. Natural berry juice is used to color the cakes in the desired shade.
Biscuits colored in this way also look impressive when cut, and they are also quite tasty. This design is very beautiful in itself, so you need to use a minimum of decor here. The top of the dessert is decorated with berries or flowers in the appropriate color scheme. This cake is a good addition to the bride’s outfit if the girl is wearing a dress with an ombre effect.
Naked cakes remain a popular treat at modern weddings. When choosing a design for the main dessert of the evening, remember that it should reflect the theme of the event. Choose a color scheme in accordance with the overall design of the wedding.
Assembling the wedding cake
Now that all the tiers of the wedding cake are ready, you can move on to assembling and decorating it. We place the lower tier on a substrate and coat it again with cream on all sides. Next, we need to strengthen the structure so that the bottom layer does not sag under the weight of the top one.
To do this, cut cocktail tubes and insert them into the bottom layer of the cake. Their length should be slightly greater than the thickness of the lower tier. Place the tubes in the place where you plan to place the top tier.
Cut out the backing for the smaller cake and place the workpiece on it. We install the upper tier on a system of tubes. The outside of the entire product is coated with cream and combed with a culinary comb to obtain beautiful waves. In addition, cream borders are formed using a star attachment. The finished product is decorated with icing leaves, beads, and cream roses.
Making cherry soufflé
Next, we start preparing cherry puree; it can be made from defrosted cherries using a blender. Add water, agar, sugar to the mixture and bring it to a boil (don’t forget to stir). After a couple of minutes, pour the jelly into a mold and place it in a cool place.
To prepare the soufflé, mix whipped cream with sugar and cherry puree, add melted gelatin. Add pieces of chopped jelly there. Gently mix the entire mass until smooth.
The biscuit for the top tier can be soaked in caramel or cognac. Both options are good. Next, in the mold that was used to bake the top crust, we assemble the smaller tier. Pour the soufflé onto the bottom layer of the sponge cake, and cover the top with the second cake layer. Place the mixture in the refrigerator until the cherry soufflé has completely hardened. Remove the finished tier from the mold.
Storage and transportation conditions
Transportation of the prepared dessert is carried out either by the manufacturing company (a separate paid service) or by the wedding organizers. Professionals prefer to use special containers of suitable shape and vehicles with a cooled cargo compartment.
When delivering by the manufacturing company, semi-finished products are often delivered - cakes, cream, finishing elements - and assembled on a stand at the site of the celebration.
Good to know: what tools are needed to cut a cake at a wedding? How to serve a cake? What accessories to decorate with? Read here.
When transporting yourself, you need to take care of suitable-sized transport, a box and careful delivery to the place. It is better to transport the product together.
The cake in a container or box is placed on a flat, hard surface (! not on a seat!) and held motionless. Use cold generators to maintain temperature.
Storage conditions for wedding dessert depend on its composition and the manufacturer’s recommendations. The usual temperature range is 5-12 degrees Celsius, humidity no more than 50%.
How to assemble a two-tier cake and decorate with fresh flowers
In this video, I tell you in detail how to assemble a two-tier cake, decorate it with fresh flowers and colored smudges.
Good day! Today we will again talk about cakes, or more precisely, how to assemble a two-tier cake and decorate it with fresh flowers. I'll also show you how to make colored drip icing. To assemble this cake, I will use 2 tiers: I baked the sponge cake for the bottom tier in a 21 cm mold, and the sponge cake for the top tier in a 16 cm mold. In total, I needed 1.5 servings of classic sponge cake. In each tier I will use 3 cake layers 2 cm thick. I used cream cheese cream. In total I needed a little less than 4 servings of cream. The total weight of the finished cake was approximately 2 kg 800 g. I will definitely leave all the necessary recipes and links to the video in the description.
I have the bottom tier for the cake ready, I’m putting it in the refrigerator, and in the meantime, let’s work on the top tier. For its base we will need food cardboard. Cut a circle out of it equal to the diameter of the mold in which the sponge cake was baked. We cut off the excess cardboard around the perimeter. Now we move directly to assembling the upper tier. You can see more about this in my video How to assemble and decorate a cake. If desired, the sponge cake can be soaked in any liqueur or syrup, and you can also make a layer of berries, chocolate or nuts. The sponge cake can also be layered with a liquid filling, such as jam, confiture or curd.
I'll show you how I do it. First, I apply a small layer of cream to the sponge cake, then I make a side out of the cream and pour the liquid filling into the middle - for me it’s orange curd, level it and cover it with the sponge cake on top. Now we level the surface of the cake. If any questions arise and something is not clear, I also talk about this in detail in the video How to assemble and decorate a cake. We level the surface to the desired state and put it in the refrigerator.
It is very important to cool both tiers well
In the meantime, let's talk about flowers. It is advisable, of course, to use flowers from your garden or, as in my case, from your windowsill. Flowers that can be eaten are great, such as geranium or lavender. Orchids look very beautiful and unusual on cakes, besides, they do not fade for a very long time and remain fresh. You can also use violets and herbs such as rosemary, thyme, basil and mint for decoration.
If you nevertheless decide to decorate the cake with purchased flowers, but know nothing about their origin, I recommend doing the following: first, wash the flowers well from the outside and dry them on a towel, then cut a small piece from cling film and wrap the cut with it flower. Thus, we prepare all the flowers. And under the video I will leave a complete list of flowers that can be used to decorate the cake, the leader among which is the rose!
Both of our tiers have cooled well, now we need to strengthen the lower tier. This can be done using wooden skewers or cocktail straws. If the cake is quite large and heavy, you can even use sushi chopsticks. I like to use wooden skewers. We measure the required height and insert it into the lower tier. Due to this trick, our biscuit will not sag under the weight of the top tier.
I colored a small amount of cream in a contrasting color and wanted to make the cake a little spotted. By the way, while working, I accidentally noticed that if you put one plate on top of another, you get a pretty good turntable
Now we clean the substrate from excess cream and, using two knives or spatulas, carefully transfer the upper tier and place it on the lower one
Now let's prepare the ganache. To prepare it, we need 3 parts white chocolate and 1 part heavy cream. Those. For 150 grams of white chocolate we take 50 grams of cream. Melt everything in a water bath and add the necessary dye. In my case it is a pink gel dye. As a result, we get colored glaze for drips. In the last video I showed how to apply smudges using a teaspoon. You can also use a pastry bag for these purposes. In my opinion, this is even more convenient.
And now comes my favorite creative process - the decorating process. Here we turn on our imagination and decorate absolutely to our taste. Our two-tier cake is ready! As you can see, everything is not as complicated as it might seem at first glance. I hope you found this video useful. Try it, please your loved ones, and I wish you good luck in the kitchen!
Assembling the product
How to make a two-tier cake? Once all the ingredients are ready, you can start assembling the dessert. Place the first light cake on a flat plate, grease it with cream and cover with the second. We coat not only each layer with cream, but also the side parts. Next, apply the mixture to the middle of the top cake and cover with the brown dough. So we gradually collect all the layers and coat them with cream. Our product is almost ready. Using this template you can make a dessert on any theme.
Two-tier cakes made at home are good because you can come up with options for decorating them yourself. We suggest making chocolate sides and adding fruit. To do this, melt the chocolate in a water bath. Next, we will prepare strips of parchment; their width and height depend on the parameters of the cake and your preferences. In our case, the sides will be higher than the cakes themselves, so that there is room for fresh fruit.
We apply chocolate to parchment strips and apply them to the sides of the product, put the cake in this form in the refrigerator for fifteen minutes to allow the chocolate to harden. Only after this can the parchment be carefully removed. Since we made the sides higher than the cakes, we got niches in which we can put fresh fruit. You can also fill them with cream if the fruity option doesn't appeal to you. So the two-tier cake is ready at home.
An original treat for men
You can pamper your beloved man with a dessert based on the famous aphrodisiac products that the “strong half” of those with a sweet tooth love. For a banana-chocolate cake, you will need to bake a sponge cake with cocoa, prepare curd cream and glaze. Ingredients for filling you will need:
- cottage cheese (9%) – 450 g;
- low-fat yogurt – 150 ml;
- bananas – 4 pcs.;
- vanilla sugar – 30-45 g – to taste.
Cream is made from this:
- The fermented milk product must be passed through a sieve and mixed with sugar.
- Next, dilute the mixture with yogurt and add banana pieces.
- Beat the mixture in a blender until the consistency of thick foam. To make a liquid cream, just take more yogurt.
- The mixture needs to be refrigerated for about half an hour before using it in the cake.
The cakes need to be soaked in Irish cream liqueur or chocolate milk (1 tsp cocoa + 1 tsp sugar + 0.5 tbsp milk), and then coated with cream, cool and assemble the cake. The finished structure is evenly poured with dark chocolate glaze. You can decorate the product with thin banana slices, chocolates, figurines or crumbs.
As you can see, creating a two-tier cake with your own hands is not at all difficult. Set aside a few hours for culinary magic - all your guests will appreciate your efforts!
Birthday cake
Two-tier birthday cakes are a great solution for a special occasion. Whatever you say, such a confectionery product looks much more impressive than a simple single-layer cake. But you don’t have to order a beautiful dessert from a pastry shop. Now there are many recipes that allow you to make a two-tier cake yourself at home.
We offer a recipe for dessert with fruit. To prepare it we will need the following ingredients:
For the light sponge cake:
- Five eggs.
- Flour – 260 g.
- Sugar – 260 g.
- Vegetable oil.
For the chocolate sponge cake:
- Three eggs.
- Flour – 160 g.
- Sugar – 160 g.
- Two tablespoons of cocoa.
For cream:
- Powdered sugar – 5 tbsp. l.
- Cream for cream – 0.5 l.
- Cream cheese – 0.5 kg.
For impregnation:
- Liqueur (you can use Baileys or any other) – 70-110 ml.
- Instant coffee – 0.5 l.
For decoration:
- Fresh berries.
- Chocolate – 0.6 kg.
It takes a lot of effort to make a two-tier cake with your own hands. Therefore, we will consider all stages of preparation step by step.
The history of the origin of mastic cake coating
The most interesting thing is that mastic was invented back in the 16th century, but at that time it was used only in the form of candies. Since it was very plastic, the candies were produced in the form of different figures and were supplied mainly to the rich nobility.
Only in the 50s of the last century they began to decorate cakes with mastic, rolling it out and covering all the cakes at the same time. Due to this, the confectionery products began to look more pompous, and various figures made from the same material only added to the beauty of the cake.
At the same time, only very strong cakes were able to withstand the weight of the fondant, soft ones lost their shape and the whole product seemed to float.
Until recently, when naked cakes came into fashion, fondant was the main material in the production of wedding cakes. Covered with white glaze, decorated with flowers and monograms, medieval script - these confectionery masterpieces decorated the table of the bride and groom. It was scary to cut something like that, so as not to break the entire structure.
To this day, rich gypsy weddings in America and England are decorated with cakes covered with fondant. The weight of such products reaches 150 kg. of which a quarter of the weight comes from mastic and decorations made from it.
Also, famous designers who usually create dresses from traditional materials sometimes make edible dresses. Thus, at some edible clothing shows, dresses made from chocolate and mastic won first place. Of course, this is the most pliable material and any jewelry can be made from it.
Mastic decor
As a rule, to decorate a children's cake you will need a lot of colored details, so using one color of fondant is simply not enough. You will have to mix a lot of different shades. If you want to decorate the entire cake with mastic, then you should roll it out into a thin layer and cut out the details to decorate each tier. Each of them is attached to the product for a while with toothpicks (after a couple of minutes such fasteners are removed). The joints are usually decorated with ribbons made from the same mastic. The upper tier can be decorated with all kinds of figures made of plastic material, beads, and inscriptions. You can use confectionery powder for decoration.
The most beautiful wedding cakes
Let’s take a closer look at the popular trends in cake decorating for modern weddings:
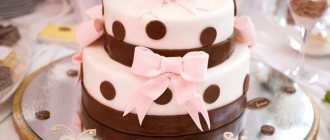
- Classic option.
These are snow-white cream cakes that will never lose their relevance because they look luxurious and festive. Such cakes, as a rule, have several layers, covered with protein cream, decorated with various lace patterns and other decorative elements. On the top tier of such a cake there are always figures placed - either the bride and groom, or blues, or wedding rings.
- Cake with a fairy tale theme.
The choice that girls who have thought through their wedding in childhood always settle on. As a rule, such cakes look like a fairy-tale castle with carved windows, columns and decorations.
- Cake "Statue".
These are cakes that have some original shape - a heart, pillows for rings, doves, rings.
- Exotic themed cake.
These are cakes that look extravagant in appearance - they are black or neon in color.
- Naked cake.
These are cakes in which the cake layers are not covered with either cream or mastic. At the same time, they do not look boring and ugly, because they are usually decorated with fruits and berries, which add brightness and beauty to the dessert.
Racks for multi-tiered cakes
If you are planning to order a large and tall cake, keep in mind that there are several options for such desserts:
- A 3-tier cake is placed on one stand, and special substrates are placed between the tiers to ensure the reliability of the structure;
- The stand itself has several floors, each of which has a separate cake layer. The shape of the cake resembles a pyramid, that is, the diameter of the tiers will narrow from top to bottom;
- Similar to the previous version, the cake stand is multi-story, but each tier is the same size and is directed in different directions from the center of the structure.
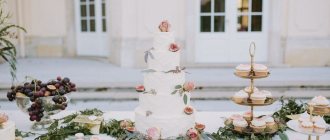
Wedding cake with three tiers and a delicate design on a stand
An original three-tier stand that essentially turns 3 cakes into a single composition
Women's information magazine
For a particularly special occasion, a homemade cake should also be special. For example, a two-tier cake will look very impressive on a festive table. And how many compliments a skilled housewife will receive! By the way, making a two-tier cake with your own hands is not so difficult - you just need to use some little confectionery tricks.
Multi-tiered cakes always look very elegant and solemn. Therefore, these cakes are usually baked for weddings, anniversaries and other significant occasions. It can be quite difficult to bake cakes with 3 or more tiers yourself, but a two-tier cake can be made at home even without much experience in confectionery.
A two-tier homemade cake should be made if there are many guests at the table - 20-25 people. In this case, the cake will need to be quite large, weighing 4-5 kg (based on 200-250 g of cake per serving), and if you assemble it in only one tier, then this tier may turn out to be too bulky. But a two-tier cake will be quite compact and at the same time will serve as a real decoration for the festive table.
To assemble a two-tier cake yourself, you need to bake and assemble 2 cakes of different sizes separately, and then combine these cakes into one. At the same time, the tiers of a large cake can have any shape - even round, oval, rectangular or square. When preparing tiers for a cake, their size is of great importance.
The fact is that if you choose the wrong ratio of diameter (or width and length) and height of the tiers, then the finished cake will not look harmonious. In pastry shops, exact formulas are usually used for calculations, but to assemble a two-tier cake at home, it will be enough to know that the optimal difference between the sizes of the tiers is on average 8-10 cm, provided that the heights of the tiers are the same.
The choice of composition for a two-tier cake is an individual matter, but it is important to remember that the lower tier can settle under the weight of the upper one, which means it should not be too tender. And, for example, it is better to choose a cake like “Bird's Milk” for the upper tier, making the lower one from traditional sponge cake, honey cakes, shortbread cakes, etc.
d.
How to assemble a two-tier cake at home?
Directly to assemble a two-tier cake, in addition to the cakes themselves, you will also need thick cardboard, foil and cocktail tubes or sushi sticks. It is necessary to cut out the backings for the tiers from cardboard, equal in size to the dimensions of the tiers. Each tray should be wrapped in food foil. If desired, you can take ready-made foil substrates of a suitable size.
The tiers for the cake are completely assembled and, depending on the idea, leveled or covered with mastic. The lower tier is installed on the substrate. To prevent it from moving, it is useful to lubricate the substrate with a small amount of thick cream or icing. Then, to strengthen the structure of the cake, cocktail tubes are inserted into the lower tier, which will take the weight of the upper tier.
One tube is inserted in the center, several more tubes should be inserted in a circle, the diameter of which is approximately 1-2 cm less than the size of the upper tier. As a rule, 4-5 tubes are enough. Using sharp scissors, the tubes are cut so that their height is equal to the height of the lower tier and they do not protrude above the surface of this tier.
The upper tier is installed on its substrate, and then, together with the substrate, is carefully installed on the lower tier. To prevent the tiers from moving relative to each other, the lower tier can be slightly greased with cream or icing (for example, where the tubes are located). After installing the top tier, you can begin the final decoration of the cake.
The decor of a two-tier cake can be anything, but there is one general rule for all cases: the joint between the tiers must be masked. This can be done by decorating the joint with a cream border or decorating it with a ribbon or mastic beads. If the general concept of the cake allows, you can also disguise the joint with flowers (cream, mastic), fruit, and chocolate figures.
09.11.2016
What is important to know before ordering?
For small, modest weddings with family, three-tier cakes are unlikely to be suitable, because they all have a very impressive weight. Experienced confectioners say that for the reliability of the design of such a dessert, its lower tier must be at least three kilograms, respectively, the total weight will be on average 7-8 kg.
However, if you really want to surprise your loved ones with a three-story dessert, but there will be few guests, you can use a trick. You will need a special stand, as well as a foam base as a replacement for the lower tier. The inedible part is usually decorated with whipped cream or mastic.
Whatever the composition and design of the cake, you need to order it only from proven and well-established confectionery shops!
If you decide to prepare a holiday dessert yourself, choose the highest quality and freshest products.
Jewelry ideas
Summer is wonderful in itself, and even simple tables in nature, covered with snow-white tablecloths, look great. However, we should not neglect the scenery that the most wonderful, blooming time of the year gives us. Here are some options.
The fruit decor is very cute. Whenever in the summer you should decorate wedding tables with compositions of fruits and berries. You can simply place vases with seasonal apples or strawberries on the tables. And the florist will offer you various options for compositions of fruits, berries and flowers. Such decorations look impressive and colorful.
Artistically cut fruits and vegetables will look beautiful and unusual on wedding tables. Carving is very popular today. Masters create incredible masterpieces that are not embarrassing to decorate any table with.
Flowers
Perhaps not a single modern wedding, especially a summer one, can do without them. To decorate tables, use seasonal flowers: daisies, cornflowers, gerberas, sunflowers, spray roses, chrysanthemums, gladioli and others. For a rustic wedding, create bouquets of wildflowers and dried flowers. Small bouquets are suitable for small tables. The larger the table, the larger the bouquet. Place them in vases or glasses.
Candles
These decorations make any holiday romantic. Candles and candlesticks with intricate shapes look great. It is especially beneficial to use candles outdoors in the evening.
Ribbons
Multi-colored ribbons are very summery. They can be used in many different ways. Tie up furniture, make flowers and bows, decorate the newlyweds' presidium, photo zone, candy bar with ribbon rain of all the colors of the rainbow.
Balloons
There are several options for using balloons in decoration. You can make garlands out of them and decorate the entire room. Or use balloons to highlight separate areas of the banquet hall and the presidium of the newlyweds. Craftsmen make interesting and intricate figures from balloons. For example, you can decorate ceilings (or a tent, if the wedding is outdoors) with daisies twisted from balls. It is very popular to decorate the newlyweds’ area with balloon hearts.
Paper decor
You can easily make cheerful summer decor with your own hands from available materials - paper and scissors. Garlands made of paper butterflies and hearts look great. Paper pompoms and lanterns of different sizes will look bright. Origami birds are also an unusual solution for a summer wedding.
Other elements
Depending on the wedding style, you can use different decorations:
- small aquariums with fish, shells (for a wedding in a marine style);
- volumetric letters;
- baskets with vegetables and fruits;
- flower crowns;
- colorful sweets, etc.
Pay attention to the design of the seating plan and place cards. These decorative elements look especially impressive at an outdoor wedding.
Interesting options: seating charts on glass, chalk board, wooden base
Interesting options: seating charts on glass, chalk board, wooden base.
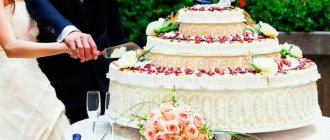
The special significance of the confectionery product
The wedding cake is the highlight of the evening. It is brought out at the final part of the celebration, ceremonially cut and laid out on plates for the guests. It can be single-tiered or multi-tiered depending on the wishes of the couple themselves and the number of guests at the wedding. Often the main dessert of the evening is made to order according to an individual sketch, so that the design matches the theme of the celebration.
In the past, weddings in many cultures used regular bread or flatbread instead of cake, and the traditions associated with this delicacy varied greatly. This lasted until the 17th century, when a Parisian pastry chef presented a creation of candied marzipan at one of the court weddings. From this moment the tradition of making wedding cakes began. She is welcome both by newlyweds who can surprise their loved ones at the celebration, and by confectioners who show their skills in all its glory.
This tradition also has a symbolic meaning. It is believed that guests try a piece of wedding cake and thereby wish the newlyweds a sweet life without quarrels, disagreements and troubles. Often the main dessert of a celebration is used as a prop for competitions and auctions. For example, the toastmaster often puts the first piece of cake up for auction for guests, and the amount received goes into the newlyweds’ treasury.
Decorations
Wedding cake decor does not limit your imagination: coconut flakes, icing, marzipan, fondant. You can draw on the cake as if on a canvas, mold figures, install the next tier, which will differ in shape from the previous one. In addition to edible decoration, there are artificial flowers, figures made of plastic or other material, ribbons and much more. It’s absolutely not necessary to stop at just one thing, but you shouldn’t forget about moderation either. Often, neat creamy lace looks much more elegant than a complex, heterogeneous and multi-colored composition.
Important! It is not recommended to use fresh flowers for decoration that come into contact with the edible part. Firstly, you don’t know what the buds were treated with, and secondly, one of the guests may have allergies
If you want to decorate the dessert with flowers, then use special mounts or miniature stands for them.
Glaze
The glaze is prepared simply from powdered sugar, butter and vegetable oils, milk, vanilla and a drop of blue food coloring to neutralize the yellowness.
If you wish, you can add a dye of a different color, then the glaze will not be pure white, but any other shade that you wish. If you do not spare the pigment, the glaze will acquire a rich dark color.
Usually the entire surface is filled with glaze, but you can also create all kinds of designs with inscriptions from it.
Colored chocolate
If you love chocolate, but want a bright, unusual shade, then food coloring will come to the rescue again.
Add them to regular white chocolate, previously melted in a water bath. The resulting mixture is poured over the top of the cake as a whole, like icing, or patterns are drawn and inscriptions are made.
Idea! The decorative chocolate drips around the edges look extremely appetizing.
Mastic
Mastic allows you to create a wide variety of figures - young people, rings, doves. Flowers sculpted from mastic look very delicate and elegant. Just create the desired shape, remembering how you sculpted from plasticine or polymer clay as a child. Doubt you have the necessary artistic talent? The mastic also looks good if it is applied in a continuous layer.
This delicious delicacy is prepared simply - from sugar, proteins and gelatin. You can also add marshmallows melted in the microwave. This mastic looks more impressive, but is more difficult to shape.
Figures
A very cute decoration that will appeal to both children and adults. The figurines can be either classic in the form of the bride and groom, small white birds, hearts, angels, or completely unique, reflecting the hobbies and interests of the newlyweds or the theme of the celebration - a bicycle, a camping tent, a piano.
You can place one large piece in the center or make a whole composition of smaller ones. Chocolate, mastic, cream, and marzipan are used as materials for making figurines.
If there is no time for jewelry work, use ready-made artificial figurines. But if you chose the latter option - one large ready-made plastic figure or several small ones, do not forget to remove them before you start cutting the cake.
Original decor ideas
A three-tier wedding cake is a real masterpiece of culinary art, which perfectly emphasizes the solemnity of the moment and invariably delights all guests.
In recent years, non-standard approaches to the design of such cakes have become fashionable, and many non-trivial designs have appeared: hanging cakes, asymmetrical, inverted or cakes with prints. Such original decors will be discussed further.
Hanging Cakes
Not long ago, an unusual way of serving a cake came into fashion - on a stand that is attached to the ceiling. Visually, this treat resembles a large chandelier descending towards the guests
This invariably attracts increased attention and truly decorates the wedding celebration
Creating such a cake is not at all easy: you not only need to make the treat itself, but also work out all the technical and design nuances of the attachment. All this work takes quite a lot of time, so this cake should be ordered in advance.
Inverted
This is a cake for creative people who are alien to the standard canons of wedding events. Fans of originality will certainly appreciate the so-called upside-down dessert. To assemble it, the largest cake is installed on the stand using special hooks, the middle one is attached to it from below, and the smallest one is attached to the middle one. This creates the effect of a sweet structure floating in the air. All hanging elements are covered with mastic and decorated with beads, threads and fresh flowers.
Asymmetrical
This is another new and very original way to decorate three-tier cakes. Visually, it resembles a staircase, that is, all its tiers are shifted to one edge. To prepare such a treat, a variety of cakes can be used: biscuit, shortbread, and honey. They can be decorated with mastic or a generous layer of cream. Often the design is complemented with fresh flowers, real berries, or images of doves, swans or other characters.
With prints
One of the latest trends in wedding fashion is cakes with designs. They are usually made on rice paper using edible dyes.
This type of decoration gives a lot of scope for imagination and decoration of the cake. These can be standard floral patterns, or they can be plots from fairy tales or favorite films of the newly made spouses.
A recognized hit of the last season was the placement of photographs of the newlyweds on cakes.
Two-tier cake for a woman
Ladies are more likely than others to watch their figure, so you need to prepare a dietary fruit cake. Stock up on apples, bananas, kiwis, oranges, strawberries or other fruits of your choice. From part of their pulp you need to prepare sugar-free puree, then use it to soak the biscuit.
For a light cake, it’s better to take a healthy one – curd and cream, but a classic custard recipe will also work. The part that will be used for coating must be mixed with pieces of fruit: bananas, apples and strawberries.
The cream for external coating and decoration can be tinted in any suitable color and used to create decorations that will delight the hero of the occasion. And also the main highlight of the culinary inlay will be fruits. They need to be cut into thin slices and laid out in beautiful rows. Such a delicate cake will not leave even supporters of proper nutrition indifferent!
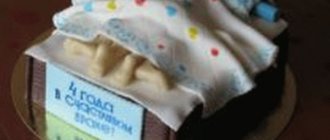
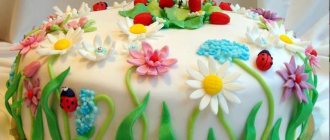
Children's cakes
An original, beautiful dessert is a must-have at children's parties. At home, you can prepare a two-tier cake for your baby’s one-year anniversary. The basis of such a product can be any biscuit (we gave the recipe earlier in the article). But the outside of the dessert needs to be decorated using a children's theme. A two-tier mastic cake is considered quite popular and easy to make. It is worth noting that mastic is actively used to decorate not only desserts for children, but also for adults. The plastic material makes it possible to make the most bizarre and beautiful decorative details, which is why the products acquire a unique look.
To prepare the mastic we need marshmallows. Heat the marshmallows in the microwave and add a little coloring (the coloring can be any color, depending on your imagination). Next, add powdered sugar and knead into a dough.