Reads: 2,098
Reading time: 14 min.
no comments
A wedding bouquet has long become a necessary accessory that every bride simply must have.
First, the girl shows off with him during a photo shoot, and at the end of the celebration, she throws him to her friends: the one who catches him will be the next to go down the aisle.
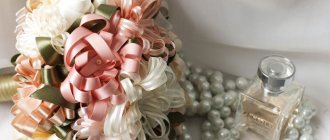
Fresh flowers are always relevant. But now at the peak of fashion are bouquets for the bride made from satin ribbons: such an attribute of a wedding celebration is surprisingly beautiful and very original.
Why is it customary to give flowers?
Giving flowers as a sign of respect, gratitude, and love has been a relatively recent practice among us, since the 19th century. Bouquets were first presented to actresses, and later to ladies, as a sign of special treatment towards them.
Bouquets became more and more complex and elegant. Nowadays, their composition, shape, and color scheme are incredibly diverse! A modern bouquet is no longer just a nice addition to a gift, it can be an independent gift that will attract the attention of all guests at the celebration.
The second and no less important function of a bouquet is to be a beautiful and elegant addition to the bride’s image. And there are a lot of variations here too.
Various varieties of flowers, different shapes of bouquets, hundreds of color combinations. The bride's bouquet can be modest and inconspicuous or bright and even extravagant. It all depends on the image of the bride and the style of the wedding.
Photos of beautiful do-it-yourself bouquets of stand-ins 2022 with photos
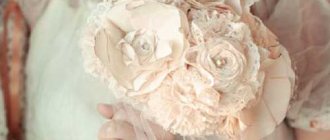
A stylish elegant double bouquet is part of the bride’s wedding look. Doing it yourself or ordering it from a florist is the couple’s decision. Important points are the weight of the composition and its harmonious imitation of the main accessory. In the selection of photos you can see original ideas that will make you think about the same bouquet for your own wedding.
Reasons for the popularity of artificial bouquets
In recent years, artificial bouquets made from unusual materials have become very popular. Beads, pearls, artificial and stabilized flowers and plants are increasingly being used in bouquets.
But the most striking accent for the bouquets were metal brooches. They are added both to bouquets of fresh flowers and to bouquets made of inanimate flowers (from fabric, ribbons, beads, polymer clay and cold porcelain, felt and paper).
Bouquets of lifeless flowers are becoming increasingly popular, and there are several reasons for this.
- The most important reason is that they don’t fade! Such a bouquet will delight its owner for many years.
- A bouquet of lifeless flowers is very unusual and can easily attract attention.
- This bouquet is reliable, not afraid of frost, the flower petals do not darken or break.
- The bouquet can be made in absolutely any color so that it matches with some accessories.
A wedding bouquet for the bride, made from satin ribbons with her own hands, has a special value, because the warmth of her hands and soul is put into it.
Signs
A wedding is surrounded by a lot of signs and superstitions. Not all of them can be trusted, but the most common ones have already become a tradition. For example, a Slavic man gives his beloved a flower arrangement only after the ransom has been carried out. At this moment the groom kisses the bride. The rest of the time before registration or wedding, kissing is avoided.
During the wedding event, the bride does not let go of the flowers. The bouquet can only be given to the girl’s mother. In the West, they give it to the bridesmaid to hold. Superstitious brides sew a loop to their dress, to which they attach flowers when it becomes inconvenient for them to hold them. But in this case, the loop is not attached at waist level - this promises a difficult birth.
Girls without an obvious groom, but of marriageable age, if they dreamed of wedding flowers, expect their betrothed to appear soon.
Necessary materials
The necessary materials for making such bouquets are:
- Satin ribbons. These are mainly single-sided tapes with a width of 2.5; 4 and 5 cm. But if necessary, you can use double-sided tapes.
- Textile. Flowers can be made from satin, silk and chiffon, and other fabrics can be used as needed, including cotton, organza, crepe de Chine, etc.
- Lace. Diverse! And nylon, and stretch, and even linen.
- Artificial pearls, rhinestones, glass beads, half beads, beads, buttons with rhinestones.
- Of course, brooches! Here your imagination is limited only by your choice! You can use brooches with white, yellow, and bronze metal, with transparent or colored rhinestones, with pearls and plastic, small and large. There are plenty of options.
- Foam balls with a diameter of 12-15-20 cm.
- Wooden or plastic tubes with a diameter of 2.5-3 cm.
- Various sewing supplies such as needles, threads, pins, scissors, dry soap or chalk.
- Glue . Only hot melt adhesive is suitable for polystyrene foam. You can use glue in thin sticks with a diameter of 7-8 mm and a glue gun - or take thicker sticks, 12 mm wide, and a corresponding gun. The only difference will be in the volume of glue squeezed out at a time. The larger the gun, the more glue. But you can get used to any pistol.
In addition, you need pliers, a lighter, a knife, a saw and other tools.
Choosing the right shade of satin
The color of the ribbons is an important choice for such a celebration as a wedding. It should go well with the bride’s image, her makeup and hairstyle, as well as with the wedding style. It is believed that the bride’s bouquet is a talisman that will set the newly-made family in the right mood and will bring happiness to the newlyweds’ home. Therefore, it is worth taking a closer look at the most common color options for compositions of artificial flowers made from ribbons.
Color
Green bouquets look original (in light, light green, lime, pine and other shades). This color speaks of well-being, stability, and tranquility of the young.
Yellow – wealth and fun. Previously, it was believed that this color should never be used at weddings, but modern designers are convinced that this is just prejudice and are increasingly beginning to recommend this sunny tone. You can always choose a gold, silver, bronze shade.
It is not necessary to use only one tone when making a wedding bouquet with your own hands from ribbons; there are options for combining several colors (you should not take more than 3) and shades of one leading tone. Great combination:
- blue and white,
- purple and lilac,
- pink and mint.
White
White – purity, innocence and the beginning of a happy family life. Under a white dress, you can choose peach, soft pink, beige satin - these options look cute and very romantic. These are symbols of trust, tender love and caring attitude towards each other.
Red
A composition in such colors symbolizes passion and seething feelings in a couple. A red bouquet is perfect for a snow-white dress, will act as a bright accent and will not go unnoticed by guests. This color always looks very elegant. Bright red is best for a brunette.
Turquoise
Turquoise speaks of mutual gratitude for the fact that the newlyweds met each other. There is also another interpretation - peaceful happiness, tranquility and well-being. This bouquet is ideal for a young bride and will make her image even more touching.
Blue
This color in the composition indicates nobility, trust and purity of thoughts. Blue will make the bride's image romantic and airy. It will be ideally combined with pink, yellow, white and blue, but even without combinations it is a worthy option. A bouquet in a blue shade will suit a bride of any age, especially if she has the same eye color.
Blue
Blue speaks of calm, it is for people who know what they want in this life and are confidently moving towards their goal. For newlyweds, a bouquet in this shade indicates fidelity, stability and harmony. Blue will go perfectly with a snow-white dress, but it is better to add an additional accessory of the same shade - a hairpin, shoes.
Bouquets in blue are usually used at weddings with nautical, winter and Greek themes. It will fit perfectly into the style of the special event.
Classic rose
This flower is very popular, and bouquets can be made exclusively from roses.
We will need:
- Tape 4 or 5 cm wide
- Scissors
- Needle and thread
- Lighter
Step-by-step master class with photos on how to make a rose from satin ribbons for a bride’s wedding bouquet:
- We treat the end of the ribbon with a lighter so that it does not unravel.
- Take the ribbon, right side facing you, wrong side down.
- Fold the upper right corner to create a triangle.
- Fold the resulting triangle in half vertically.
- Now, starting from top to bottom, we roll up the tube from the folded triangle.
- Approximately in the middle, we use a thread to grab the resulting tube with two stitches so that it does not open. If you release your left hand, the tube does not unfold.
- We lift the right edge of the tube up and turn it out a little.
- Then we turn the tube counterclockwise, so the tape is wound onto it on the right.
- Next, we take the top fold of the free tape near the tube and, as it were, turn it away from us, pressing it against the tube, and turn the tube counterclockwise, i.e., we wind the bent tape around it. This is the main movement when creating such a rose - bending away from you and turning the flower.
- We secure the fold pressed to the center of the rose with a thread. And so every turn, every fold must be secured with thread so that the rose does not fall apart.
- Next, we repeat these movements - bending and turning the rose, thus increasing its layers in a circle.
- When you have a rose of the required size, cut the ribbon and singe it with a lighter.
- Attach the remaining ribbon to the rose.
- We fasten the thread at the back.
Such roses can be made from different ribbons, even from fabric and lace.
Candy surprises
A delicious original option - bouquets of sweets. Sweets are chosen from one or more types - expensive Ferrero, Raffaello, chocolate to order, mischievous candy.
Paper or real flowers, as well as feathers, birds, and silk ribbons will decorate this delicious accessory.
A sweet bouquet for a wedding differs from a regular gift arrangement. Looking at the skillfully assembled accessory, guests will not immediately realize that the bride is not holding a classic version. Light colors and shine of foil give the set a solemn wedding look.
Sweet bouquet of roses
This bouquet is a solution if the young woman is allergic to plants. For themed weddings, a tasty bunch will become the missing original accent. Sports motifs will be emphasized by several chocolate medals, ideas about animals will be supported by funny toys and sweets in the shape of animals. They order candy wrappers with the names of the newlyweds and the date of the celebration. In summer, caution is required - at temperatures above +25°C the composition will begin to melt. Roses for an edible bouquet are made from corrugated paper:
- Petals of different sizes are cut out, similar to real ones.
- A candy in a wrapper whose color is in harmony with the future flower is attached to a wooden stick with adhesive tape.
- The area under the treat is glued with paper - the cut-out parts are fixed here in a circle. For a beautiful bend, the petals are wound onto a pencil.
- The green ribbon is twisted into the shape of a sepal.
Rose on a rigid base
This is a very impressive rose. It takes longer to make than a simple one, it will take more ribbon, but such a flower looks very beautiful and festive.
We will need:
- Tape 2.5 cm wide
- Circle of hard felt with a diameter of 6 cm
- Needle and thread
- Scissors
- Lighter
Sequence of work:
- Burn the edge of the tape with a lighter.
- Take a circle of hard felt and cut out a small sector in it.
- Take the ribbon with the front side facing you and bend it. It turns out to be a square with the front side up.
- We apply the square to the center of the circle and sew it along three sides: the top - from left to right, then the right and bottom - from right to left.
- Bend the free ribbon right edge towards the bottom side of the square to form a triangle.
- We bend the tape towards the square, as if we were laying it on it. Sew the left edge from bottom to top.
- We bend the ribbon again, place it on the square and sew it on.
- This happens many times in a row, then increasing the angle.
- When almost all the felt is filled, cut off the tape and use a lighter to trim the edge.
- We bend the edge of the ribbon back and sew it on, securing the thread.
Using this technology you can make roses from any materials!
From orchids
Materials and tools:
- orchids - 5 pieces;
- ostrich feathers - 3 pieces;
- lace fabric;
- long floral flasks - 5 pieces;
- tape;
- coconut fiber;
- thin wire;
- skewers - 6 pieces;
- plastic floral ribbon to match the color of the lace;
- knife;
- pruner;
- scissors;
- stapler
salal - 2-3 branches;
Master Class:
- Pour water into the flasks and close the lids.
- Wrap the flasks in coconut fiber and secure it with wire.
Trim the stems of the orchids and insert them into the flasks.
Cut ostrich feathers 6-7 centimeters long.
Attach the feathers to the skewers with tape.
The bouquet is based on orchid flowers, place skewers with feathers just above the buds, on different sides, attach salal branches with tape.
Use plastic tape to tie all the stems at a distance of 6-8 centimeters from the buds, trim the stems with pruning shears to a suitable length.
Wrap the lace around the stem of the bouquet and secure the fabric with a stapler.
to contents ^
round flower
This pretty flower will require a minimum of time and effort.
We will need:
- A piece of fabric 5-6 cm wide (in this case satin is used)
- Needle and thread
- Scissors
- Lighter
Sequence of work:
- We use a lighter to process all sides of the piece of fabric.
- Fold the fabric in half lengthwise and begin stitching with thread along the double edge.
- We do not make very long stitches.
- By pulling the needle, we get fabric gathered along the thread.
- We continue to gather the fabric onto the thread.
- We gather the entire piece until the assembled fabric forms a complete circle.
- We cut off the excess, use a lighter to trim the edge and sew the gathered fabric together so as to maintain the shape of the circle.
This way you can make flowers from almost any fabric and lace!
Flower with sharp petals
This flower looks both gentle and impressive; it can decorate any bouquet.
We will need:
- Satin ribbon 5 cm wide
- Needle and thread,
- Scissors
- Lighter
Sequence of work:
- Cut 5 squares measuring 5x5 cm from the tape.
- Take one square, bend it in half diagonally and then in half again.
- We begin to assemble the resulting triangle along the side with the edges. It is important to start stitching the triangle always on the same side. If you look at it again, you will see that the left side of it will be a fold, and the right side will be two folds connected. It’s better to start gathering on the side where there are two folds: then the petals will turn out symmetrical.
- We continue to collect the remaining petals on the thread, always starting from the same corner.
- We pull together all the petals, connect them, fasten the thread and get a flower.
From brooches (false bouquet)
Materials and tools:
- various brooches - 80 pieces;
- tape;
- wire;
- satin ribbon;
- pins with beads;
- glue gun;
- pliers.
artificial flowers;
Master Class:
- Clean all brooches and dry well. You can use soap and a toothbrush.
- Attach each brooch to a wire, creating a “stem”.
Wrap the resulting stem of the bouquet with a satin ribbon from bottom to top and secure the end of the ribbon with a needle and bead, or a glue gun.
to contents ^
Flower with round petals
The flower differs from the previous one in the shape of its petals.
We will need:
- Satin ribbon 5 cm wide
- Needle and thread
- Scissors
- Lighter
Sequence of work:
- Cut 5 squares measuring 5x5 cm from the tape.
- Take one square and bend it in half diagonally.
- We begin to assemble the resulting triangle along the double side with the edges from the fold along the side, then along the other side to the fold.
- Let's collect the petal. We continue to collect the remaining petals on a thread.
- Then we pull the petals together and connect them, fasten the thread, and we get a flower.
From chrysanthemums
Materials and tools:
- white chrysanthemums - 3 pieces;
- white hydrangeas - 7 pieces;
- twine - 1 skein;
- brown floral wire - 1 skein;
- brown organza 5 centimeters wide - 1 skein;
- buttons;
- pruner
Master Class:
- Trim leaves from stems.
- Place 3 hydrangeas together, creating a triangle. Place 3 other flowers just below the previous ones, forming another triangle. Place the last hydrangea in the center slightly higher than the rest.
Remove excess length of stems using pruners.
Wrap the stems from top to bottom with organza and secure with a button.
Wrap the handle of the bouquet with twine and secure the ends.
Ruffle flower
This flower is quite labor-intensive, but very effective.
We will need:
- Tape 15 mm wide
- A circle of hard felt with a diameter of 5 cm (smaller is possible)
- Scissors
- Needle and thread
- Lighter
Sequence of work:
- Take a circle of felt and sew the edge of the ribbon to it.
- Then we make a fold on the ribbon and sew it to the circle, then another one and sew it next to it.
- Thus we continue to sew folds along the edge of the circle.
- When the entire edge is trimmed, we begin to sew the folds inside the circle in a spiral.
- And so we continue to work until there is no space left in the center. We cut off the excess, process the cut with a lighter and secure the tape, bending it so that the edge is not visible. This is what we got.
From butterflies
Materials and tools:
- silicone butterfly stamp and ink;
- cocktail straw;
- wire;
- glue gun;
- scissors;
- wire cutters;
- scotch;
- decorative elements (beads, rhinestones, sequins, organza, ribbon).
scrapbooking paper;
Master Class:
- Make butterfly stamps on a sheet of paper.
- Cut them out.
- Apply a small amount of glue to the back of the butterfly.
- Bite off 30 centimeters of wire, apply it to the applied glue and glue a small piece of paper on top, covering the junction.
How to make a wedding bouquet
Sequence of work:
- Take a foam ball with a diameter of 20 cm.
- Using a sharp knife (not very short, about 15 centimeters), cut the ball in half.
- Take a handle for a bouquet 20 cm long, 3 cm in diameter.
- On the flat part of half the ball, mark the center with a pen and from it in all directions we set aside half the diameter of the future handle of the bouquet.
- Using scissors or any other thin pointed object, make a depression in half of the ball, about 4-5 cm.
- The recess should be narrow, exactly the diameter of the bouquet handle. You can try on the handle.
- Pour liquid hot melt glue into the recess. We try to get the glue onto the walls of the recess and onto its bottom.
- Lubricate one side of the bouquet handle with hot glue.
- Insert the handle with the lubricated side into the recess in the ball until it stops. This must be done quickly, because hot melt glue dries quickly.
- Apply glue to the joint between the bouquet handle and the foam.
As a result, we get such a unique porta bouquet - the basis for our future bouquet!
Now let's start decorating the base:
- Take the fabric (in this case silk) and cut a piece 6 cm wide and 80-90 cm long. Then cut out a 6 x 6 cm square.
- Glue the square to the back of the handle with the front side facing out.
- And then we glue all sides of the square to the handle.
- We take a long piece, glue two corners on one side with the right side of the fabric facing out. Glue the cut to the handle with the fold towards the edge. Next, carefully apply glue to the handle along the edge.
- We glue the cut to the handle along the edge with the fold towards the edge of the handle; this must be done quickly, because the glue hardens quickly. You can’t apply glue close to the edge, because when you glue a piece, the glue can come out, and when it dries, it turns white, and it won’t turn out very neatly.
- Next, apply glue to the handle (or to the cut from the side of the handle, as convenient) and glue the cut in a spiral to the handle, overlapping so that the double edge of the cut is covered by the folded edge. And so we wrap the handle with a cut to the end, to the junction with the foam, cut off the excess and glue the fabric along the entire diameter.
- Next, we take another piece of fabric 11-12 cm wide, 65 cm long for our ball with a diameter of 20 cm, i.e. the width of the cut should exceed the radius of the foam ball, and the length should exceed its diameter.
- We sew this section in a circle with the right side out, the seam inward.
- We stretch the stitched section onto our foam half and glue it along the edge.
- We gather the other edge around the handle of the bouquet. We get a draped bouquet handle. It is not decorated yet, but you can already start decorating the top part of the bouquet.
- For the bouquet we take various flowers, brooches and other decorations. We cut off the stems of all the roses and treat the ribbon on the cut with a lighter, grease the inside of the flower with glue.
- Next, we begin to cover the entire foam with flowers. It is best to glue from the top. You can first pin the flowers to the foam with pins and decide where the brooches will be located. (Usually flowers are glued joint-to-joint or overlapping, the main thing is that the foam is not visible.)
- We glue it so that the brooches slightly overlap the flowers or are under them. We try to maintain color balance, evenly distributing flowers and brooches of different shapes on the bouquet.
- You can lay out flowers and brooches in some pattern or follow the color order. Let your imagination take flight.
- In this way we fill the entire half of the ball to the very edge.
- Then we glue the flowers close to the edge or even go a little beyond it, then it seems that the flowers seem to be hanging from the edges of the bouquet.
- After we have glued all the flowers and large brooches and covered all the foam with them, we add half-beads, rhinestones and any other decorations to the almost finished bouquet.
- And at the very end we decorate the handle of the bouquet.
A wedding bouquet of satin ribbons and brooches is ready!
Tips and advice:
- A luxurious bouquet made by your own hands can be presented as a gift. Of course, it will cause admiration: those around you always admire the extraordinary bouquet. Don't forget this when you make it, pay a lot of attention to detail.
- Hot-melt adhesive has an unpleasant feature - it can “reach” for the gun and leave thin sticky white cobwebs, which are very visible on colored fabrics, and are generally noticeable.
- Do not apply too much glue, otherwise it may stick out beyond the borders of the brooch, and since it will turn white when hardening, the bouquet will look untidy.
- The foam should not be visible. If suddenly you have a gap, it is better to cover it with decoration or a small flower. Carefully drape the bouquet skirt. If you were unable to do this carefully, then the flaws can be hidden behind lace and ribbons.
- For a bouquet with a diameter of 20 cm, use sticks with a diameter of 3 cm, for the rest - 2.5 cm, so that the porta bouquets look harmonious. Of course, small bouquets of flowers and brooches require significantly less material and are made faster, so it is better to start with smaller bouquets.
- The color scheme is limited only by your imagination and taste! Sometimes masters try to stick to classic combinations, but in fact, absolutely any combination can look stylish, it all depends on the shades. Try to avoid colors that are too bright and instead opt for deep, rich colors.
- Well, the last thing: do not skimp on materials, since it depends on them how beautiful the bouquet will look.
0 Comments
Step-by-step instruction
Let’s move on directly to creating a flower arrangement so that years later we can say: “Yes, I managed to make a bouquet with my own hands!”
First of all, you should place the pipe in the hole of the disk. We fix the structure using glue; Foam intended for installation work must be squeezed onto the compact disk. The lump must be made in a spherical shape; Excess foam is cut off with a knife; In principle, how to decorate the handle of a bouquet is a matter of taste for each bride. You need to decide for yourself how to do this
In addition, the intended design of the celebration is taken into account. The most laconic option is the use of lace
Gather the material using threads and glue it to the back of the compact disc; You can also sew the cover needed for the pen. Materials such as guipure or satin will help with this. So, you can completely hide the pipe. To securely fasten the structure, fix it in several places using satin braid;
The most awaited moment. You need to make every effort to shine throughout your day, feeling like a princess in a fairy tale created almost with your own hands.
- Rose buds are made from satin ribbons. The splendor of the flowers directly depends on the length of the material you chose. It is advisable to form the first rose without cutting the satin from the skein too early. Don't worry: you can do this a little later when you decide that the splendor of the flower is satisfactory for you. As a rule, about 30 cm of tape is sufficient.
- Treat the cut with the flame of a lighter, because satin is a material that tends to crumble.
- Fold the edge of the material into a triangle, inside out, and wrap the rest around the middle. Secure with thread.
- Repeat the action described in the previous paragraph. The inside should not be visible. The middle must be placed at a level higher than the petals. Each turn must be secured with thread. As soon as you like the splendor of the rose, cut the ribbon and sew up the edge.
- Usually 9 to 11 buds are enough for one bouquet. You can make more flowers. The middle can be decorated using pearls or rhinestones, however, beads are also suitable.
As for the subsequent design, brides can give free rein to their imagination.
- Using glue, attach the roses to the foam. We should not forget that it looks advantageous when the flowers alternate. For example, a combination of white and pink buds looks amazing.
- In the space left between the roses, you can make a composition with your own hands from the following materials: gauze, guipure, tulle. You can create delicate ruffles out of them. Feathers in combination with satin also look good.
- As for the ball that we created earlier. Flowers are glued to it in a circle.
The final paragraph is called: “Brides, you are amazing!” It involves shining during your own wedding. Agree, the effort put into the process that makes it possible to make buds is justified. The exquisite bouquet is ready.
Every girl preparing to be forever engaged to her chosen one knows: the bride’s bouquet is one of the most important and most beautiful attributes of the wedding. Flowers can give way to the palm only to a dress, about which the fair sex indulges in dreams from a young age. Not only can it complement the image of the future wife, but it also does not make it possible to forget about the tradition that is closely connected with the holiday. Throwing a bouquet into the crowd, we understand that the girl who caught it will soon invite those gathered to her wedding celebration. Why not add some piquant mystery to this moment by making a bouquet with your own hands?