2 minutes. to read
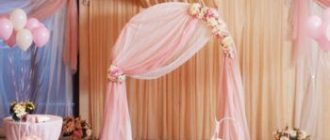
Today, various handmade decorations are becoming increasingly popular, which can be used to stylize residential and non-residential premises, decorate photo zones, party halls, and so on. Volumetric numbers and letters are popular designs that have become a sought-after element of almost any celebration.
They can be small or large, made from various materials. Abbreviations, words, and phrases are created from them. If you want to learn how to make three-dimensional letters yourself, our master class will help you.
Making three-dimensional letters from textiles with your own hands
This option is one of the most common. It will harmoniously fit into the theme of a children's and adult party, and can later be used as a decorative element or a soft toy.
The easiest way to make a product is for those who know how to use a sewing machine, although it is also possible to make such letters or numbers by hand. Usually choose a medium size (about the size of a standard sofa pillow).
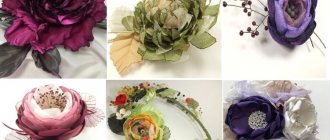
If we are making three-dimensional letters from fabric, we need to prepare textiles (it is best to choose natural materials), a stencil, scissors, threads, and needles. You can also prepare various additional decorations (sequins, rhinestones, beads).
The stencil must be transferred to the fabric, then cut out parts of the product and sew them together. As a filler, you can use synthetic winterizer, polystyrene foam, foam rubber, cotton wool, fabric scraps and any other materials.
Unusual way
Letters from quilling turn out to be interesting, not childish and fluffy, let’s try to make such an interesting craft:
- First, take a sheet of paper that will serve as the base and draw the outline of the future letter on it.
- Now let's prepare the strips with which we will work. To do this, cut colored paper into strips no thicker than six millimeters.
- Glue a wide strip of thick paper along the contour of the letter.
- Twist small strips of colored paper into curls. You can screw them onto the handle and hold them for a while.
- Well, now we decorate the letter as we wish.
How to decorate three-dimensional letters from cardboard with your own hands
You need to make several stencils of each letter at once. The more cardboard models you make, the wider and more voluminous your letter will become.
If you connect many cardboard blanks, you get a stable structure. Various decorative fonts can be used. The main thing is that all the parts are the same size.
You can decorate voluminous structures by wrapping them with multi-colored fluffy threads (you can achieve smooth transitions or choose a non-standard combination of colors).
Shells, flat beads, and fabric can be used as decoration. One option is to use corrugated paper, which is collected into small balls and attached to cardboard. The results are fluffy colored products.
First option
Probably the most common option for homemade letters is letters made of cardboard, because this is a very affordable material. The principle of operation is very simple: you just need to cut out the letters you need according to the sketch and glue them together, that’s all. As you can see, there are no complications or sophisticated methods. The finished product can be covered with colored or self-adhesive paper, or simply painted with paints or colored felt-tip pens.
Stylish plaster decor
You can create three-dimensional letters that will look not like a craft, but like a sophisticated element of the interior, using plaster. It is necessary to wear gloves when working with such material, and to create letters you will definitely need forms into which the already prepared solution will be poured.
Creating forms is the most difficult part of the whole process. You can use homemade cardboard forms, buy ready-made ones, or make them from metal or plywood. It is important to make the entire mold inside absolutely smooth to make it easier to remove the finished product. To do this, you can glue it inside with tape.
It is not difficult to prepare plaster. It is enough to follow all the recommendations indicated on the packaging. The consistency should resemble thin sour cream. To make the letter especially durable, you need to fill the mold halfway, then lay a layer of burlap on top. Next, fill the letter to the top.
The plaster hardens completely in 4-5 hours, after which the product must be removed and sanded using sandpaper. These letters can be left white or covered with paint. If you want them to retain their attractive appearance for as long as possible, spray them with acrylic spray.
Sewing a bagel: master class
Before you start making soft letters, you can practice on a simpler product that is equally popular with children - a donut. The scheme of its creation is clear even to a child.
To sew a round pillow with a diameter of 40 cm with a hole in the middle you will need:
- thick paper for making a stencil;
- threads;
- pencil;
- scissors;
- plain light material for the base 50x100 cm;
- pink fabric for decoration 40x40 cm;
- sewing machine;
- safety pins;
- multi-colored fun-shaped buttons.
Before you start making soft letters, you can practice on a simpler and equally popular product with children - a donut
Constructing a donut pattern:
- A sheet of paper measuring 50x50 cm is folded in half twice.
- One end of a simple spool of thread is tied to the pencil.
- Using a ruler, measure 20 cm from the edge of the sheet and pull the thread to this length.
- Next, applying its opposite edge to the corner of the square where the fold is located, using the principle of a compass, draw a smooth line with a pencil.
- It turns out to be a fourth part of the circle.
- Cut off excess edges.
- Fold the resulting figure diagonally.
- Measure and cut 3 cm from the corner - this will be the hole for the donut.
- Fold the paper back and the template is ready.
Preparatory stage:
- The fabric is folded in half with the right side inward.
- The pattern is secured on top with safety pins.
- Outline the shape with a pencil and draw another circle at a distance of approximately 1 cm from the template. This is not necessary if you can cut the fabric evenly by eye, taking into account the seam allowances.
- The location of the hole is also marked, but there is no need to cut it at this stage.
Decorative element:
Edible bagels are usually topped with sweet cream. The pillow should be no exception. For this purpose, a piece of pink fabric was prepared in advance.
- Fold the template again into a triangle and make the inner hole 3 cm wider.
- Straighten the paper and give the edges a wavy shape, drawing by hand, cutting off the excess.
- Place the pattern on the wrong side of the material for the “cream”, trace and cut out everything, including the hole in the middle, without seam allowances.
Connection of parts:
- A piece of pink material is attached to the front side of one half of the base, aligning in the middle.
- Fasten the fabric with pins and attach the “cream” using a machine using a zigzag.
- Fold both parts of the base face inward and stitch the edges, leaving an opening of about 15 cm.
- The place where the donut hole will be is also stitched along the drawn contour. Then make crosswise cuts and carefully cut out the excess material, retreating about 1 cm from the machine stitch. To ensure that the fabric subsequently lies flat, the tips of the scissors make neat cuts no longer than 6 mm at a short distance from each other.
- Turn the pillowcase inside out and stuff it with padding polyester or other available filler to the desired degree of elasticity.
- Using a blind stitch, sew up the remaining hole by hand.
Making three-dimensional letters from wood with your own hands
Wood products are more difficult to make, but such letters will last longer. You can use both wood blocks and plywood. However, in the second case the letters will be flat. To make an inscription, you also need to make a stencil, which is transferred to the workpiece, and then cut out with a jigsaw.
It is very important to subsequently properly process the wood using sandpaper (eliminate irregularities and remove excess material). The letters can be painted, decorated with any material, and additional lighting can be installed in them. The product must be varnished so that it is not afraid of exposure to moisture.
Materials and equipment for work
Looking at pictures depicting three-dimensional numbers made from napkins, many people fear that it is impossible to do something similar with their own hands. In fact, they are not difficult to make. The process takes some time, but the birthday boy’s emotions of happiness cover all costs.
Not the last place at the holiday is occupied by external paraphernalia - flowers, gifts, music, surroundings.
Tools and materials required for work:
- Paper napkins. They can be single-layer or multi-layer. When choosing a color, you should focus on the occasion of the celebration, the gender of the baby, and the surrounding interior. It is advisable that the napkins be plain. The approximate quantity is calculated based on the planned number of flowers - 1 napkin will be required for each unit.
- When creating numbers from napkins, you can combine several shades, alternating them with openwork and carved specimens. They will make the composition more voluminous and unusual.
- The threads can be simple cotton. For ease of cutting, you will need scissors or a stationery knife.
- A stapler will simplify the fastening process.
- Glue or tape for fixation.
- To create the base you will need a cardboard blank. You can use an empty box from household appliances.
The decor of the room in honor of the festival can turn a traditional celebration into something special.
Important! To ensure a high-quality connection of elements, it is necessary to select the strongest options.
How to make three-dimensional letters from foam plastic
Polystyrene foam is a material often used for a variety of crafts. Low cost, good strength and versatility made it so popular. You can find it in any store, and it is also often placed in boxes when packaging various goods.
The technology for creating products is no different from the one we used for wooden structures. The design is applied to the surface of the foam, the letters are cut out using a sharp tool, and then sanded so that there are no irregularities left and the surface is smooth.
If you want to paint three-dimensional foam letters, it is better to apply 2 layers of paint, which will make the structure a little stronger. Lace, threads, tulle, beads, and dry plants can be used as decoration.
Important: if you want to glue something, do not use instant glue, as it destroys the material, it is better to opt for rubber glue.
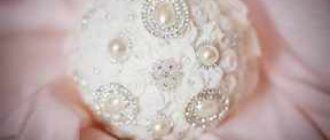
Buttons
All the variety of buttons that are now on store shelves may well be useful when decorating letters. The buttons are glued to the most ordinary hot melt adhesive. Delicate and delightful works created using ordinary buttons inspire heroic deeds.
I just want to put aside all the things that have accumulated and also decorate the house with such beauty! Moreover, it’s my daughter’s birthday very soon, and an elegant number decorated with shiny buttons will be very useful. This figure will be irreplaceable at a holiday photo shoot!
Wine cork decoration
If you are a fan of non-standard solutions and simple designs, which we talked about earlier, you can make a three-dimensional letter with your own hands from wine corks. Today it is very popular to make a variety of panels and figures using such a product.
The corks are glued to each other with superglue. The designs are decorated with appliques, dried plants, they can be painted on top or varnished.
If you want to use three-dimensional letters for decoration, but are not ready to make them yourself, you can order three-dimensional letters in Voronezh here - https://otdreklama.ru/make/illuminated-channel-letters/.
Start memorizing the alphabet
Parents are happy to take photos of the letter crafts made by their child. Learning the alphabet begins. Memorization - which letter looks like.
Purchase special folders with pockets for letters. They'll come in handy soon. And so all the children in the group draw the letter a.
Here is the letter drawn. Then the children cut it out. Phenomena and characters associated with this letter are also cut out. Then they do the same with the letter b. And with the letter v. Then with the letter g. The teachers stop there.
Because we need to approve what we have purchased. Remember. To do this, one of the kids shows a picture. For example, a mushroom. Children must guess and say g in unison. And each child shows his own letter g, drawn by him. This is how mastering the alphabet begins.
Conclusion
An inscription on the wall is an excellent choice for those who do not want to work hard, spend a lot of time and money, and also take up free space with decorative elements.
We recommend reading:
Panels for wall decoration: stylish and modern wall design options. 130 photos and videos of the use of decorative panelsWalls in the nursery - bright design ideas and nuances of decorating walls and ceilings for the nursery (120 photos and videos)
Decorating the walls in the kitchen - interior design and DIY wall decoration options (125 photos and videos)
A correctly executed inscription will last for many years, will please the eye and evoke positive emotions.
The role of wall inscriptions
When choosing one design or another, every owner wants to create a unique interior. A lot of time is spent on making the living room or kitchen a reflection of the tastes, aspirations and personality of the owners.
Inscription with a funny nuance Source oz90.ru
You can achieve your desired goal in different ways. Most often, various decor comes to the rescue: art objects, textiles, dishes, lamps. But recently, uniqueness can also be emphasized with the help of inscriptions; in the interior they solve the following problems:
- Decorate a free wall and zone the room.
Decor in the studio Source myinteriordesign.it
- Emphasize the chosen interior style.
- They serve as an accent, helping to highlight an item.
Philosophical approach Source byvaniehrou.sk
Sticker in a Scandinavian interior Source shmbk.pl
Ready-made wallpapers
If you don’t plan to create an inscription for a specific section of the wall, then use a ready-made large-scale solution - wallpaper with inscriptions. However, there is no need to cover all rooms with similar material.
It’s better to make one wall an accent wall and leave the others neutral. Otherwise, the room will become very overloaded, which will clearly not impress visitors.
The ideal option is to have inscriptions on one wall and a bright poster on the other. As a result, we get a harmonious composition.
Using paint
Acrylic paint is an affordable and popular way to create a beautiful inscription on the wall. Of course, the suggested result depends on artistic skills. If you do not have such talents, it is better to entrust the work to a skilled artist.
He will paint the wall according to your preferences. However, this option for creating an inscription requires significant financial costs.
- If you don’t want to spend money, try solving the problem with inscriptions yourself. First, grab a stencil and paint.
- Many stores sell ready-made templates that are glued to the wall. Didn't find anything suitable?
- Create your own template: print the text on paper and cut out holes with a utility knife. Tape or lamination will help seal the sheets.
To create inscriptions with paint, use a sponge, roller or brush. Fix the stencil tightly on the wall and paint over the free areas. Spray paint speeds up the process, but be careful.
Rich color and smooth texture are achieved by applying 2-3 thin layers of paint. When the paint has dried, be sure to varnish the surface. Then the design will be preserved, despite wet processing.