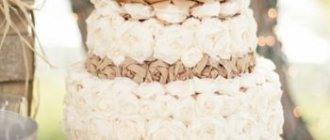
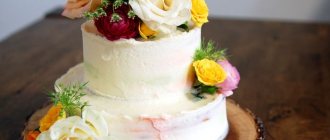
The wedding cake is an integral part of the wedding ceremony, along with the dress and rings. The tradition of preparing wedding delicacies is deeply rooted in the past. However, earlier the recipes were not so “tasty”. For example, no one even thought about choosing a wedding cake with roses.
However, time passes and traditions change. Now newlyweds can afford to choose any filling and appearance of the cake. At the same time, the meaning of the ceremony remains the same: by cutting the cake and sharing it with the guests, the newlyweds seem to share their happiness with their loved ones.
Basis for decorating a cake with roses: necessary ingredients
The most common option for decorating a cake is flowers made from cream. In most cases, these are roses. They can be of various shapes, any color and as many as you want.
- Additionally, you should have special kitchen auxiliary equipment on hand - a pastry syringe and plastic nails of various sizes, which today can be ordered on the Internet at an affordable price. You can order on Aliexpress, see the catalog at this link.
- And even if you don’t have such a syringe at hand, arm yourself with a simple plastic bag. It just needs to be strong enough, ideally using slice bags. The main thing is that you have desire and patience!
- The most suitable mass for decorating a cake is considered to be one that has the following characteristics: oiliness, which can be of any intensity;
- thickness, because the cream should not spread, but retain its shape and patterns until it hardens;
- therefore, the most important criterion is the ability to maintain the original shape for a long time;
- be moderately harsh in structure - so that the cream does not spread, but also does not turn out to be very hard;
- chilled;
- and only cooked.
The rose cream should be thick enough to hold its shape.
- It is for this case that the expression that “the more modest the better” is typical. The best option is a mixture prepared on the basis of only two components. All you need is butter and condensed milk. And the resulting composition can be diversified as desired by adding some of these ingredients: dyes - natural and food (if the decorations are white, then they do not need to be added);
- instant coffee – adds a pleasant aroma and, accordingly, a brown color;
- sugar syrup;
- sour cream - it is imperative that it be homemade, as it is richer and whips better, turning out thick;
- cocoa - to give the mass the color and taste of chocolate;
- cream to improve the white color;
- flavorings: vanilla or vanilla sugar, cinnamon powder or stick, lemon zest or juice, etc.
It is better to avoid adding the following elements to the cream:
- whole pieces of fruit or berries;
- pieces of chocolate. The exception is if it is ground to a powder;
- any other bits and pieces that may prevent the mass from becoming ideal for further use. After all, it should come out smooth, uniform and shiny, without foreign elements.
This is interesting: Pizza mince: recipe
With gold elements
A wedding cake decor in the form of gold will look simply amazing. The cake will look richer and more luxurious. However, you should be careful with such decorations and not overload the product with them.
Beads and bows are enough, or you can decorate only the first tier. Gold will add additional solemnity and importance to the cake.
How to make buttercream roses
Buttercream - ideal for creating roses on a cake. Buttercream roses are realistic, retain their shape well and taste good - they can be made in different colors and tastes, as discussed above.
To make roses from cream you will need:
- a culinary bag with a special attachment for creating roses;
- butter cream;
- baking paper;
- marzipan or a piece of biscuit in the form of a small cone, it will be the base on which the rose will grow;
- pastry nail.
If you have these elements, then you can safely start making buttercream flowers to decorate the torus.
Step-by-step instructions for making buttercream rosettes for decorating a cake:
- Cut the baking paper into small squares slightly larger than a rosebud;
- You need to attach a cut out square of paper to the base of a cooking nail with a drop of cream;
- A cone made of marzipan or biscuit with a wide base should be attached to a piece of paper with a drop of cream. The cone will be the core of the rose, petals will grow on it;
- Rotating a culinary nail, squeeze the core of a rose onto a cone from a culinary bag with a nozzle for creating roses;
- Next, squeeze out 3 petals with the second layer by rotating the nail. Each petal should occupy 1/3 of the circumference;
- With the third layer we make 5 petals, occupying 1/5 of the circumference of the cone;
- With the fourth layer we make 7 petals, occupying 1/7 of the circumference of the cone;
- The rose is ready, carefully remove it from the nail and repeat steps 1 to 7 to prepare other roses;
- Place the finished rose or roses in the refrigerator;
- After the roses have cooled, they can be placed on the cake;
- All that remains is to make green leaves. To do this, you will need a culinary bag with an attachment for creating leaves for the cream cake and green cream. The cream should be squeezed towards the base of the rose to create the appearance that the leaf is part of the rose.
Popular articles Happy 1st Day of Spring
In order to create rosebuds from butter cream you need:
- Pipe a small strip of buttercream onto a piece of baking paper, using the same pipette used to create buttercream roses. This will be the base of the bud. The buds can be immediately planted on the cake.
- Squeeze the same strip of cream to the right of the base of the bud;
- Squeeze the same strip of cream to the left of the base of the bud;
- The bud is ready. You can make other rosebuds by repeating steps 1 to 3;
- Place the rose buds in the refrigerator. After the buds have cooled, they can be placed on the cake.
Thus, you can make roses, buds and leaves for the cake of different colors and tastes. Experiment, use different colored creams to get multi-colored roses, be creative in placing them on the cake and you will get a real culinary masterpiece.
Rustic wedding venue
The ideal option is in nature: a forest clearing, a river bank is perfect. As a last resort, it will be possible to add a thematic touch to the interior of a country-style restaurant. Country village houses, hangars or tents with a minimum of decor are also suitable for the celebration.
Artificially aged and slightly worn materials, fabrics like chintz and cotton, wood, burlap, coarse ropes, craft paper, berries, moss, branches are suitable for decoration - all attributes of eco-style will be appropriate. If you want to arrange an original photo session, you can do it near a cart decorated with flowers, in the hayloft, on a swing, and so on.
In general, a classic of the rustic genre: bright accents can be wreaths and bouquets of wild flowers, bright vegetables and fruits, beautiful pottery, a cozy checkered blanket, pillows in multi-colored pillowcases, and so on.
All kinds of inscriptions and deliberately rough garlands, signs in the hands of the newlyweds, funny accessories like glasses or mustaches look great - they will add color to the photographs.
Even the bride and groom who sat down to rest near a woodpile or the newlyweds who had a cozy tea party in nature will look very harmonious.
Invitations, cards, bonbonnieres in rustic style
The simplest and at the same time appropriate invitation is in the form of a scroll tied with twine or a piece of burlap.
Go to craft stores, you may find textured paper and postcards in an antique style. If you wish, you can make invitations on the bark or log of a tree, decorate the card with pine cones, seeds, flowers and other natural materials. If you like handicrafts, you can embroider invitations on a piece of linen fabric and place it in a stylized paper envelope.
It will be possible to make the entire set in the same style: invitations, cards, bonbonnieres, cushions for rings. You can decorate them not only with coarse fabric, but also with lace, jute, beads, and ribbons.
Bonbonnieres can be not only miniature bags with sweets, but also jars with homemade jam or honey, handmade soap, beautiful memorable badges and much more - the main thing is that your guests have a pleasant reminder of the holiday.
Oil cream based on Swiss meringue for spectacular roses
For those who find the taste of meringue “empty,” we suggest making a full-fledged butter cream based on it - for this, take 450 grams of softened good quality butter for the serving above.
Add butter to the already whipped whites in portions, beating well each time. The resulting cream will be airy, with an intense creamy taste. The main requirement for a successful cream is that the butter and meringue must be at the same temperature! From the indicated proportions of cream you get a lot, so you can safely divide the products in half. This buttercream can not only be used to decorate a cake with roses - it can be used to layer the cake, fill eclairs, etc.
Decorated with a floral cascade
Cakes with cascading flowers look simply amazing. The buds falling over multiple tiers are terribly romantic. It would be original to use a red dessert with a cascade of white flowers.
And if your wedding is dominated by combinations of red and black, then a chocolate cake with a cascade of scarlet buds would be an excellent solution.
Ingredients for Cream Cake Roses:
Cream 1
- Butter
— 250 g
- Milk
(200 ml) - 1/2 cup.
- Sugar
(200 g) - 1 cup.
- Chicken egg
- 1 PC
- Vanilla sugar
— 1 package.
Cream 2
- Butter
— 250 g
- Condensed milk
- 8 tbsp. l.
- Vanilla sugar
— 1 package.
Recipe for Cake Cream Roses:
I make roses on a piece of white bread crumb. I cut out a cube of bread, put it on a fork (I use a fork for peeling jacket potatoes), or you can put it on a pencil.
We begin squeezing the cream out of the bag with a rose tip, from the top side of our cube and placing each next petal under the previous one in a checkerboard pattern until our cube is covered in petals.
Carefully remove the rose from the fork with scissors and place it on the cake.
This is what the rose looks like from above.
But do not rush to remove the lily from the paper, first you need to put it together with the paper in the refrigerator or freezer for a while, after cooling, carefully separate the paper from the flower and transfer the flower to the cake
We put the leaves on the cake in advance and then put flowers on them and next to them, as we like.
This time I decorated the sides of the cake with a braided pattern. It is made with a special nozzle - a flat straight one, one side of which is serrated.
Preparation of the cream: Remove the butter from the refrigerator in advance so that it becomes soft. Pour the sugar into a small saucepan, pour in the milk and heat, stirring constantly, until the sugar dissolves. Beat the egg with a mixer and, continuing to beat, pour in the resulting syrup (hot) in a thin stream. Allow the syrup to cool until it becomes fresh milk. Put the butter in a cup, mash it with a spoon, add a little syrup and stir. With a mixer at low speed, begin to beat the butter, gradually adding syrup in portions. When you have added all the syrup, beat the cream well into a fluffy white mass. Color the cream in different colors in portions, place it in a small cup, and then decorate the cake.
Cream with condensed milk: Mash soft butter, adding condensed milk, then beat with a mixer until fluffy. The cream is ready - you can start decorating, as in the previous version.
I wish everyone good luck!
A piece of happiness for everyone
By cutting the wedding cake, the newlyweds not only distribute it, but also convey a piece of their joy and happiness to all the guests present, sharing their happiness with them. This is where the order of distribution of delicacies comes from: the bride and groom take the first piece for themselves, then distribute it to family, friends and all invited guests in order.
At all times, all sorts of customs, beliefs and prejudices have been associated with this wedding masterpiece.
Even the ingredients used to prepare this important dessert had a purpose:
- marzipans - the possibility of good and bad moments arising in the family life path;
- honey, almonds and dried fruits - passion in relationships;
- flowers in the design are a symbol of the beauty and youth of emerging feelings;
- Spikelets of wheat are a symbol of prosperity.
So the wedding confectionery product has always remained and remains one of the main symbols of marriage.
Of course, the appearance and design of this important dessert changes over the years. Today, the requirements for decorating wedding delicacies are very diverse. But according to tradition, these are usually multi-tiered cakes, lavishly decorated according to the wishes of the young couple
But according to tradition, these are usually multi-tiered cakes, lavishly decorated according to the wishes of the young couple.
The main thing at a wedding celebration is the presentation of this culinary masterpiece. Taking out the vintage cake should be enchanting and you should take care of this in advance.
How to make roses on a cake with a pastry tip?
To start creating a rose, you need a base, which can be either some kind of cone-shaped surface or a ready-made confectionery product. But if you still have little experience, then you should practice first on a separate base, and then, for example, “transplant” the finished rose onto a cake or biscuit. You can also buy a special pastry stick, also called a “carnation”.
You can create magnificent roses in the following way.
We will need:
- pastry bag;
- rose attachment;
- cream;
- a blank on which we will make a rose;
- fork (to transfer the rose to the product).
So let's get started.
- Prepare your cone blank, we will attach the petals to it.
- Fill a pastry bag with cream and place a rose on it. Prepare a thick cream so that it holds its shape.
- Take the cap so that the thin part of the slot is at the top. The petals are different depending on the angle of inclination.
- Slowly turn your cone shape in one hand and press down on the piping bag with the other hand to create swirls around the base. Use your imagination, change your hand movements often, especially if you are just experimenting, and you will see how fancy the flowers turn out.
- Stop pressing on the bag and remove the nozzle. If you continue with other cones, then change them and continue decorating, but if you are finished, then remove the nozzle and remove excess cream from the end of the cone.
In the next video you can learn in detail the process of forming roses from protein cream.
For those who are not afraid to experiment: berry meringue with albumin
Very, very tasty cream and a great chance to get a non-greasy, light cream with intense flavor. Would you like raspberry cream roses? You will get them! Take:
- albumin (dry protein) - 34 grams;
- seedless raspberry puree - 340 grams;
- water - 100 grams;
- sugar - 300 grams.
Mix sugar and water in a saucepan, place over low heat and bring to a boil.
At the same time, mix until smooth and beat the albumin with raspberry puree.
Bring the syrup to a temperature of 120 ° C.
With the mixer running, pour boiling syrup into the berry mixture.
Beat the mixture until it cools completely.
The finished cream will be thick, shiny, with a rich raspberry flavor. Your loved ones will be amazed when you serve berry rose cake.
At the same time, you should not limit your imagination - you can take any puree to your taste.
Red wedding cake - unusual designs of the best cakes + 66 photos
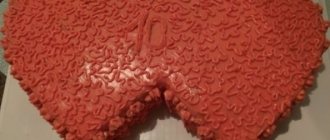
Wedding cakes in red are something new, while still maintaining an appetizing appearance.
If you are going to have a wedding ceremony in red, then the cake should match the chosen style. It must fit perfectly with the overall atmosphere, the bright dress of the bride, and the decoration of the banquet hall. In a word, all the details must form an integral, unified composition.
World trends in decor. More roses for the rose god!
Cream roses are characterized by a clear, expressive texture - you should see every petal. This imposes a number of restrictions on the cream, since it must be very thick and stable. So forget about sour cream and mousses - the petals will blur before you have time to see them in their “assembled” form. We have described the most popular types of creams for creating roses below.
Cream decoration of confectionery products is now extremely popular thanks to the so-called Malaysian technique. It is based on neat buds that form a single composition. The most important thing in decor is harmony, it’s not just a basket of flowers. All shades echo each other and present a single picture. Ombre is welcome. The craftsmen who create masterpieces, as in the photo below, have probably leafed through a lot of information on the topic of botany.
Painted flowers
Painting on wedding cakes is a fashion trend that allows you to move away from traditional methods. It looks very stylish and original. The designs are applied to the glaze using special food paints.
You can create a unique black and white dessert design by painting black roses on white frosting. The combination of black and gold is in fashion now. Using food watercolors, you can create any unusual wedding cake design.
A very successful addition to celebrations in vintage and shabby chic style is a dessert painted with delicate roses. Patterns on the glaze can imitate patterns on antique dishes that are used for table decoration. Painted flowers can be complemented by a small composition of the same living plants, which looks simply amazing.
Decorating a cake with roses: tips
We want to share with you some simple tips to avoid incidents and unpleasant situations. And as a result, you will get a beautiful masterpiece that will retain its freshness and original appearance for a long time.
- Try to avoid combining foods at different temperatures. Never pour melted or hot ingredients into the butter or cream base. That is, milk or chocolate, as well as gelatin. They must be at room temperature. And with gelatin you need to be extremely careful, since it can even form lumps from temperature fluctuations.
- Cream is a perishable product that can float in the literal sense of the word. Therefore, you need to store it both before and after decorating strictly in the refrigerator! And not even on the balcony in the cool season.
- The container that is used to mix the ingredients and beat them until smooth should be wiped dry with napkins. There should not be any drops of water and, especially, oil in it.
- Each component must have its own temperature. The oil should be soft and at room temperature, but not in a liquid state.
- But take cream, whites or sour cream only chilled. To make the cream whip better, you can use a popular life hack - place a container of cold water under the bowl.
- It is better not to overdo it with dyes, because the color may become too rich, artificial and unnatural. The optimal amount of dye is 1 drop or on the tip of a knife.
- You also need to know that each cream has its own shelf life. On average, this period does not exceed 24 hours. The only thing is that oil-based cream can last a little longer than a day. But it is not advisable to delay it to the extreme.
- Don’t forget about what surface the mixture will be placed on when decorating the cake. If you want it to “stick well”, it is best to use the following options: not completely hardened chocolate or caramel icing;
- jam, confiture;
- cream;
- grout used “under mastic” - cake crumbs mixed with cream.
Be sure to consider what surface the roses will stick to.
- On the contrary, the cream will fall off and slide off from such surfaces as: mirror glaze;
- jelly coating;
- cake without coating at all.
- Every experienced housewife already knows that the dough retains its properties for several weeks in the freezer. So cream for roses is no exception.
- Moreover, in the future you can even create compositions not only from multi-colored roses, but also from flowers of different textures.
- To make it easier to find the material you need later, divide the remains into different bags, labeling them by color and type.
- But keep in mind that you cannot suddenly throw the cream into the cold! First you need to put it in the refrigerator for a couple of hours, and only then in the freezer.
- And you need to defrost only under natural conditions. And again, don’t take it straight to the table. Place it on the refrigerator shelf overnight for at least a few hours.
- And even if everything didn’t go smoothly the first time or it took longer than originally planned, don’t be discouraged. Everything comes with time and experience. After some time, you will only remember this with a smile. And you yourself will share your experience and give valuable advice to beginners.

